34 Chapter 3
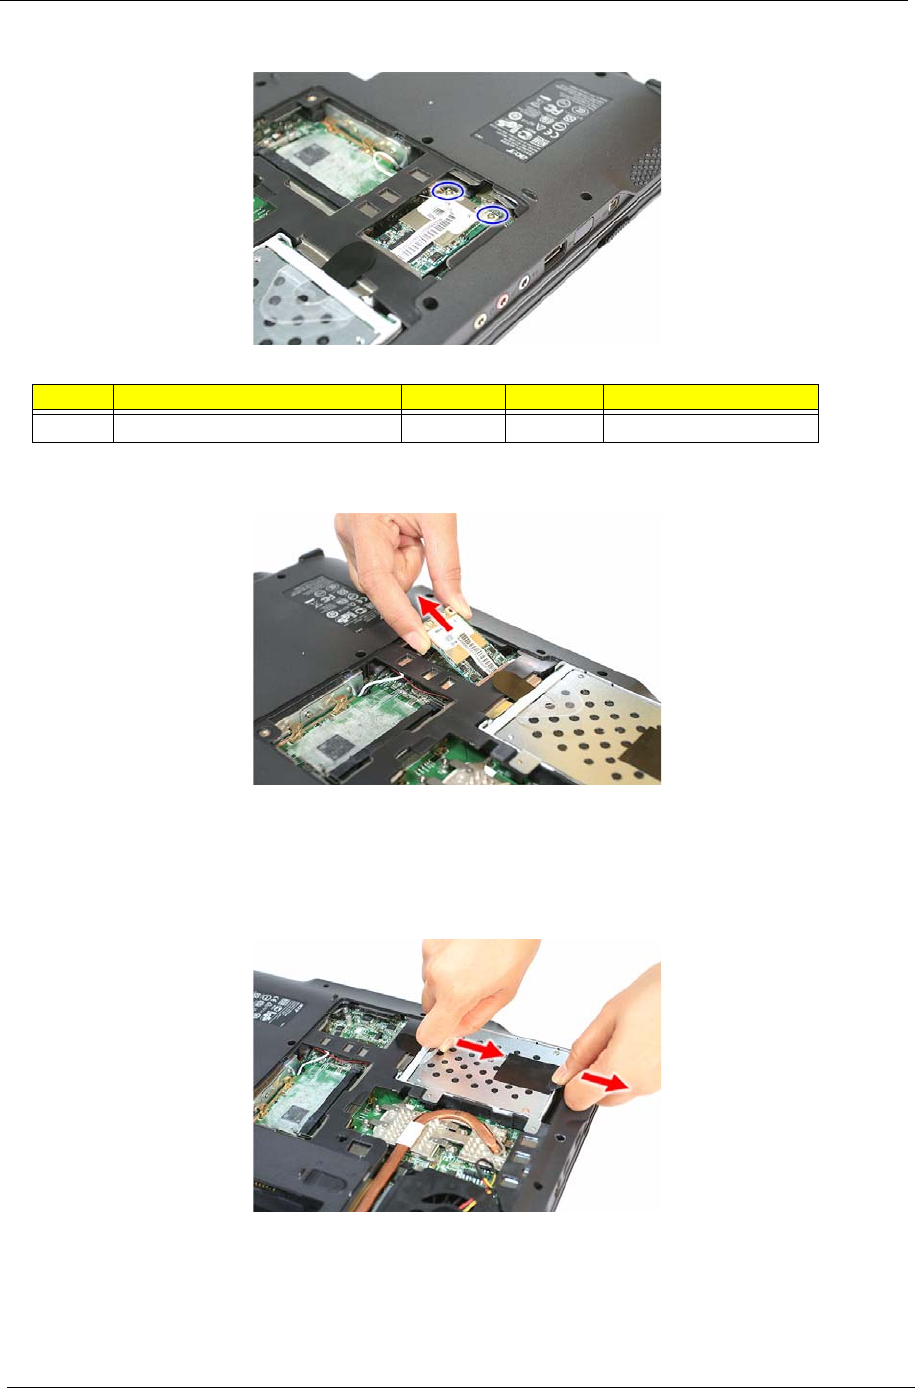
3. Remove the screws securing the WLAN board.
4. Remove the WLAN board from its slot (MINIC1).
Removing and Dismantling the HDD Assembly
1. Use the clear plastic tab and the black mylar tape to disconnect the HDD assembly from its connector
(SATA).
Step Type Quantity Color Torque
3 M2 x L4 BZN+NYLOK 2 Silver 1.6 kgf-cm +/-15%
Acer TM 4520 SG.book Page 34 Friday, June 22, 2007 5:43 PM


