86 Chapter 3
Replacing the Mainboard
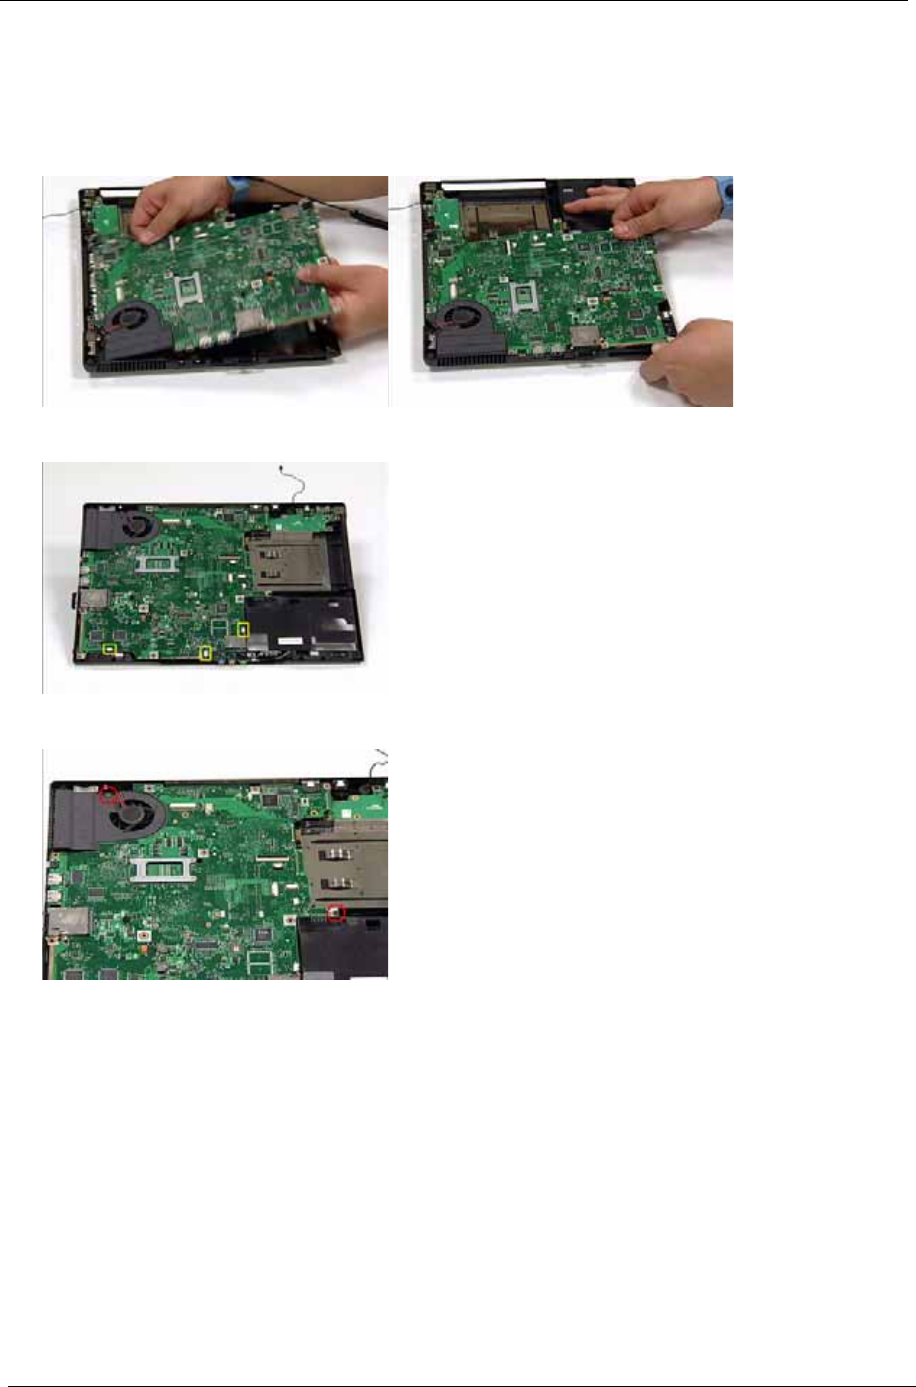
1. Ensure that the Mainboard is face up (the Heatsink and CPU are not visible). Place the Mainboard in the
chassis, rear edge first, and press down to install. Replace the two securing screws as shown.
NOTE: If any resistance is met while installing the mainboard, ease the computer case outward to clear the
obstruction.
2. Replace the three connectors in the Mainboard sockets as shown.
3. Secure the Mainboard to the chassis using the two screws provided.


