


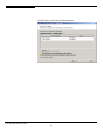
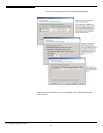


ASC SAN Client on Linux
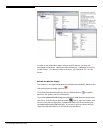
All configuration of the Client is done through the ASC Console. Once
configured, the ASC SAN Client software connects to the appropriate ASC
Servers and gets its assigned resources.
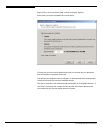
Note: If you assign additional resources to the Client from a new Server after
you have installed the Client, you will need to add that Server to the Client.
You will also need to restart the Client in order for the changes to take effect.
Start/stop the ASC SAN Client processes
In order for the Client to be able to access SAN resources, the Client software
must be started. You can type the following commands from
/usr/local/sanclient/bin:
./sanclient start starts the Client.
./sanclient stop stops the Client, detaching all devices in use by the
Client.
./sanclient restart restarts (stops and then starts) the Client.
./sanclient status displays the current status of the Client.
./sanclient devices (Solaris, HP-UX, and AIX only) displays a list of ASC
devices that are available for use.
Note:
Before stopping the Client, make sure all read/write operations are complete
and make sure all of the ASC devices are not being used and are not mounted.
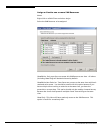
Add/delete/display/rescan ASC Servers
The Client has a program that allows you to:
• Add and delete ASC Servers.
• Display the Client’s current configuration.
• Display a list of ASC devices - for SAN/IP Clients only.
• Rescan ASC devices - eliminates the need to restart the Client after
adding a virtual device to an existing adapter, deleting a virtual device,
or expanding a virtual devices for Linux and Solaris 8 Clients.
• Attach/detach SAN devices.
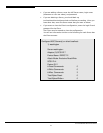
• Execute the following from /usr/local/sanclient/bin:
• ./sanclient monitor
• Select which action you would like to take.
Acer Altos® NAS 700 Solution Guide
96