


Addonics Technologies, Inc.
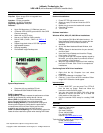
ADSA4R-E (4-Port External SATA PCI Controller Card)
SPECIFICATIONS
Chip Set: Silicon Image Sil3114 integrated host
Controller
Interface: PCI bus compatible
I/O Ports: (4) eSATA Connectors
Regulatory approvals: FCC, CE
Features:
• Up to 150 Mbytes/sec (1.5 Gbits/sec) per port
• 4 External SATA (eSATA) ports with the new SATA
External connector
• Work with any SATA drive
• Use as a non-RAID or RAID controller
• Built-in RAID 0, RAID 1, RAID 1+0, RAID 1+ S
support
• Support large hard drives of 137 GB or greater
• Upgradeable firmware
• Hot-plug capability
• Fits standard height Desktop case
System Requirements:
• Computer with one available PCI slot
• Windows DOS/NT/2000/XP/2003 server
RAID 0/1 described
Stripe (RAID 0): Greatly increases the performance of data
transfer by simultaneously writing data to 2 drives.
Mirror (RAID 1): duplicates or mirrors the data on both
drives. No data will be lost if one of the drives fails.
Mirror-Striping (RAID 0+1) Combined both Striping and
Mirroring technologies to provide both the performance
enhancements that come from Striping and the data
availability and integrity that come from Mirroring.
RAID 1+S (Mirrored-Sparing) Can automatically replace the
failed drive and rebuild the system when booting HDD failed.
INSTALLATIONS
Hardware Installations:
1. Power OFF PC and remove its cover.
2. Select an empty PCI slot and insert the SATA
Controller.
3. Makes sure to secure the bracket with a screw.
4. Close the PC’s cover.
5. Turn PC ON.
Software Installation:
Windows NT4.0, 2000, XP, 2003 Driver Installations
1. Turn computer ON. When Windows boots up, “A
New Hardware Found” pops on the screen and the
Addonics Serial ATA PCI Host Controller is
identified.
2. At the “Add New Hardware Wizard Window, click
“Next”
3. Choose “Select for the best driver for your devices”,
and click “Next”
4. Insert the Drivers Diskette and check the “Floppy
Drive” option. Click “Next”
5. If using a driver that has not been digitally signed by
Microsoft, you will be asked if you want to continue
the installation. Click Continue.
6. When the new hardware wizard has finish installing
the Serial ATA card. Click “Finish” to complete the
installations.
Confirming Serial ATA Driver Installation
1. Right click the My Computer icon and select
properties.
2. Click Device Manager in the Menu Tree.
3. Click the “+” sign in front of SCSI controllers. Silicon
Image SATA controller should appear.
Important Note:
• To do a RAID SET, you can press F4 or CTRL+S
from the boot up screen. Read and follow the
instruction inside the BIOS screen.
• You can also install the SATA GUI utility Under
Windows to monitor the RAID Set. It is under the
Utility section of the driver disc.
• Use the controller BIOS setup for creating RAID
SET.
SUPPORT
Main: Addonics Technologies
2466 Kruse Drive
San Jose CA 95131
Phone: 408 433-3899
Fax: 408 433-3898
Internet: http://www.addonics.com
Technical Support (8:30 am to 5:30 pm PST)
Phone: 408 433-3855
Email: Techinfo@addonics.com
Note: Specifications subject to change without notice.
Copyright © 1998 - 2005 Addonics Technologies, Inc. All Rights Reserved.