ADDONICS TECHNOLOGIES
Model: ADU2N1G
For more detailed information on setting up the NAU (Network
Attached USB) adapter, refer to the User Manual located on the CD
that came with the device.
I. Hardware Installation
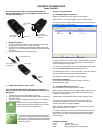
1. Plug in the Ethernet wire into the RJ-45 socket of the NAU adapter
and the other end of the wire to a router or a switch.
2. Connect the DC-Jack with the bundled power adapter. Green LED
will light up. If an active Ethernet line is detected, the yellow LED will
also light up.
3. Attach your USB2.0 device to the NAU adapter.
II. Software Installation for every PC client
Note: The Addonics NAU Adapter utility need to be installed on
every PC client in order to access the USB2.0 device attached to the
NAU adapter.
1. Insert the driver CD of the NAU adapter on your PC.
2. Run the application file “Addonics NAU Adapter utility” and follow the
installation wizard.
3. Check and confirm the following new shortcut icons are generated
on the PC desktop
Use this icon to access the USB2.0 devices (except
printers) attached to the NAU adapter. Only one client
at a time can connect to the USB device.
Use this icon when the NAU adapter is configured as
a printer server. Multiple clients can print on the NAU
network printer. This allows the printer attached to the
NAU adapter to be shared simultaneously by multiple
users on the network
Functions of the NAU adapter
A. Using NAU adapter as USB server
Attaching any USB device to the network via NAU adapter.
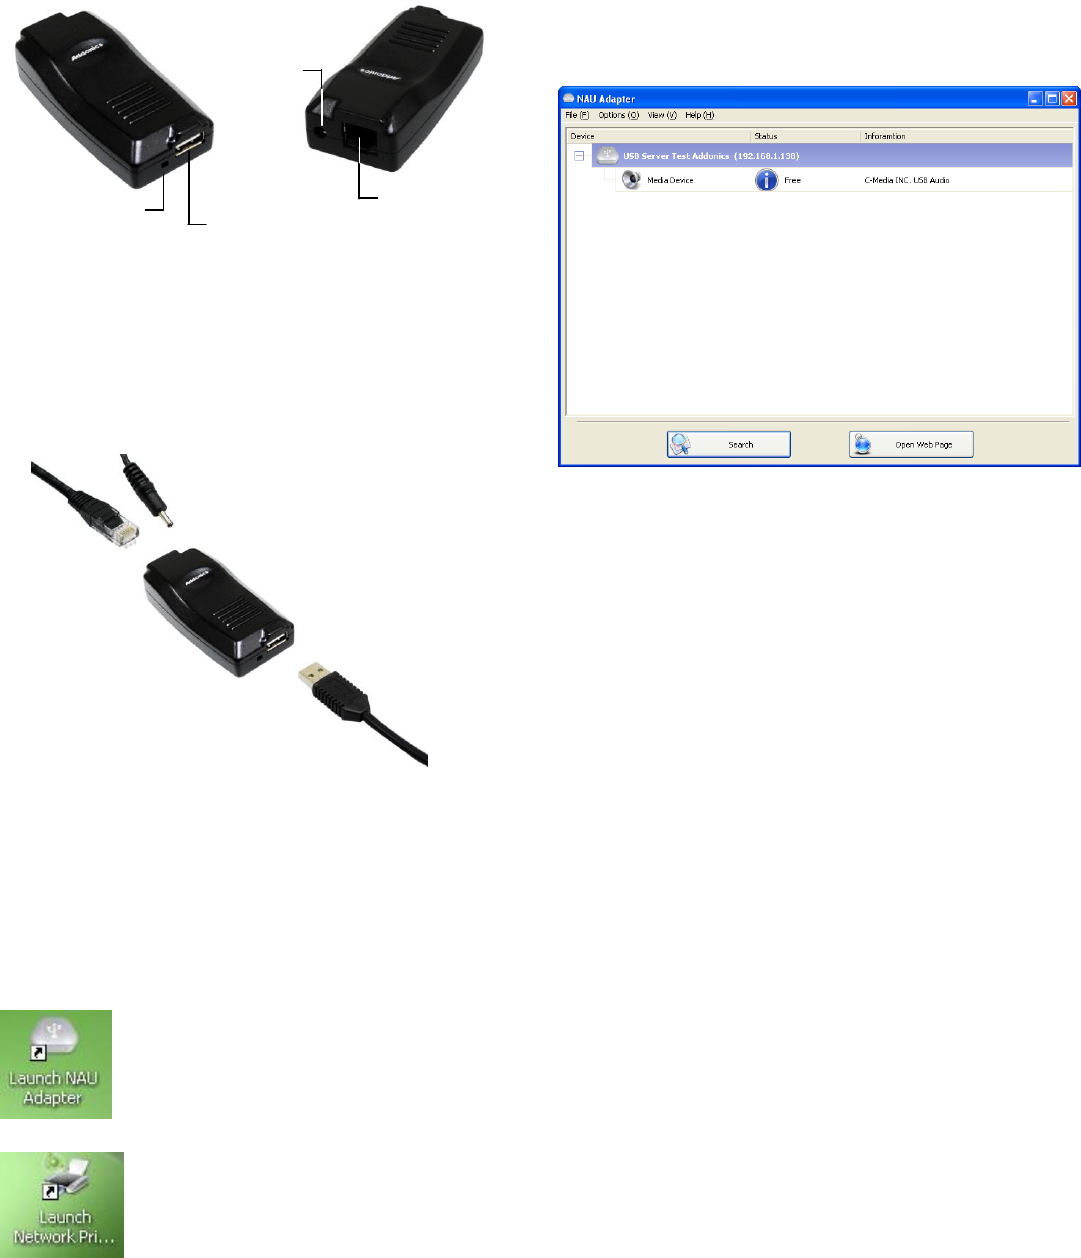
Double click the “Launch NAU Adapter” on the PC desktop screen.
This will open the NAU adapter window. Allow about 30 seconds for the
USB device to show up on the window.
By default, the NAU adapter is set as a DHCP client.
As shown on the above screenshot, shows the USB device is attached to
the NAU adapter. In this case, it is a USB speaker. You would observe
that it is free below the status column.
To connect to the USB speaker, click on the USB media to select it then
click on the Connect Device button to access the device.
This will change the status to „Locally Connected‟. You will also observed
the Connect button is also change to „Disconnect Device‟.
The USB device should now appear in Device Manager.
Disconnect the USB device
To disconnect the USB device from the PC client, click on the
„Disconnect Device‟ button.
B. Using NAU adapter as Print server
Note: A USB printer is connected to the NAU adapter.
Allow multiple PC clients with the NAU Adapter utility installed to access a
USB printer plug into the NAU Adapter which is connected to a LAN
network as a network printer.
Double click the “Lauch Network Printer” on the PC desktop screen.
This will open the Network Printer wizard window. Allow about 30
seconds for the USB device to show up on the window. Follow the
onscreen instructions to complete installation.
When everything completes successfully, a new printer drive icon will
appear under the Printer / Fax folder.
To configure multiple PC clients to use the USB printer attached to the
NAU adapter as a network printer, install the Addonics NAU Adapter
utility on all the PC clients and repeat the printer server installation
procedure above.
TECHNICAL SUPPORT
Phone: 408-453-6212
Hours: 8:30 am - 6:00 pm PST
Email: http://www.addonics.com/support/query/
RJ45 socket
(10/100/1000 Mbps
ethernet)
Factory default
reset button
CAT5, CAT5e
or CAT6 cable