User's Guide
Cleaning and Maintenance 5-9
Inspecting Printer Parts––continued
After you complete the inspection checklist on these two pages, turn on
the printer and run a self test to verify normal operation.
,Caution: Do not inspect the printer with the power turned on.
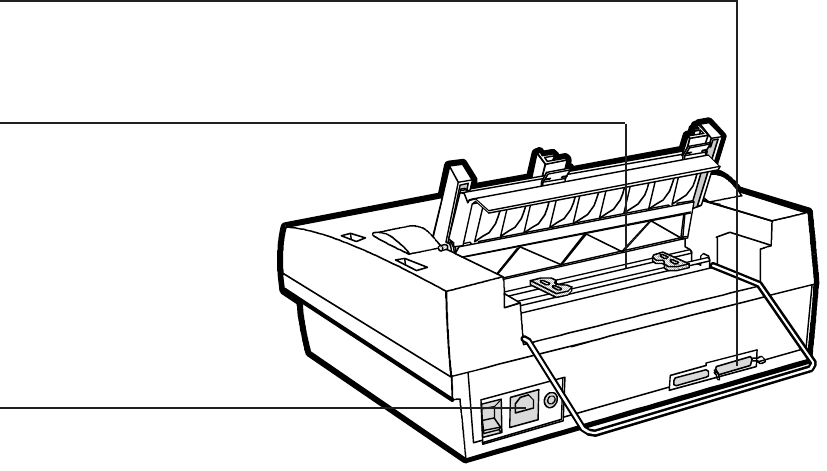
Figure 5-9. Inspecting the Printer, Rear
INTERFACE CONNECTORS
Detach the cables. Inspect the cables
and connectors for broken wires,
frayed or burned insulation, or loose
fit.
FORMS TRACTORS
Look for obstructions in the paper
path. Remove any dust, paper fibers,
or other foreign matter from inside the
printer. Open and close the tractor
locks and doors. Slide the tractors
along the shafts. Inspect for binding
or stiff movement.
AC POWER RECEPTACLE
Detach the cord. Inspect the cord
and receptacle for visible signs of
wear or damage.


