


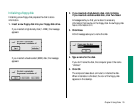


Ejecting a disk
You can eject a floppy disk by doing any of the following:
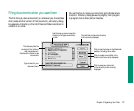
m Click the disk icon to select it and choose Put Away from the
File menu.
The disk is ejected and its icon disappears from the desktop.
m Drag the disk icon to the Trash.
The disk is ejected and its icon disappears from the desktop.
(Dragging a disk to the Trash does not erase the disk’s
contents.)
m Click the disk icon to select it and choose Eject Disk from the
Special menu.
The disk is ejected and its dimmed icon remains on
the desktop.
You can use the first two methods to remove a hard disk icon
from the Macintosh desktop (provided that it’s not your startup
disk), or to disconnect from a shared disk on the network.
All three methods also work with CD-ROM discs.
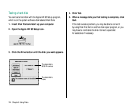
If you can’t eject a floppy disk
If you can’t eject a floppy disk in the usual way, try the following in
order:
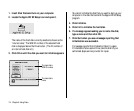
1. Hold down the x and Shift keys and press the number 1 key
on your keyboard to eject a disk in an internal disk drive;
press x-Shift-2 to eject a disk in an external disk drive.
2. Turn off the Macintosh. If the disk isn’t ejected, then hold
down the trackball button while you turn the computer on
again.
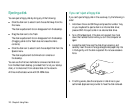
3. Locate the small hole near the disk drive’s opening, and
carefully insert the end of a large straightened paper clip into
it. Push gently until the disk is ejected. Do not use excessive
force.
4. If nothing works, take the computer or disk drive to your
authorized Apple service provider to have the disk removed.
120 Chapter 8: Using Disks