


Removing and replacing disk drives
32 Avaya CMS R12 Sun Enterprise 3500 Computer CMS Upgrade Express
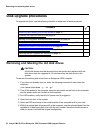
Disk upgrade procedures
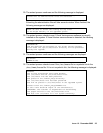
To upgrade the disks, use the following checklist to keep track of each procedure:
Removing and labeling the old disk drives
!
CAUTION:
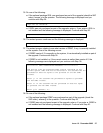
CAUTION: All old disk drives must be removed from the system and replaced with the
disk drives from the upgrade kit. Do not leave any old disk drives in the
system.
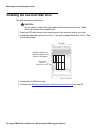
To remove the existing disk drives from an Enterprise 3500 computer:
1. If you have not already done so, enter the following command to shut down the
computer:
/usr/sbin/shutdown -y -i0 -g0
2. Turn off the power to the computer using the key switch on the front of the computer
and the power switch on the back of the computer.
3. For ESD isolation, verify that the AC power cord is plugged in.
4. Open the front door of the system.
5. Attach an ESD wrist strap to the metal chassis of the computer and to your wrist.
6. While the original disk drives are still in the computer, use the colored labels from the
upgrade kit to label each disk drive with the slot number. Save the old disk drives in
case you have to reinstall the original configuration.
Procedure
Removing and labeling the old disk drives
on page 32
Installing the new boot disk drive
on page 34
Booting up the system with the new boot disk drive
on page 35
Verifying that the system recognizes the new boot disk drive
on page 38
Checking the status of the boot disk drive
on page 38
Checking the status of the tape drives
on page 39
Verifying that the upgrade can continue
on page 39