Chapter 2: Installation 13
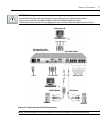
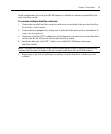
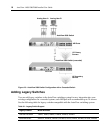
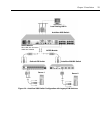
To add a legacy KVM switch:
1. Mount the primary KVM switch into your rack cabinet.
2. Connect one end of a CAT 5 cable to an available port on the back of your AutoView switch.
3. Attach the keyboard, monitor and mouse connectors of the AVRIQ module to a user port on
your cascaded switch.
4. Attach the other end of the CAT 5 cabling to the RJ-45 connector on the AVRIQ module.
5. Connect the servers to your cascaded switch according to the instructions included with
the switch.
6. Power cycle the cascaded switch to enable its local user port to recognize the AVRIQ module.
7. Repeat steps 2 to 6 for all cascaded switches you wish to attach to your system.
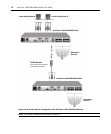
To connect local peripherals:
1. Select the keyboard, monitor and mouse to be connected to local user A.
2. Locate the port set labeled A on the back of the switch. Connect these peripherals to their
respective ports.
3. For the multiuser, 16-port AutoView switch, repeat steps 1 and 2 for the local analog port set
labeled B.
- or -
For the AutoView 1400/1500 switch, proceed to step 4.
4. Bundle and label the cables for easy identification.
Setting Up Your AutoView Switching System
The AutoView switching system enables you to auto detect and configure each port on your
appliance. Chapter 3 provides detailed instructions on name customization and OSCAR interface
setup and configuration.


