58 EVR1500 Installer/User Guide
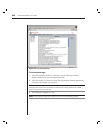
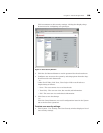
The timed rule information displays in the dialog box.
3. Click the Enabled checkbox to enable the timed rule. An enabled timed
rule is processed periodically by the system.
4. Type a new name for the timed rule in the Unique name fi eld. The name
cannot contain any spaces. The only special character allowed is
the underscore (_).
5. Select a new value (in minutes) from the Frequency for action to fi re
drop-down menu. The number of minutes you select is the frequency that
the system will process the enabled timed rule. For example, if you select 5
from the list, the timed rule will execute its action at fi ve-minute intervals.
6. Select an action from the Action to fi re drop-down menu.
7. After confi guring the new or existing timed rule, click the Test Selected
button to evaluate the timed rule. A message box displays with the results
of the test. Click OK to exit the message box.
8. Click the Save button to save all confi guration items in the Application tab.
- or -
Click the Cancel button to revert all confi guration items in the
Application tab to the last Save operation.
To delete a timed rule:
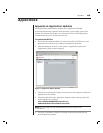
1. After launching the web GUI, click Application - Timed Rules. The Timed
Rules window displays a list of timed rules.
2. Click the row containing the timed rule you wish to delete.
3. Click the Delete button to delete the selected timed rule.
4. Click the Save button to save the change.
Configuring User Security
The User Security feature enables the system administrator to set custom
security levels, including Full Access, View Only Access or No Access for each
user in the system.
To confi gure user security:
1. After launching the web GUI, click System - User Security. The User
Security window displays.
2. Click Add to add a new user. In the dialog box that displays, enter your
username and click OK. A dialog box displays. A new row is added to the
User Name list.
-or -


