3. Installation Guidelines
3.7.4 Lens Installation
How to install ?
Follow the next procedure:
1. Remove the foam rubber in the opening of the lens holder.
2. Take the lens assembly out of its packing material and remove the lens caps on both sides.
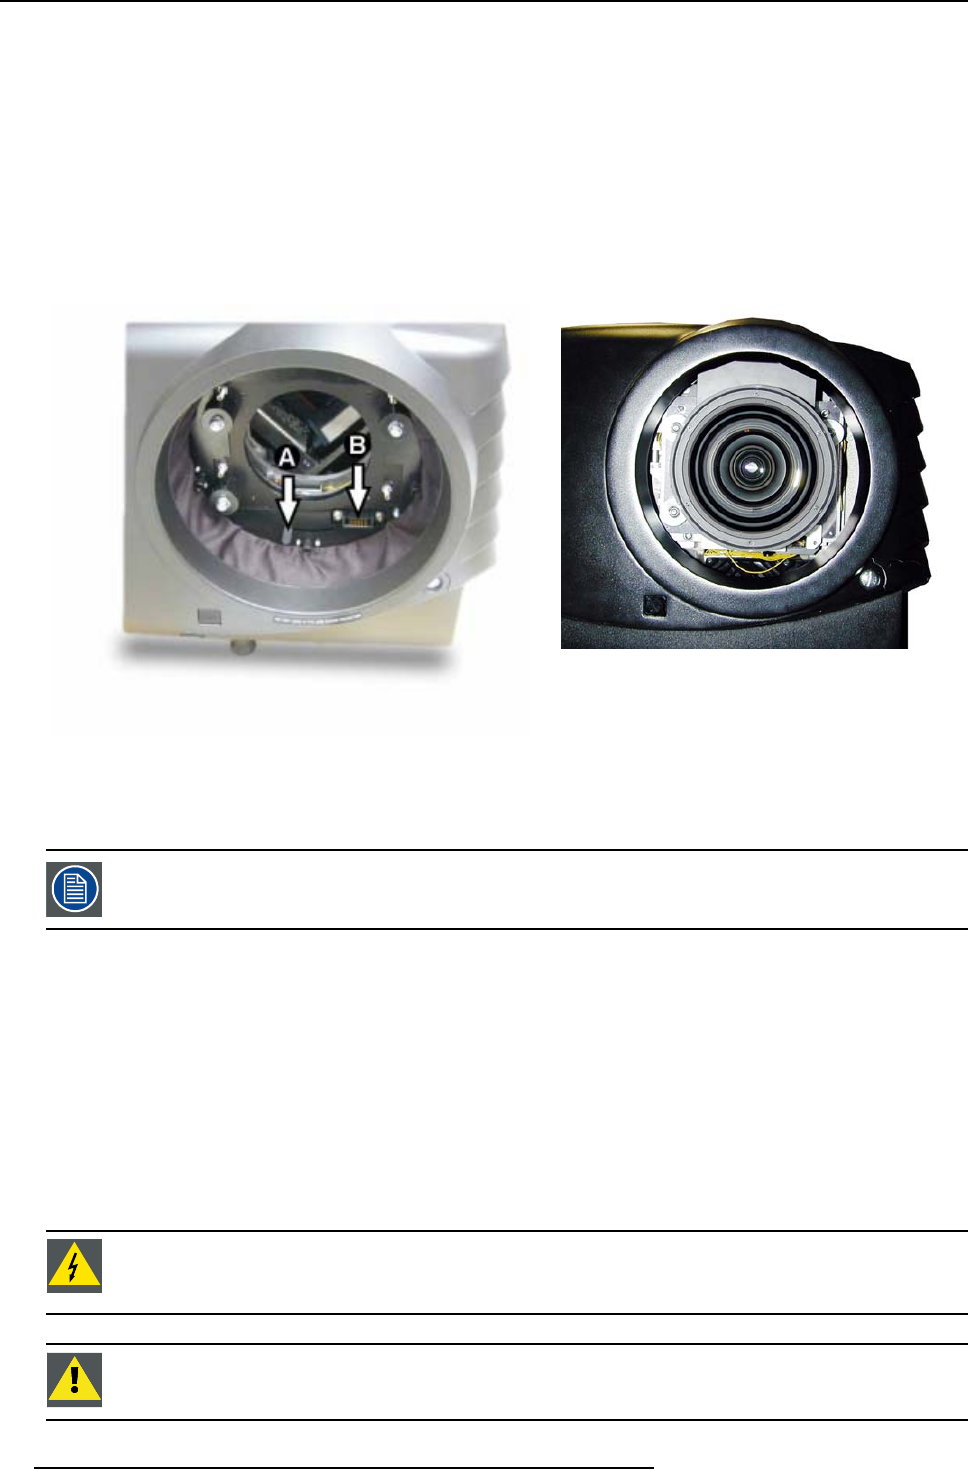
3. Move the handle (A) of the lens anchor system to the right. (image 3-17)
4. Push the lens, motors at the top, in the lens block gap horizontally, lining up the motor connector on the lens with the connector
on the lens block (B), until the lens clicks in the lens anchor system. (image 3-18)
Caution: On a table mounted projector, hold the projector w hen pushing the lens into the lens block to avoid sliding off fro m
the table.
Image 3-17
Lens installation
Image 3-18
Mounted Lens
3.7.5 Cleaning the lens
To minimize the possibility of damaging the optical coating or scratching exposed lens surface, we have de-
veloped recommendations for cleaning the lens. FIRST, we recommend you try to remove any material from
the lens by blowing it off with clean, dry deionized air. DO NOT use any liquid to clean the lenses.
Necessary tools
Toraysee
TM
cloth (delivered together with the lens kit). Order number : R379058.
Howtocleanthelens?
Proceed as follow :
1. Always wipe lenses with a CLEAN Toraysee
TM
cloth.
2. Always wipe lenses in a single direction.
Warning: Do not wip
e back and forwards across the lens surface as this tends to grind dirt into the coating.
3. Do not leave cleaning cloth in either an open room or lab coat pocket, as doing so can contaminate the cloth.
4. If smears occur when cleaning lenses, replace the cloth. Smears are the first indication of a dirty cloth.
WARNING: Do not use fabric softener when washing the cleaning cloth or softener sheets when drying the
cloth.
Do not use liquid cleaners on the cloth as doing so will contaminate the cloth.
CAUTION: Other lenses can also be cleaned safely with this Toraysee
TM
cloth.
20 R5976563 BARCOR10 SLM 20/10/2004


