Order toll-free in the U.S.: Call 877-877-BBOX (outside U.S. call 724-746-5500)
FREE technical support 24 hours a day, 7 days a week: Call 724-746-5500 or fax 724-746-0746
Mailing address: Black Box Corporation, 1000 Park Drive, Lawrence, PA 15055-1018
Web site: www.blackbox.com • E-mail: info@blackbox.com
Customer
Support
Information
February 2010
MT1000A-85-R4
DTX5000-CTL-R2 Management Appliance (DTX Control)
DTX5000-CTL-R2
To continue, turn this page over…
These instructions will help you install and use your ServSwitch
™
DTX Control appliance
(DTX5000-CTL-R2). If you require further assistance, see the ServSwitch DTX Control
User Guide.
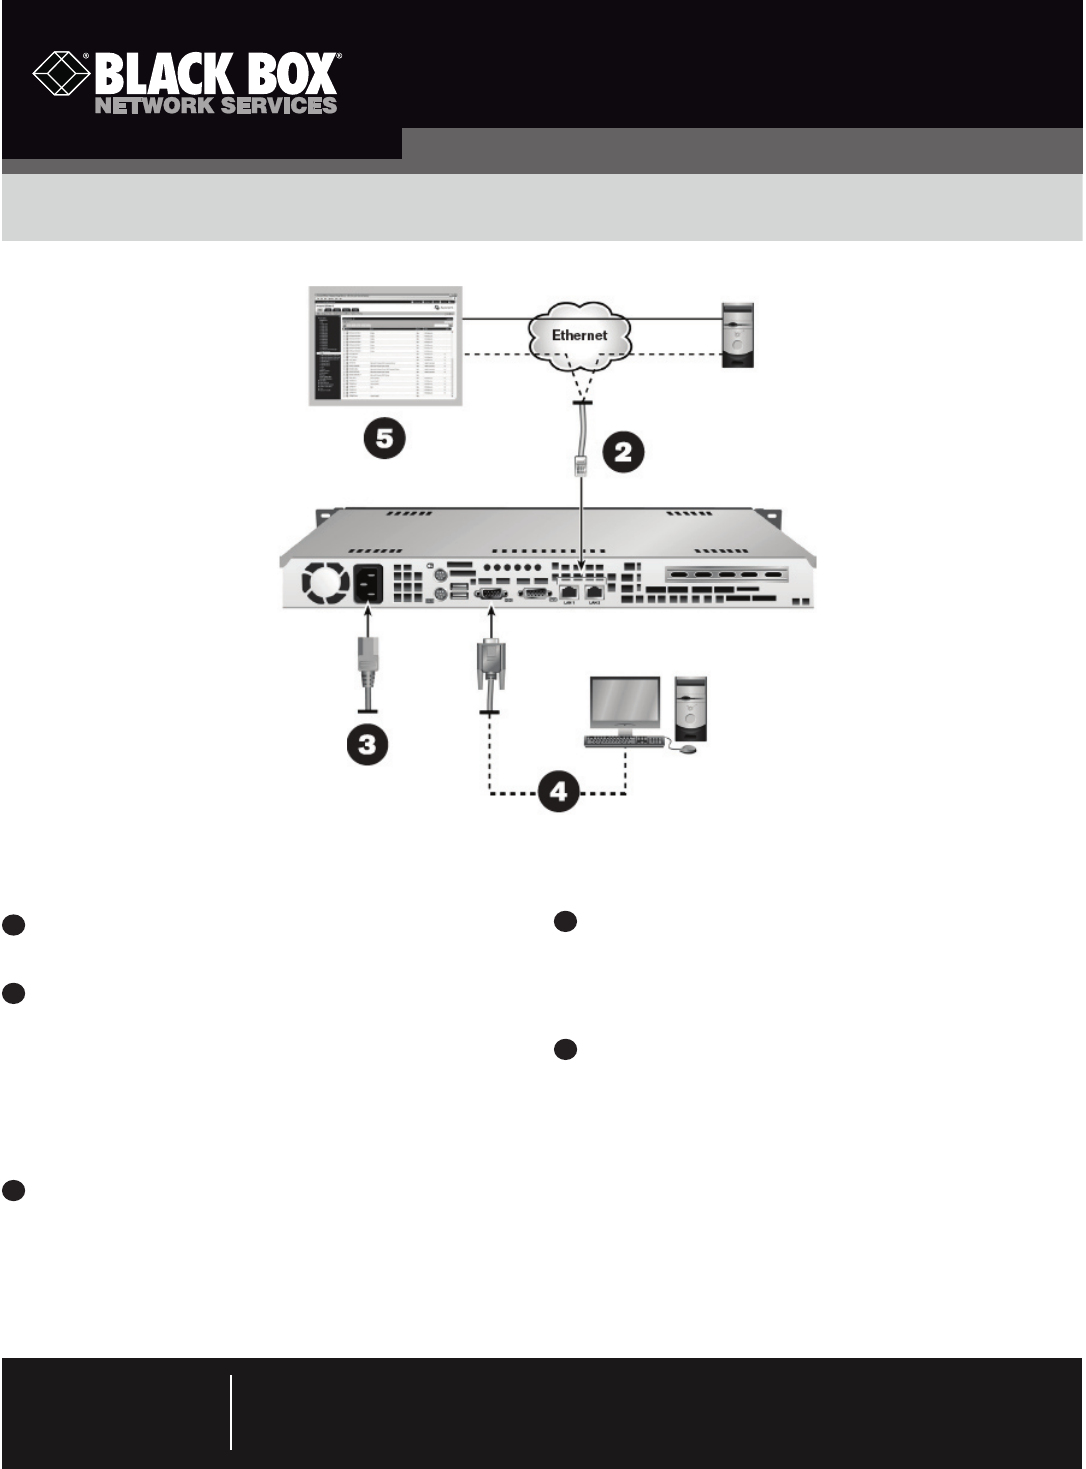
Installing the DTX5000-CTL-R2 management appliance. Install the
DTX5000-CTL-R2 management appliance in a server rack or in another appropriate
location.
Connecting to your network. Connect one end of a CAT5 cable to LAN Port 1
on the back panel of the DTX5000-CTL-R2 management appliance and the other to the
LAN on which all managed units (IQ modules and user stations) are connected.
NOTE: The DTX5000-CTL-R2 management appliance may be connected to two different
networks using LAN Port 1 and LAN Port 2 on the rear panel. Use LAN Port 1
to connect to the network where the IQ and user stations are connected. Use
LAN Port 2 to connect to another network. The administrator can access the
DTX5000-CTL-R2 management appliance via a web browser from a computer
that is connected to networks on either of the LAN ports.
Connecting the power supply. Attach one end of the supplied power cord into
the back panel of the DTX5000-CTL-R2 management appliance and attach the other
end to an AC power source.
WARNING: To reduce the risk of electric shock or damage to your equipment:
• Do not disable the power cord grounding plug. The grounding plug is an important
safety feature.
• Plug the power cord into a grounded outlet that is easily accessible at all times.
1
2
3
• Disconnect the power from the target device by unplugging the power cord from
either the electrical outlet or the target device. The AC inlet is the main disconnect
for removing power to this product.
Configuring the IP address. To set an IP address for the DTX5000-CTL-R2
management appliance, establish a connection to the serial menu. Use the options on
the serial console menu to configure the network settings for each of the LAN Ports on
the DTX5000-CTL-R2 management appliance. For more information, see the ServSwitch
DTX Control User Guide. You must use the serial port to change the default IP settings
on the DTX5000-CTL-R2 management appliance.
Accessing the Web Interface. Open Microsoft
®
Internet Explorer
®
and type the
URL for the DTX5000-CTL-R2 management appliance in the Address bar. The address
will be in the format http://<<addr>>, where <<addr>> is the IP address assigned to
the DTX5000-CTL-R2 management appliance. For example, using the default settings
on LAN Port 1, the address is http://10.0.0.10. The login screen appears. Log in using
the administrator credentials. (If this is the first login to the DTX5000-CTL-R2
management appliance, use the default login [admin] and default password [password].)
NOTE: If DNS is enabled, the address is the fully qualified host name assigned to the
DTX5000-CTL-R2 management appliance.
4
5
590-1075-501A
