


2
Upgrade Guide to Release 5.2.180.0 for Cisco Digital Media Encoder 2000
OL-13987-01
Preparing to Upgrade
Preparing to Upgrade
Before you start to upgrade your DME 2000, use this checklist to confirm that you are ready.
Task
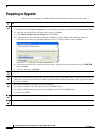
1. From a PC that uses Windows XP, configure a “network place” association to your DME.
a. Double-click the My Network Places icon on the Windows desktop, then double-click Add Network Place.
b. After the Add Network Place Wizard window opens, click Next.
c. Click Choose another network location, then click Next.
d. In the Internet or network address field, enter \\DME\share (where DME is the routable IP address or
resolvable device name for your DME 2000 and share is its shared volume), then click Next.
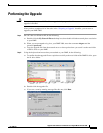
e. In the Type a name for this network place field, enter a name that you can remember easily, like DME2000,
then click Next.
f. To save your work, click Finish.
2. Back up or remove all VoD files that you have stored under the D:\AVFiles directory.
3. Back up all custom encoder profiles that you have stored locally on your DME 2000. These profiles typically are
stored in the C:\Program Files\Windows Media Components\Encoder\Settings directory. The upgrade will delete
all of these profiles.
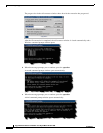
4. Shut down your DME 2000, then do all of the following:
a. Connect a monitor to the VGA port on back of the DME chassis.
b. Connect a USB mouse and keyboard to the USB ports on back of the DME chassis.
c. Restart your DME.
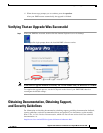
5. Log in to your Cisco.com account, then go to http://www.cisco.com/cgi-bin/tablebuild.pl/dms.
6. Download the DME2000_92_00314_05_070924.exe upgrade file, then save it on a network server or share point.