


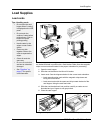
Load Supplies
RP90 Plus E and RL90 User Guide 9
Load ink ribbon
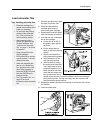
1 Slide the door latch to the right
and open the printer door.
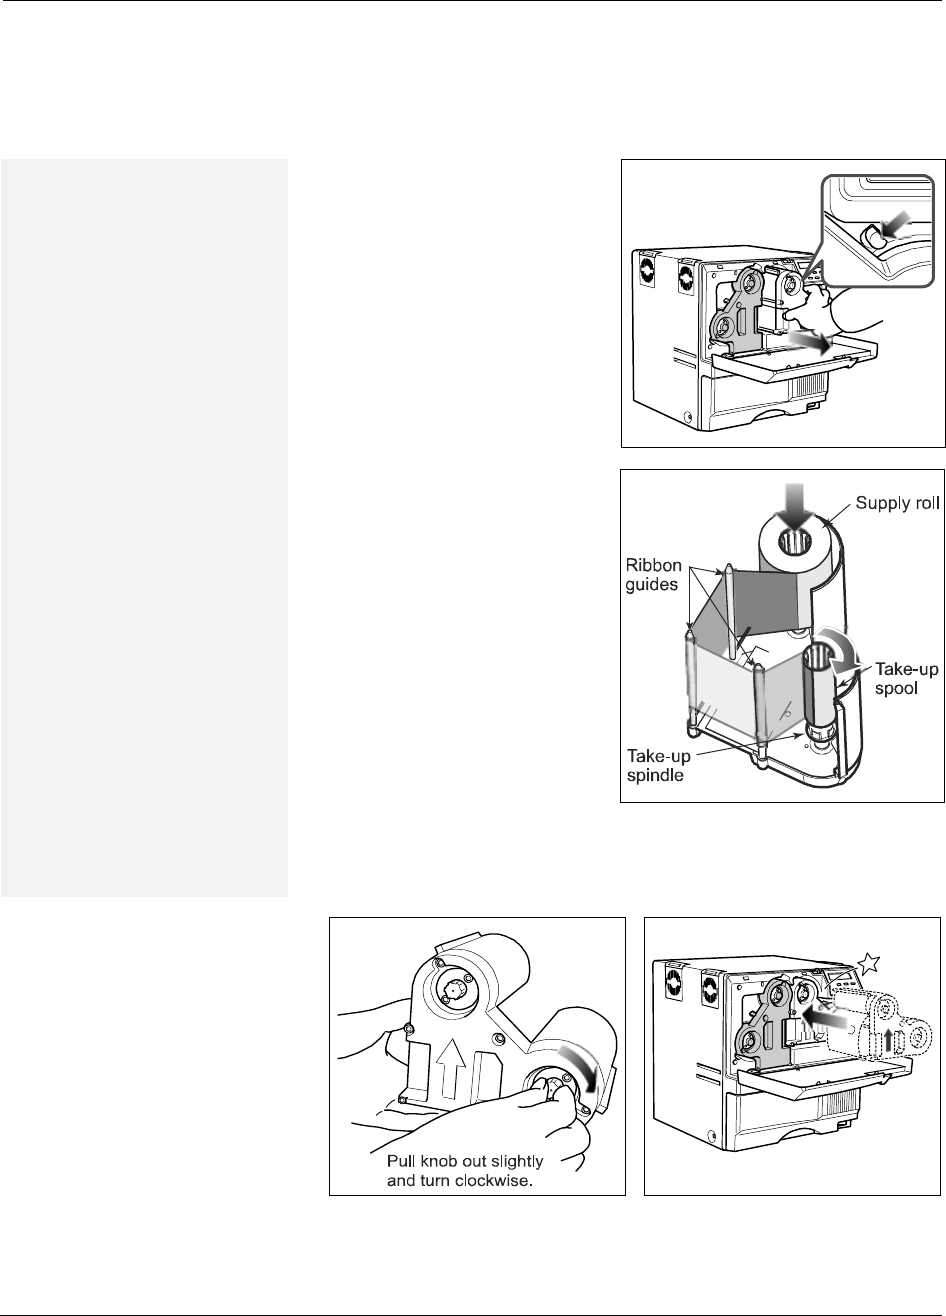
2 Press the ink ribbon cartridge
eject button to remove the
orange cartridge.
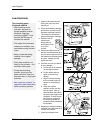
3 Remove both used ribbon
spools from the cartridge (if
present).
4 Load the new roll of ink ribbon
on the cartridge:
a Put the full spool of ribbon
on the orange supply
spindle as shown.
b Put the empty take-up
spool on the black take-up
spindle.
c Align ribbon along the three
ribbon guides.
d Take up any slack by
turning the supply knob
clockwise. The supply knob
must be pulled out slightly
to turn. If slack cannot be
removed, check that the
supply and take-up spools
are firmly seated on the
spindles.
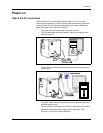
5 Replace the loaded ribbon cartridge in the printer until it clicks into
position.
6 Close the printer door.
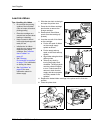
Tips: Handling ink ribbon
• Do not touch the printing
surface of the ink ribbon.
(Oils on hands will reduce
printing quality.)
• Place the cartridge on a
smooth level surface when
loading or reloading.
• Keep unused ink ribbon
in the original package until
ready for use.
• Initialize the ink ribbon
each time you remove and
replace the ink ribbon
cartridge. See
“Initialize
the ink ribbon” on
page 16
.
• See “Storage
Environment for supplies”
on page 73
for information
on storing ink ribbon.
• See “Ink ribbon” on
page 68
for more
information about ink
ribbon supply.