Replacing the Display Panel
1. Follow the instructions in Before You Begin.
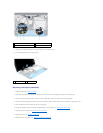
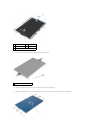
2. Align the display back cover on the display panel and snap it into place.
3. Replace the eight screws that secure the display back cover to the display panel.
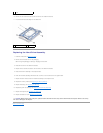
4. Replace the display-panel hinge brackets.
5. Align the holes on the display-panel hinge brackets with the guide posts on the display frame and place it in position.
6. Route the display cable through the routing guide.
7. Replace the six screws that secure the display panel to the display frame.
8. Replace the display hinges (see Replacing the Display Hinges).
9. Replace the display bezel (see Replacing the Display Bezel).
10. Replace the hinge caps (see Replacing the Hinge Caps).
11. Replace the display assembly (see Replacing the Display Assembly).
Display Cable
Removing the Display Cable
1. Follow the instructions in Before You Begin.
2. Remove the display assembly (see Removing the Display Assembly).
3. Remove the hinge caps (see Removing the Hinge Caps).
4. Remove the display bezel (see Removing the Display Bezel).
5. Remove the display hinges (see Removing the Display Hinges).
6. Remove the display panel (see Removing the Display Panel).
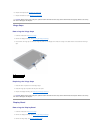
7. Turn the display panel over.
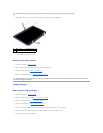
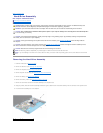
8. Disconnect the touch-screen cable from the connector on the display panel.
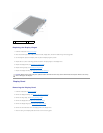
9. Push the display-panel hinges out to release the tabs on the hinges from the slots on the display panel.
10. Lift the display-panel hinges and pull the pull-tab to disconnect the display cable from the connector on the display panel.
1
screws (8)
2
display back cover
CAUTION: Before turning on the computer, replace all screws and ensure that no stray screws remain inside the computer. Failure to do so may
result in damage to the computer.
CAUTION: The two display-panel hinges are part of the display cable and cannot be removed separately.


