1208 PowerConnect B-Series FCX Configuration Guide
53-1002266-01
Configuring SSH2
33
1. The client sends its public key to the Dell PowerConnect device.
2. The Brocade device compares the client public key to those stored in memory.
3. If there is a match, the Dell PowerConnect device uses the public key to encrypt a random
sequence of bytes.
4. The Dell PowerConnect device sends these encrypted bytes to the client.
5. The client uses its private key to decrypt the bytes.
6. The client sends the decrypted bytes back to the Dell PowerConnect device.
7. The Dell PowerConnect device compares the decrypted bytes to the original bytes it sent to the
client. If the two sets of bytes match, it means that the client private key corresponds to an
authorized public key, and the client is authenticated.
Setting up DSA challenge-response authentication consists of the following steps.
1. Importing authorized public keys into the Dell PowerConnect device.
2. Enabling DSA challenge response authentication
Importing authorized public keys into the Dell PowerConnect device
SSH clients that support DSA authentication normally provide a utility to generate an DSA key pair.
The private key is usually stored in a password-protected file on the local host; the public key is
stored in another file and is not protected. You should collect one public key from each client to be
granted access to the Dell PowerConnect device and place all of these keys into one file. This public
key file is imported into the Dell PowerConnect device.
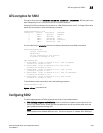
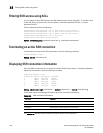
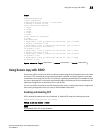
The following is an example of a public key file containing one public key.
You can import the authorized public keys into the active configuration by loading them from a file
on a TFTP server. If you import a public key file from a TFTP server, the file is automatically loaded
into the active configuration the next time the device is booted.
To cause a public key file called pkeys.txt to be loaded from a TFTP server each time the Dell
PowerConnect device is booted, enter a command such as the following.
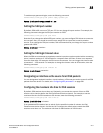
PowerConnect(config)#ip ssh pub-key-file tftp 192.168.1.234 pkeys.txt
Syntax: ip ssh pub-key-file tftp | <tftp-server-ip-addr> <filename> [remove]
The <tftp-server-ip-addr> variable is the IP address of the tftp server that contains the public key
file that you want to import into the Dell PowerConnect device.
---- BEGIN SSH2 PUBLIC KEY ----
Comment: DSA Public Key
AAAAB3NzaC1kc3MAAACBAPY8ZOHY2yFSJA6XYC9HRwNHxaehvx5wOJ0rzZdzoSOXxbET
W6ToHv8D1UJ/
z+zHo9Fiko5XybZnDIaBDHtblQ+Yp7StxyltHnXF1YLfKD1G4T6JYrdH YI14Om
1eg9e4NnCRleaqoZPF3UGfZia6bXrGTQf3gJq2e7Yisk/gF+1VAAAAFQDb8D5cv
wHWTZDPfX0D2s9Rd7NBvQAAAIEAlN92+Bb7D4KLYk3IwRbXblwXdkPggA4pfdtW9v
GfJ0/RHd+NjB4eo1D+0dix6tXwYGN7PKS5R/FXPNwxHPapcj9uL1Jn2AWQ2dsknf+i/FAA
vioUPkmdMc0zuWoSOEsSNhVDtX3WdvVcGcBq9cetzrtOKWOocJmJ80qadxTRHtUAAACB
AN7CY+KKv1gHpRzFwdQm7HK9bb1LAo2KwaoXnadFgeptNBQeSXG1vO+JsvphVMBJc9HS
n24VYtYtsMu74qXviYjziVucWKjjKEb11juqnF0GDlB3VVmxHLmxnAz643WK42Z7dLM5
sY29ouezv4Xz2PuMch5VGPP+CDqzCM4loWgV
---- END SSH2 PUBLIC KEY ----


