


Removing and Replacing Parts 4-67
13.3-Inch LCD Inverter Board
.
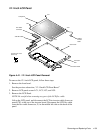
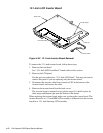
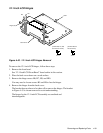
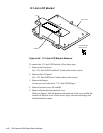
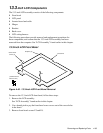
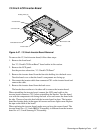
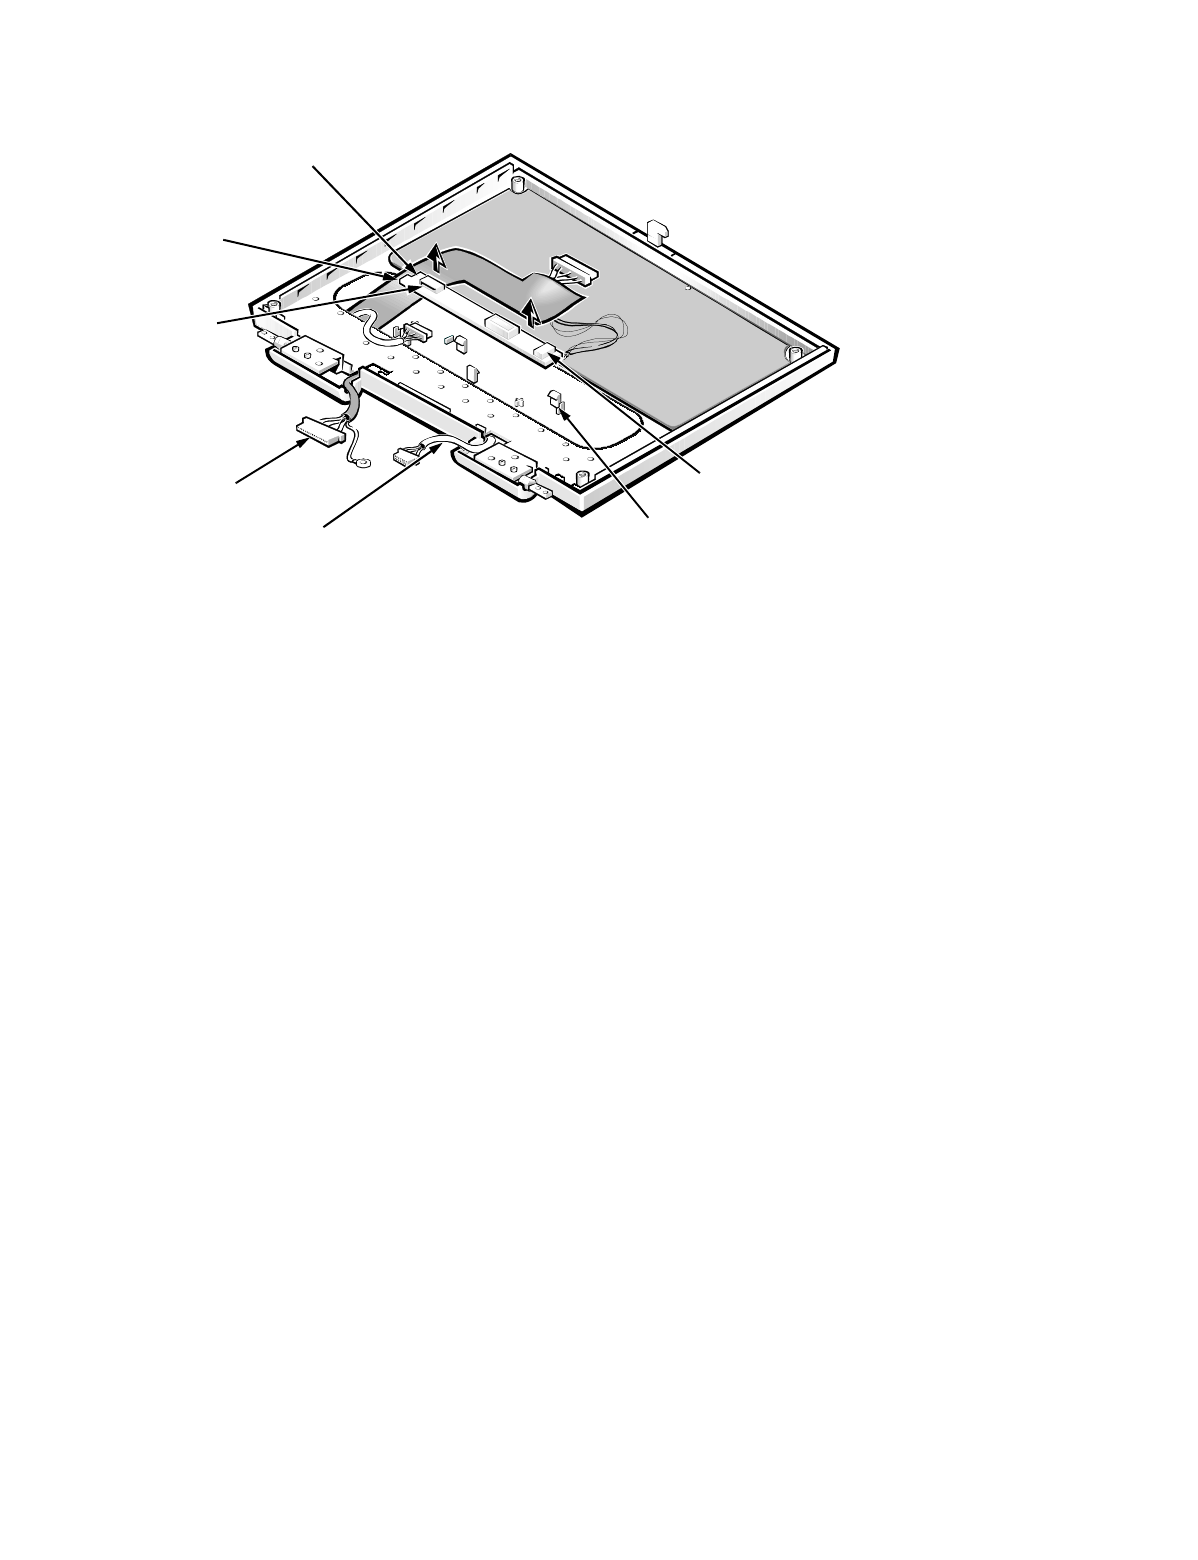
Figure 4-47. 13.3-Inch Inverter Board Removal
To remove the 13.3-inch inverter board, follow these ste
p
s:
1. Remove the front bezel.
See “13.3-Inch LCD Front Bezel” found earlier in this section.
2. Remove the LCD
p
anel.
See the
p
revious subsection, “13.3-Inch LCD Panel.”
3. Remove the inverter board from the four tabs holdin
g
it to the back cover.
Turn the board over so that the board’s com
p
onents are facin
g
u
p
.
4. Disconnect the inverter cable from connector CN1 on the inverter board and
remove the cable.
5. Remove the inverter board from the back cover.
The bracket does not have to be taken off to remove the inverter board.
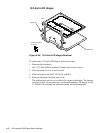
When reinstallin
g
the inverter board, connect the LCD
p
anel cable to the
inverter board connector, CN1, before reinstallin
g
the bracket. Turn the board
over with the com
p
onents side facin
g
the back cover and secure the board with
the tabs. There are four tabs that hold the inverter board in
p
lace. The inverter
board has locatin
g
holes in the u
pp
er-left corner and lower-ri
g
ht corner. Re
p
lace
the ta
p
e on the back of the board.
When re
p
lacin
g
the inverter board, make sure
y
ou have the correct board. The
inverter board for a 13.3-inch IBM LCD assembl
y
is different from the inverter
board for a 13.3-inch Samsun
g
LCD assembl
y
.
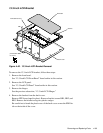
LCD cable harness
inverter cable
connector CN1
connector CN2
tabs (4)
inverter board
locating holes (2)