


Removing and Replacing Parts 4-29
H
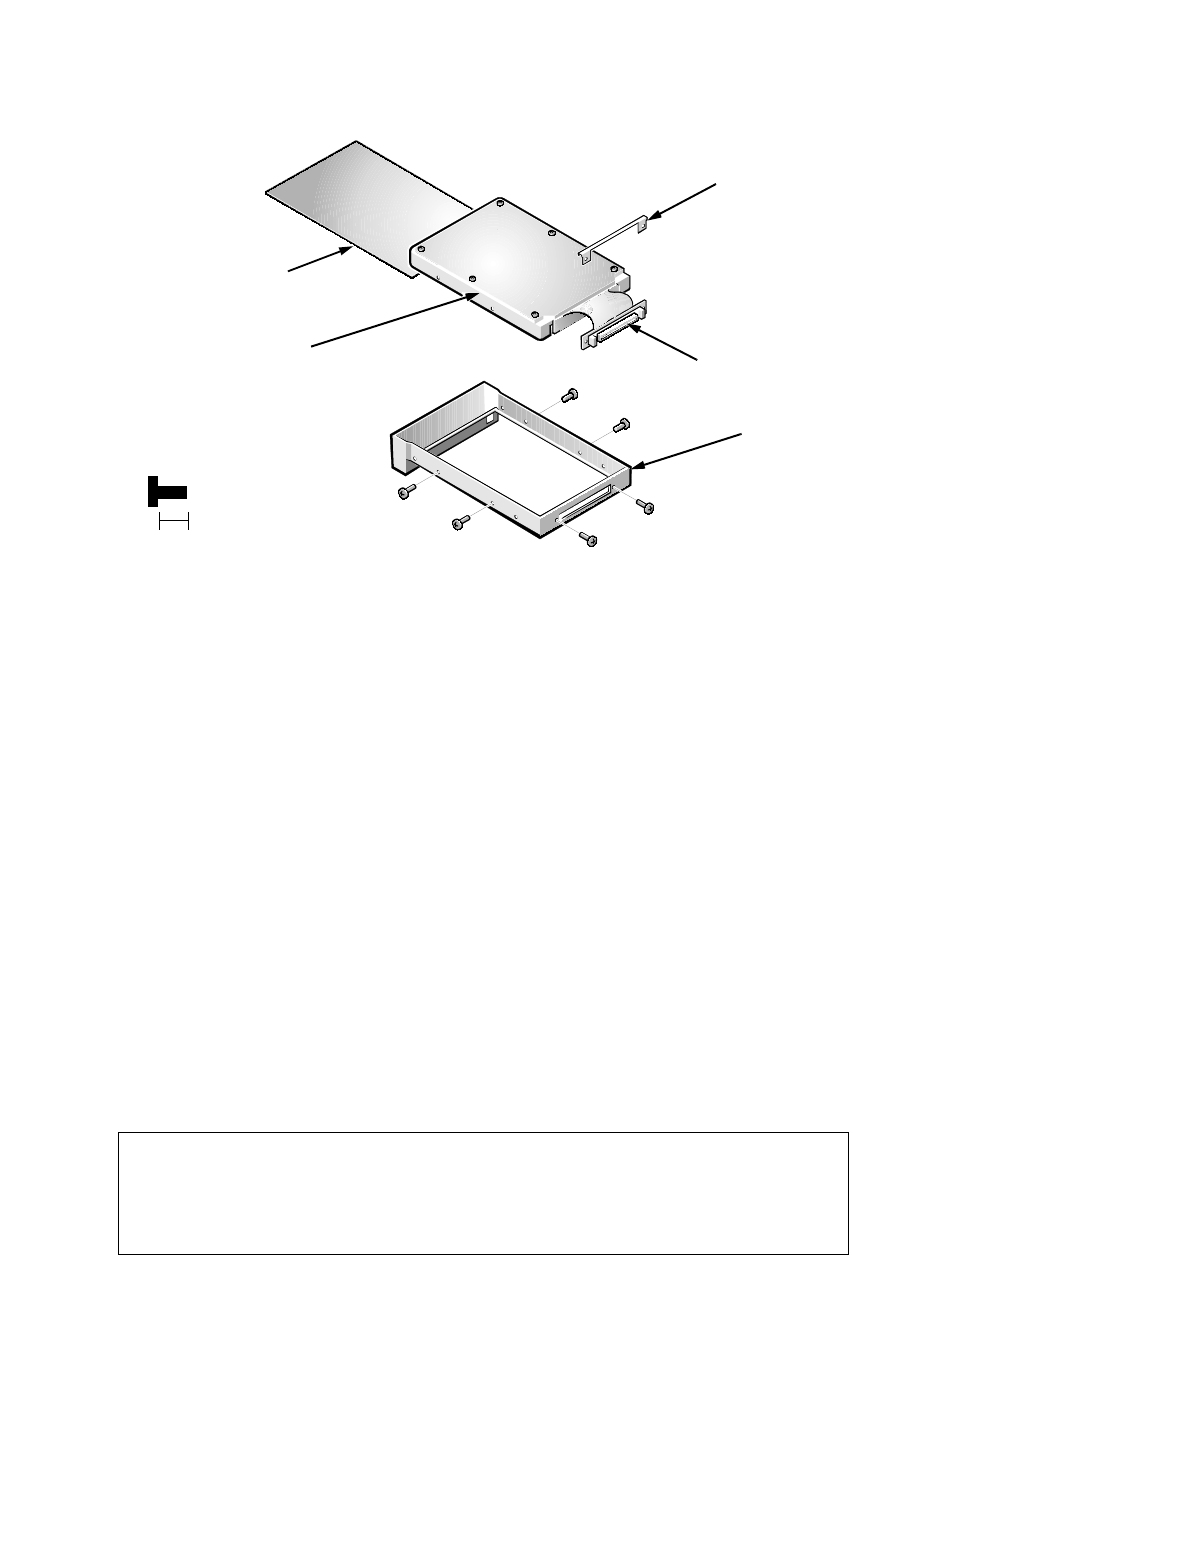
ard-Disk Drive
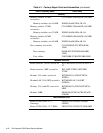
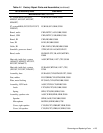
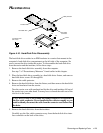
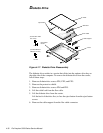
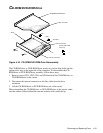
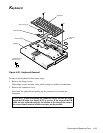
Figure 4-16. Hard-Disk Drive Disassembly
The hard-disk drive resides in an EMI insulator in a carrier that mounts in the
computer’s hard-disk drive compartment on the left side of the computer. Six
screws secure the drive inside the carrier. To disassemble the hard-disk drive
from the carrier and the insulator, follow these steps:
1. Remove the hard-disk drive assembly from the computer.
See step 7 of “Precautionary Measures” found earlier in this chapter.
2. Place the hard-disk drive assembly in a hard-disk drive fixture, and remove
hard-disk drive screws E1 through E6.
3. Remove the cable protector.
4. Remove the hard-disk drive from the fixture, and then remove the hard-disk
drive and insulator from the carrier.
Turn the carrier over with one hand and let the drive and insulator fall out of
the carrier into your other hand. You may have to thread the cable out of the
slot for it in the carrier.
5. Remove the hard-disk drive from the insulator.
Carefully pry the flex-cable connector away from the hard-disk drive inter-
face connector on the back of the drive.
CAUTION: In step 5, use a small flat-blade screwdriver to disconnect
the flex-cable connector. Do not handle the flex cable too roughly or you
could accidently disconnect the cable from the connector card rather than
the drive.
insulator
E1
E2
E3
E4
hard-disk drive
(screws E1–E6
are 5 mm)
E5
E6
5 mm
flex-cable
connector
carrier
cable protector