Removing and Replacing Parts 4-35
H
eat Sink
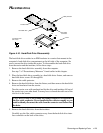
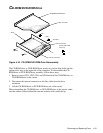
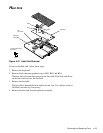
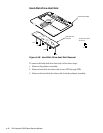
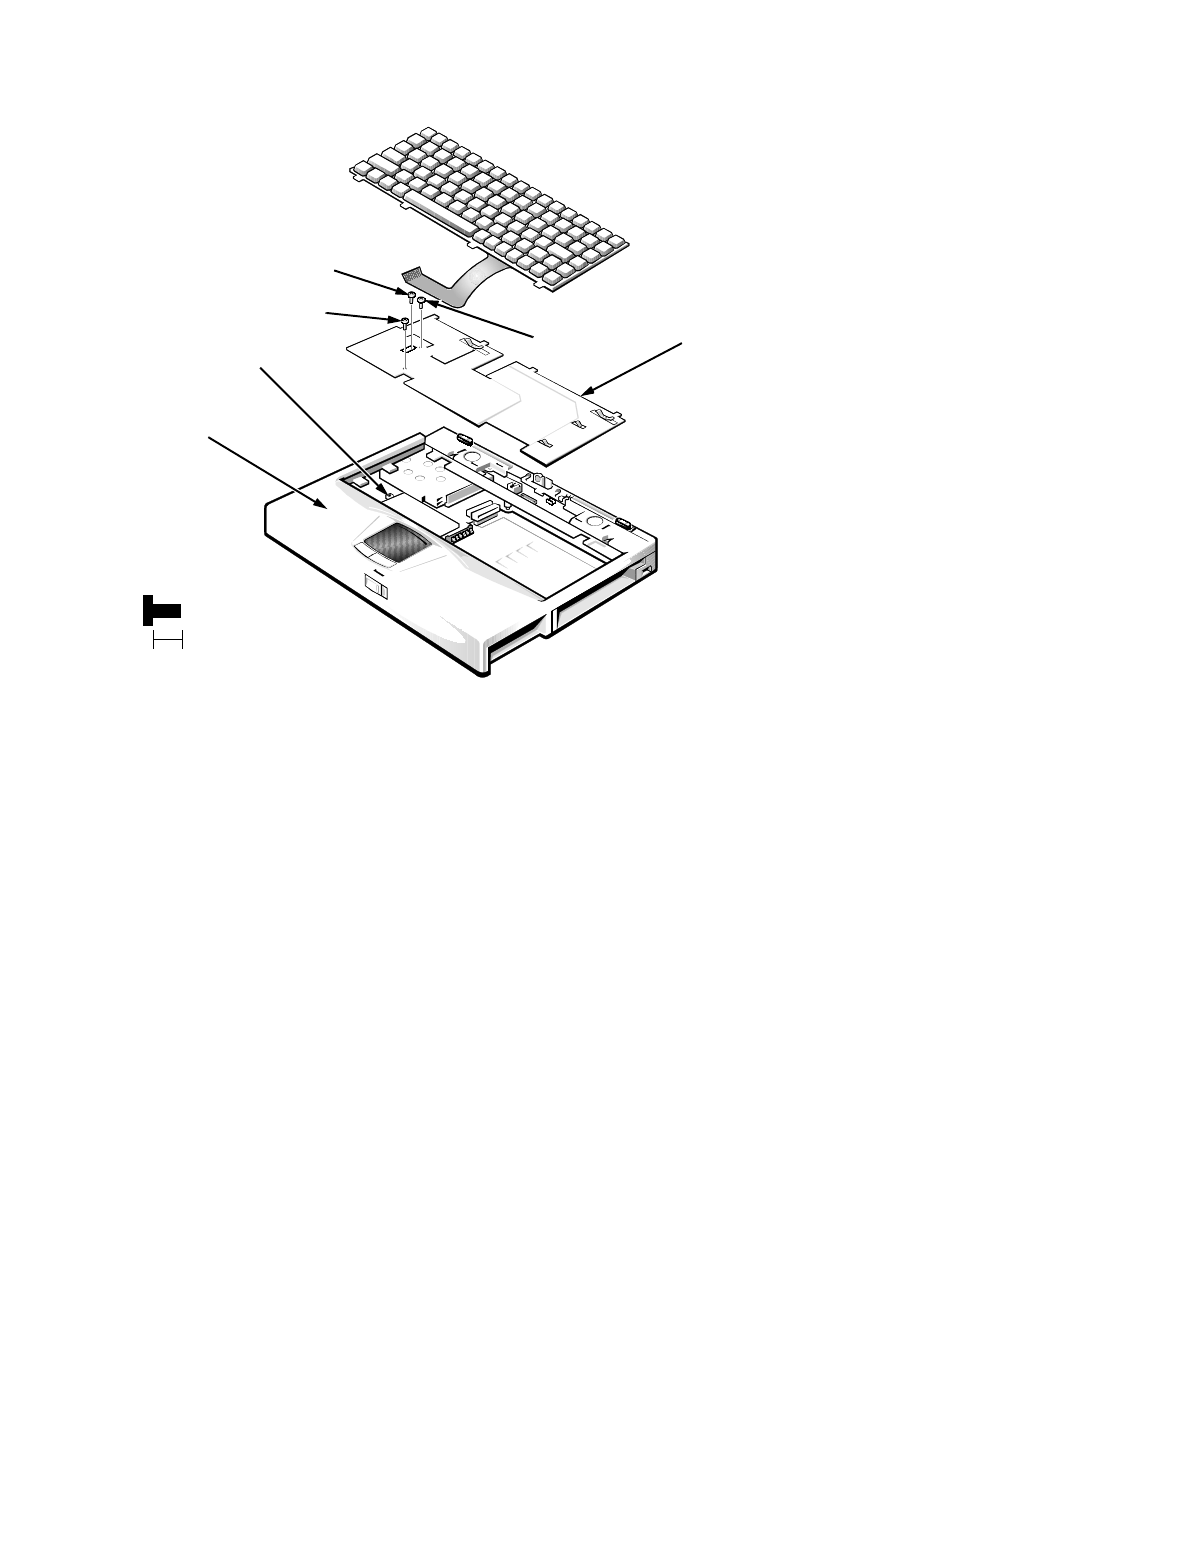
Figure 4-21. Heat Sink Removal
To remove the heat sink, follow these steps:
1. Remove the keyboard.
2. Remove black chromate panhead screws HS1, HS2, and HS3.
The heat sink will come free except for the fan cable. Push back and lift up
on the heat sink to access the fan cable.
3. Remove the fan cable.
The fan cable is beneath the heat sink on the left side. Use a plastic scribe or
flat-blade screwdriver, if necessary.
4. Remove the heat sink from the palmrest assembly.
HS1
HS2
HS3
heat sink
fan
connector
(screws HS1–HS3
are 5 mm)
5 mm
palmrest
assembly


