


Setting Up and Using Your Computer 31
6
Use the up- and down-arrow keys to select a hard drive to include in the RAID array and then use the
right-arrow key to move the selected drive from the
Free Disks
field to the
Array Disks
field. Repeat for
each disk you want to include in the RAID array.
NOTE: Your computer supports a maximum of two drives per RAID 1 array.
7
After assigning the hard drives to an array, press <F9>.
The
Clear disk data
prompt appears.
NOTICE: You will lose all data on the selected drives in the next step.
8
Press <Y> to clear all data from the selected drives.
The
Array List
window appears.
9
To review the details of the array that you set up, use the arrow keys to highlight the array in the
Array Detail
window and press <Enter>.
The
Array Detail
window appears.
NOTE: To delete an array, use the arrow keys to select the array and press <D>.
10
Press <Enter> to return to the previous screen.
11
Press <Ctrl><X> to exit the RAID BIOS.
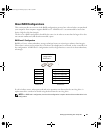
Using Nvidia MediaShield
Nvidia MediaShield allows you to view and manage RAID configurations.
Rebuilding a RAID Configuration
If one of the hard drives in a RAID array fails, you can rebuild the array by restoring the data to a
replacement drive.
NOTE: Rebuilding an array can only be performed on RAID 1 configurations.
1
Launch Nvidia MediaShield.
2
Click to select your RAID configuration (
Mirroring
) in the management utility window.
3
Select
Rebuild Array
in the
System Tasks
pane.
The
NVIDIA
Rebuild Array Wizard
appears.
4
Click
Next
.
5
Select the hard drive you want to rebuild by clicking the checkbox beside it.
6
Click
Next
.
7
Click
Finish
.
The MediaShield RAID management utility window appears and displays the status of the rebuild process.
NOTE: You can use your computer while the computer is rebuilding the array.
NOTE: You can use any available (RAID-enabled) free disk to rebuild an array.
book.book Page 31 Monday, July 23, 2007 3:47 PM