


46 Installing System Components
3
Unpack the replacement diskette drive, and prepare it for installation.
4
Check the documentation for the drive to verify that it is configured for your system.
5
Remove the front drive bezel. See "Removing the Front Drive Bezel" on page 42.
6
Remove the 3.5-inch insert on the front drive bezel. See "Removing an Insert on the Front Drive Bezel"
on page 43.
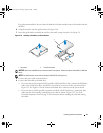
7
Remove the four shoulder screws from the back of the insert. See Figure 3-4; the 3.5-inch insert holds
four screws.
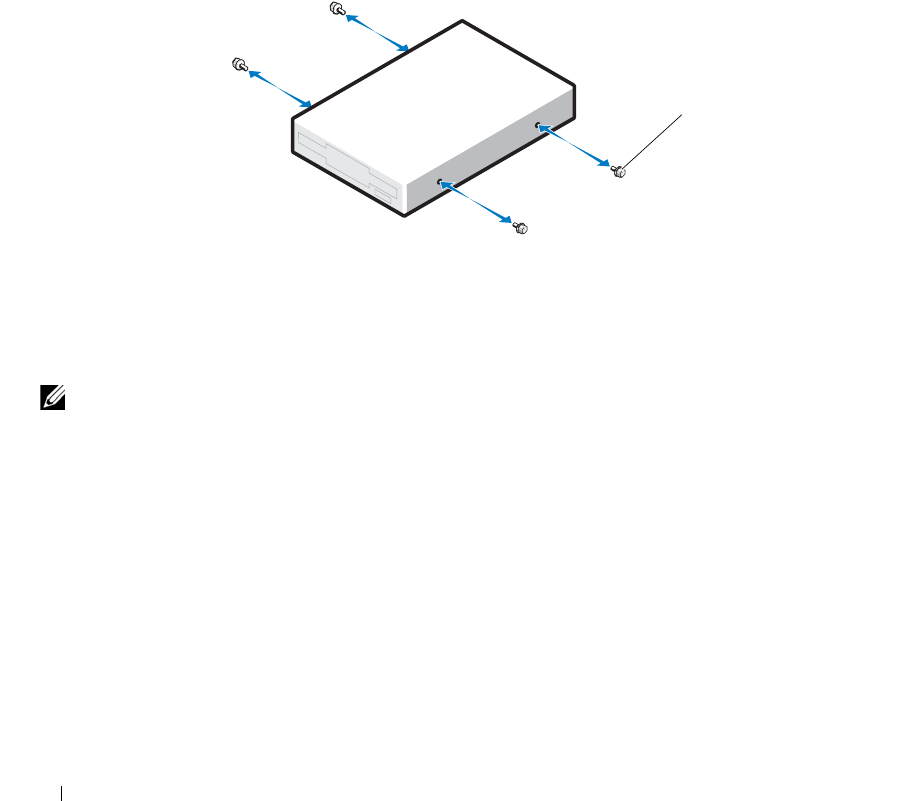
8
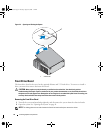
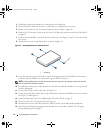
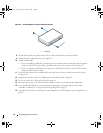
Attach the four screws to the diskette drive as shown in Figure 3-6.
Figure 3-6. Installing Diskette Drive Shoulder Screws
9
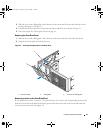
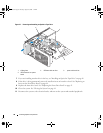
Verify that the drive-stop tab on the drive cage is in the proper position. It should be in its lowermost
position so that the diskette icon on the drive cage is visible. See Figure 3-5.
NOTE: Inserting a diskette drive into the drive bay with the drive-stop tab in the improper position will cause the
drive to be positioned too deep in the bay.
10
From the front of the chassis, slide the drive into the drive bay until the shoulder screws snap securely
into the sliding plate.
11
Connect the P7 power cable to the drive. See Figure 3-5.
12
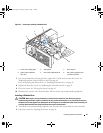
Connect the data cable from the drive to the diskette drive connector (FLOPPY) on the system board.
See Figure 3-5 and Figure 6-2.
13
Replace the front drive bezel. See "Replacing the Front Drive Bezel" on page 43.
14
Close the system. See "Closing the System" on page 41.
15
Reconnect the system to the electrical outlet, and turn on the system and attached peripherals.
16
Enter the System Setup program and ensure that the drive’s controller is enabled. See "Using the
System Setup Program" on page 27.
1 screws (4)
1
book.book Page 46 Tuesday, August 25, 2009 1:14 PM