1 Figure
Quick Reference Guide
2Figure
3Figure
Remove
cardboard insert
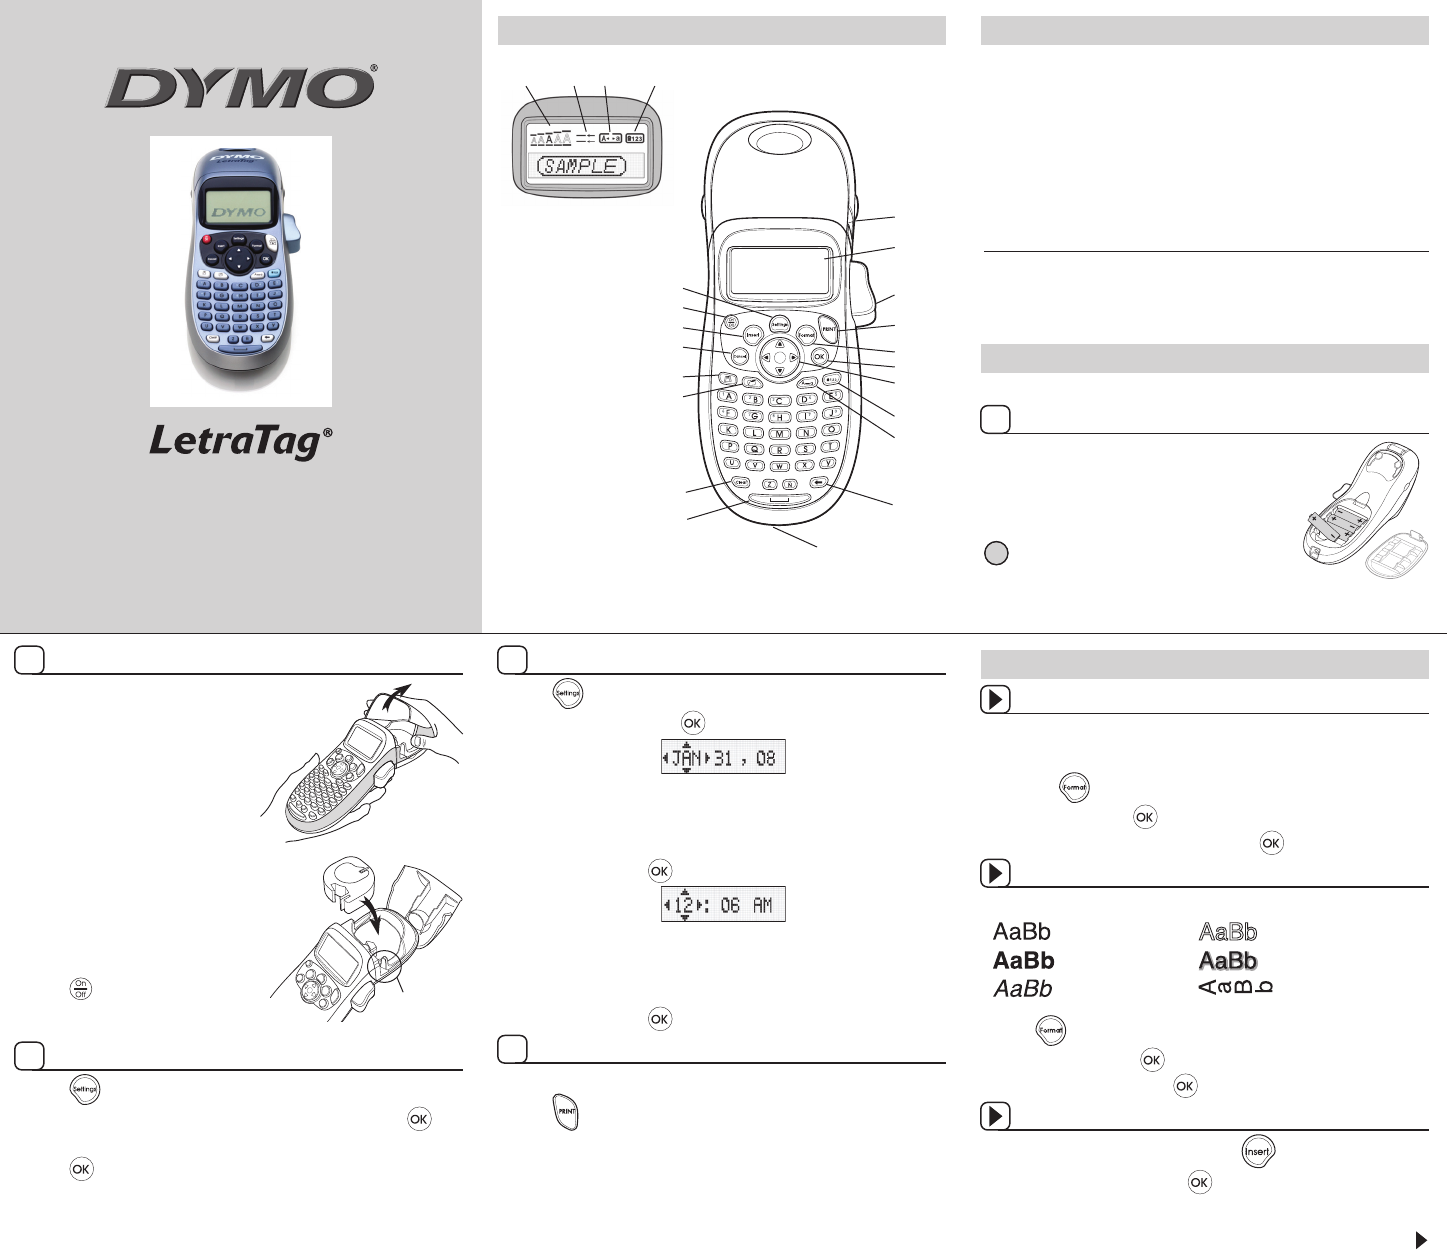
Font Size
# Lines CAPs
Num Lock
Print
LCD Display
Power Connector
OK
Navigation
Cancel
Num Lock
CAPs
Backspace
Space Bar
Clear
Settings
Format
Insert
Cutter
Power
Label Exit
Memory Save
Memory Recall
1
2
3
4
5
Inserting the Label Cassette
Press and release the label 1.
cassette cover to open the label
compartment. See Figure 2.
Remove the protective cardboard 2.
insert from label exit slot. See
Figure 3.
Insert the cassette with the label 3.
positioned between the print head
and pinch roller.
Press firmly until cassette clicks 4.
into place.
Close the label cassette cover and 5.
press to turn on the power.
About Your New Label Maker
With your new DYMO LetraTag® label maker, you can create a wide
variety of high-quality, self-adhesive labels. The label maker uses
DYMO LetraTag (LT) 1/2 inch (12 mm) label cassettes. LT label cassettes
are available in a variety of colors and materials such as paper, plastic,
metallic, magnetic, and iron-on.
Visit www.dymo.com for a complete User Guide, and for information
on obtaining labels and an optional AC adapter for your label maker.
Product Registration
Visit www.dymo.com/registration to register your label maker online.
Getting Started
Follow the instructions in this section to print your first label.
Inserting the Batteries
Remove the battery compartment cover. 1.
Insert the batteries following the polarity 2.
markings (+ and –).
Replace the cover.3.
Remove the batteries if the label maker will not
be used for a long period of time.
Setting the Date and Time
Press 1. .
Select 2. Set Date and press . The default date is displayed.
Use the left or right arrow key to move the cursor over each setting 3.
(month, day, and year) and use the up or down arrow key to increase
or decrease the value.
When finished, press 4. .The default time is displayed.
Use the left or right arrow key to move the cursor over each setting 5.
(hours and minutes) and use the up or down arrow key to increase or
decrease the value.
When finished, press 6. .
Printing Your First Label
Enter text to create a simple label.1.
Press 2.
.
Press the cutter button to cut the label.3.
Remove the paper backing from the label to expose the adhesive, and 4.
then attach the label.
Designing Your Label
Changing the Font Size
Five font sizes are available for your labels: Extra Small, Small, Medium,
Large, and Extra Large.
Press the 1.
key.
Select 2. Size and press .
Select the desired font size and then press 3. .
Adding Font Styles
You can choose from six different font styles:
Normal Outline
Bold Shadow
Italic Vertical
Press 1. .
Select 2. Style and press .
Select a font style and press 3. .
Creating Two-Line Labels
Type the text for the first line and press 1. .
Select 2. Second Line and press . A multi-line symbol is inserted at
the end of the first line, but will not print on the label.
Type the text for the second line.3.
Getting to Know Your Label Maker
Selecting a Language
Press 1. .
Use the up or down arrow key to select 2. Language and press .
Use the up or down arrow key to select the language you want and 3.
press .
Continued


