3.5" PATA Hard Drive
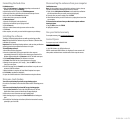
Power LED
Backup button
Activity LED
USB 2.0 B type
12V DC
Power switch
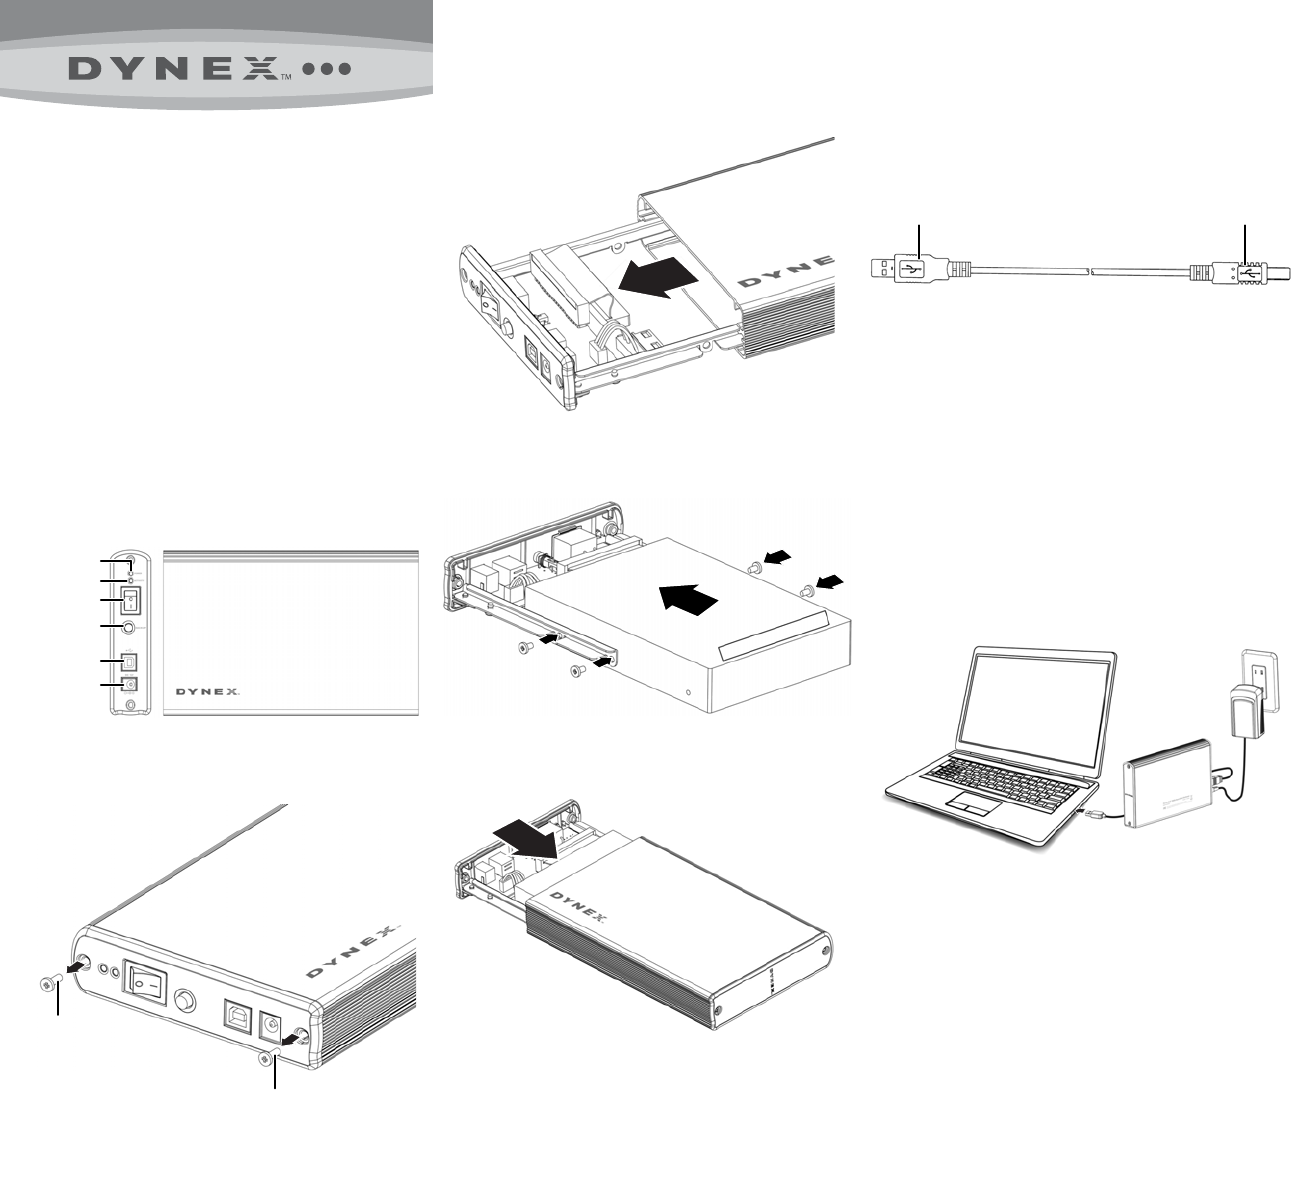
Screw
Screw
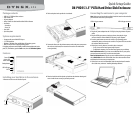
USB 2.0 A type connector USB 2.0 B type connector
Quick Setup Guide
DX-PHD35 3.5" PATA Hard Drive Disk Enclosure
Package contents
• USB 2.0 3.5" PATA hard drive enclosure
• USB 2.0 cable A-B
• AC power adapter
• Utility CD with User Guide and Roxio BackOnTrack software
• Accessories:
Screwdriver
Screws (4)
• User Guide
• Quick Setup Guide
System requirements
• Computer with an available USB 2.0 port
• 3.5" PATA hard drive
• Windows 7, Windows Vista, and Windows XP operating system.
• MAC OS X version 10.4 or higher operating system.
For highest performance and reliability, install the latest updates and service
pack (SP). For Windows, go to the Start menu, then select Windows Update.
Features
Installing your hard drive in the enclosure
1 Remove two screws on the left side of panel.
2 Pull out the plastic end cap with the circuit board.
3 Connect the drive to the 40-pin data connector and to the power connector on
the enclosure circuit board, then secure the drive to the rails with the four
screws (provided).
4 Place the hard drive with the plastic cap back into the aluminum housing and
secure it with the two screws you previously removed.
Connecting the enclosure to your computer
Note: Make sure you have already installed a hard drive into the enclosure before
you connect the enclosure to your computer.
1 Plug the AC power adapter into the 12V DC jack, then plug it into an AC power
outlet.
2 Plug the USB B type connector into the enclosure, then plug the A type
connector into one of the available USB 2.0 ports on your computer.
3 Press the power button to turn on the enclosure. The operating system
automatically detects and sets up the new drive. The power LED turns on when
the enclosure/hard drive turns on.
4 If the drive is correctly detected, a new drive letter is assigned.
• For PCs, the new drive letter appears in My Computer.
• For Macintosh computers, the new drive letter appears on your desktop.
Note for Windows users: If you do not see an additional drive in your system,
you must format the new drive. See the instructions below.
Note for Macintosh users: If you do not see an additional drive in your system,
select Disk Utilities from the Utilities folder, then select the external enclosure
and format the drive to meet your requirements.
5 If the drive is new and is not formatted, follow the steps below to format the
drive. Otherwise, continue to “Installing the backup software”.