Table of Contents
Table of Contents 1
Welcome Message and Thank You 1
Important Safeguards 2
1. Specifications 3
2. Parts and Features 4
3. Operation 4
4. Troubleshooting 7
5. Limited Warranty 9
Welcome and Thank You
Welcome and thank you for purchasing this EdgeStar® wine cooler. Once you
complete our easy unit set up by following this manual, it will provide you and
your family years of great service.
If you are reading this owner’s manual, you’ve probably already unpacked the
unit. Note that you should save the packaging in case you need to safely
transport this wine cooler in the future.
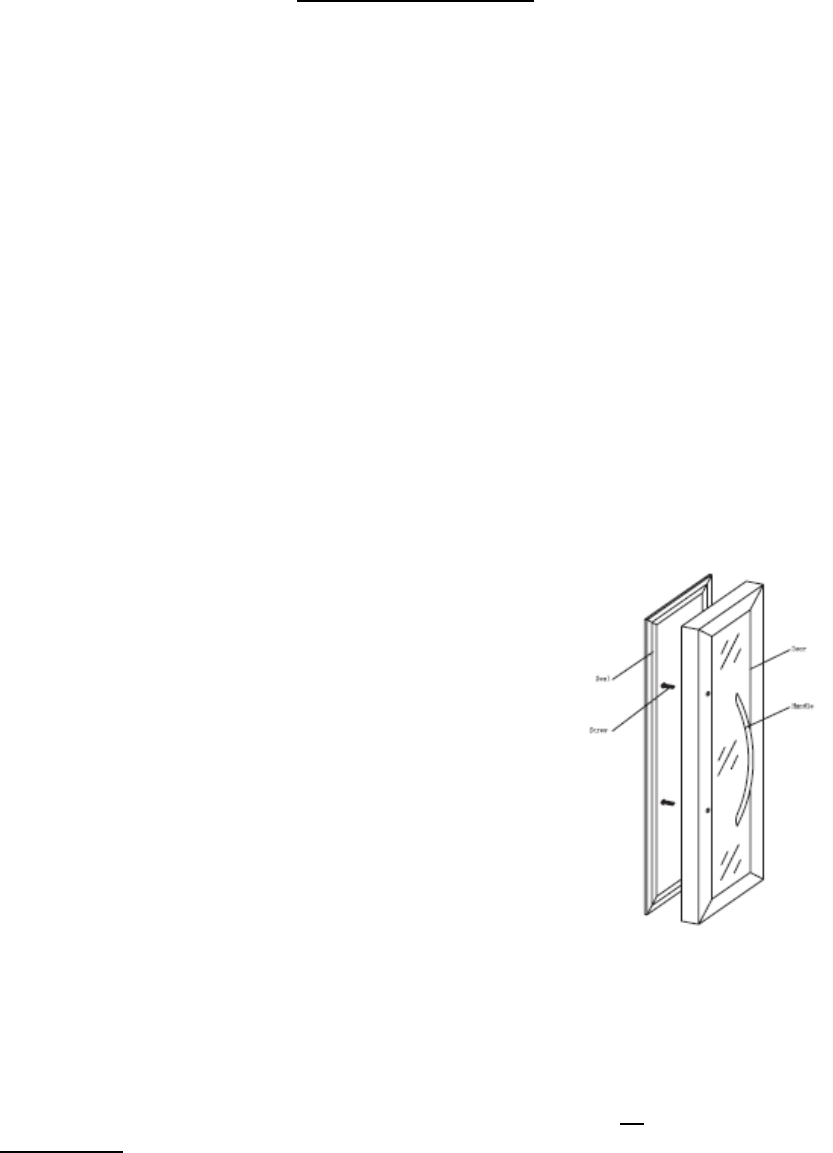
In order to assemble this wine cooler, carefully
unpack all parts. The only assembly required is that
of the handle(s). In order to install a handle, you
need a Phillips head screwdriver, the handle(s), and
the two installation screws.
• Open the door of the wine cooler.
• Locate the two screw holes on the inside of
the door (they may be partially obscured by
the door liner gasket.
• Insert the screws into the holes. They should
now poke out of the front of the door.
• Line up the holes in the handle with the
screws and give each screw about 2-4 full
turns into the handle.
• Now screw the screws in all the way, and
your handle is installed!
After you get the handle(s) installed, make sure that your wine cooler is fully
unpacked, and position it into your preferred location (remember, for the best
conditions for your wine, choose a spot in a cool (room temperature) area,
away from direct sunlight leaving about 2-4 inches around all sides,
specifically the back for adequate ventilation. Make sure the unit is set on a
sturdy surface that can support its weight.
Note: that you can screw in and out the legs to level the unit. You may also
want to clean the interior with a solution of mild soap and water and a damp
cloth. Then plug the unit in, set the temperature, and fill it with wine.
1
