If anything is missing, contact Epson as described on the back.
Note: The model name of your product may vary slightly from the one shown above.
The included CD and documentation apply to all products in the series.
Caution: Do not open ink cartridge packages until you are ready to install the ink.
Cartridges are vacuum packed to maintain reliability.
Canada only: For French speakers, remove sticker(s) from the backing sheet and
place over corresponding text on the control panel.
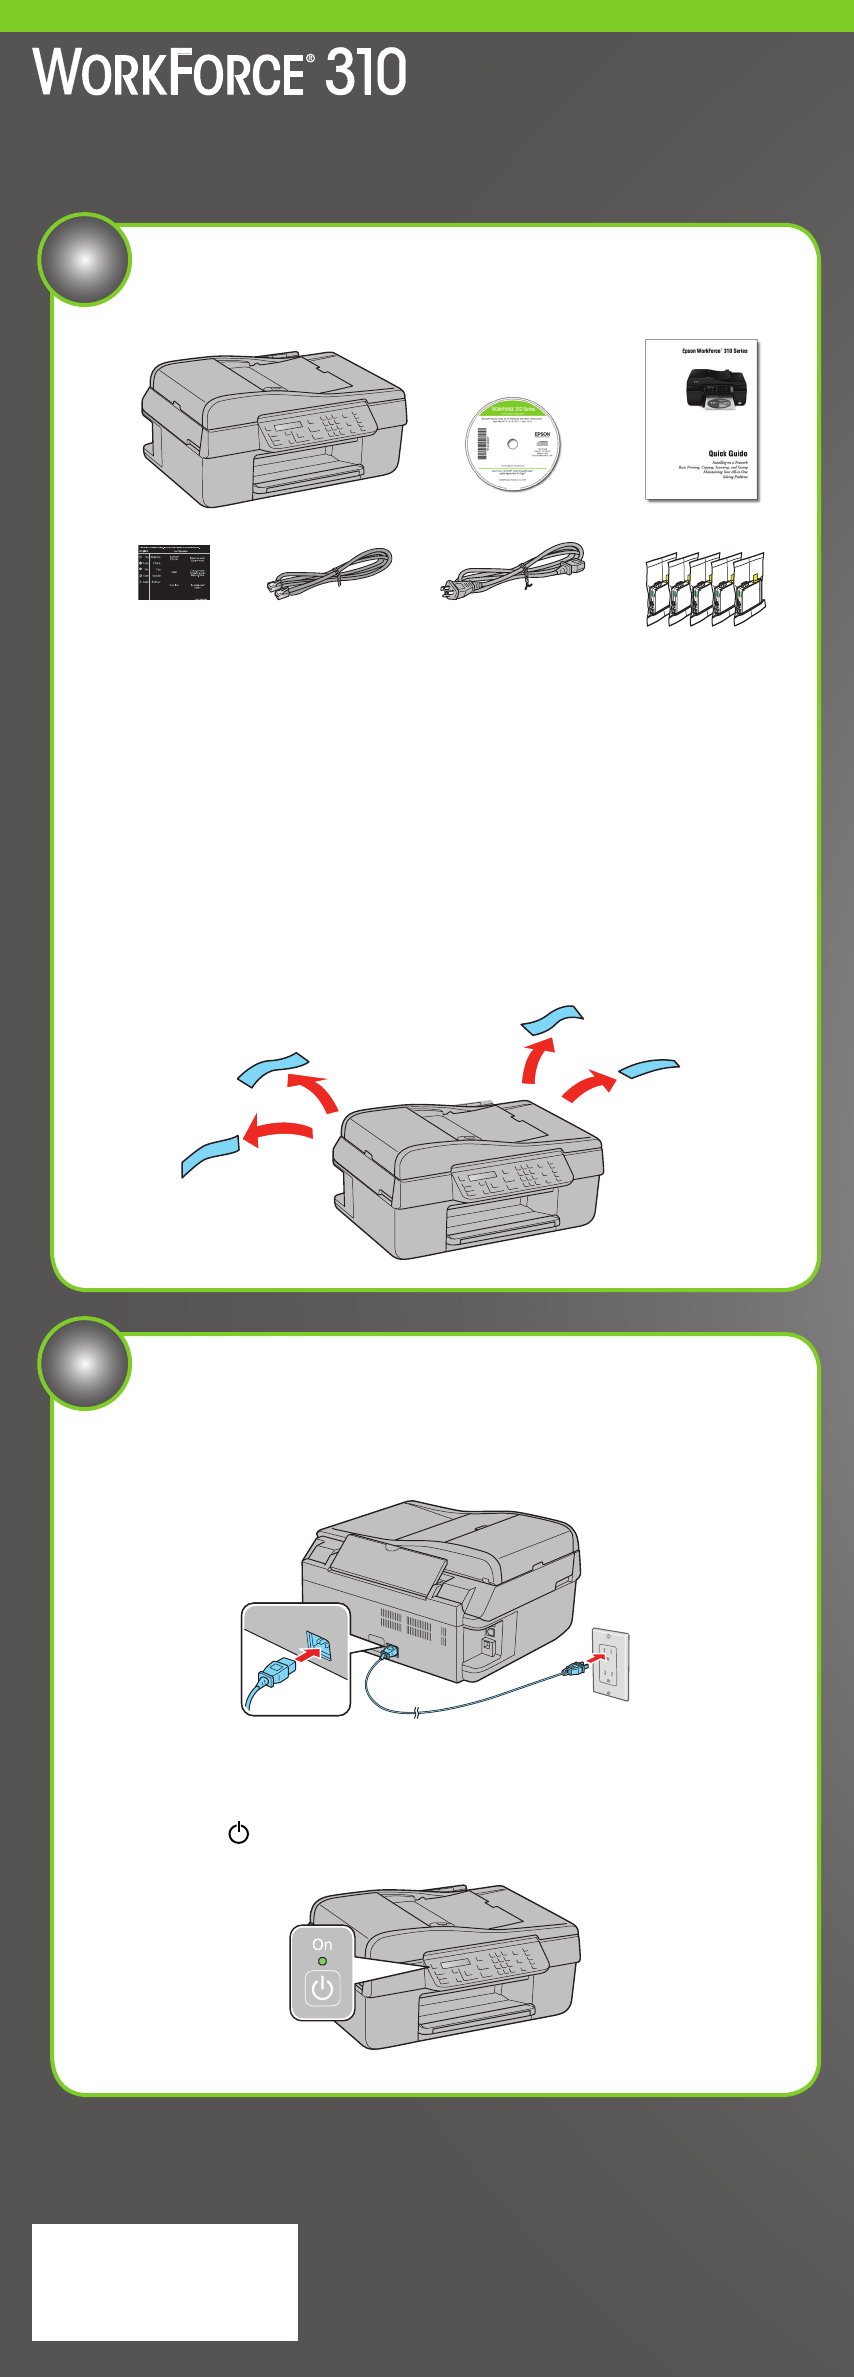
Remove all protective materials.
Unpack
1
Start Here
Make settings
3
Auto Answer/
Space
Redial/Pause
Stop/
Clear Settings
B&W
Color
Speed Dial
Group Dial/
Backspace
1 Select your language.
Press or to select the desired option.
Press OK when done.
2 Press or to select your country/region, then
press OK.
3 For the Daylight Saving Time setting, press
or to select Summer if your region uses
Daylight Saving Time and it’s currently in effect.
(DST is effective from spring through summer.)
Otherwise, select Winter to turn off the setting.
Press OK.
4 Press or to select the date format, then
press OK.
5 Use the numeric keypad to set the date, then press OK.
6 Press or to select the time format, then
press OK.
7 Use the numeric keypad to set the time.
8 If you selected 12h as the time format,
press or to select AM or PM.
9 Press OK when done.
Note: You can change the date and time settings by pressing the Copy button,
pressing the Menu button, selecting Maintenance, then selecting Date/Time.
1 Open the paper support and pull up the extensions.
2 Pull out the output tray extensions, and raise the stopper.
Note: If you are using legal-size paper, do not raise the stopper.
3 Squeeze the edge guide and slide it left.
Tip: If the feeder guard is in the way, flip it forward.
4 Load paper against the right edge and behind the tab, with the printable
side face up.
Note: Don’t load the paper sideways; always load it
short edge first.
5 Slide the edge guide over.
5
Load paper
3 Remove only the yellow tape from each cartridge.
Caution: Don’t remove any other seals or the cartridges may leak.
4 Insert the cartridges in the holder for each color.
5 Press each cartridge down until it clicks.
6 Close the ink cartridge cover. Press it down until it clicks.
7 Lower the scanner.
8 Press the OK button to charge the ink. Charging takes about
2
1
/2 minutes.
Note: Your WorkForce 310 Series ships with full cartridges and part of the ink
from the first cartridges is used for priming the WorkForce 310 Series.
Caution: Don’t turn off the WorkForce 310 Series while the ink system is
charging or you’ll waste ink.
(Included for
Canada only)
1 Connect the power cable.
Caution: Do not connect to your computer yet.
2 Press the On button.
Turn on
2
Series
Phone cord Power cord
Install ink cartridges
4
Note: Don’t load paper before installing the ink cartridges.
1 Lift up the scanner, then open the cartridge cover.
2 Shake the ink cartridges gently 4 or 5 times, then unpack them.


