continued
EPSON Stylus
®
Photo R200
Start Here
Windows
®
Follow the steps below to install the software for your operating system.
Windows XP
1
Make sure your printer is connected and turned on.
Then turn on your computer.
2 Wait for Windows to detect your printer and display a screen like this:
DON’T CLICK ANY BUTTONS ON THIS SCREEN.
Note: If a screen like this doesn’t appear, make sure your printer
is turned on and connected.
3 Put the EPSON
®
CD in your CD-ROM or DVD drive and wait a few
seconds for the CD to be recognized.
Your printer software installs automatically and various messages
appear on the screen.
4 When installation halts, click Finish.
5 You see the license agreement. Read the agreement and click Agree.
You see the Options Menu. Continue with the instructions in
“Finishing Windows Installation” on the back of this sheet
to complete the software installation.
Windows Me and 98
1
Make sure your printer is connected and turned on. Then turn on
your computer.
2 Wait for Windows to detect your printer and display a screen like this:
DON’T CLICK ANY BUTTONS ON THIS SCREEN YET.
Note: If a screen like this doesn’t appear, make sure your printer
is turned on and connected.
3 Put the EPSON CD in your CD-ROM or DVD drive and wait a few
seconds for the CD to be recognized.
4 Click Next on the Add New Hardware Wizard Screen.
(In Windows Me, you may not need to click Next.)
If you’re using Windows Me, installation proceeds automatically;
go to step 8.
If you’re using Windows 98, continue with step 5.
Install Software
6
1 Flip open the paper support and pull up the extension.
2 Lift the printer cover.
3 Open the output tray and pull out the extension.
4 Unwrap the ink cartridges.
5 Open the cartridge cover and remove the paper insert.
6 Lower each cartridge into its holder with the green circuit board
facing the front.
The color of the cartridge label should match the marker above
the holder.
Gently push each ink cartridge until it clicks into place.
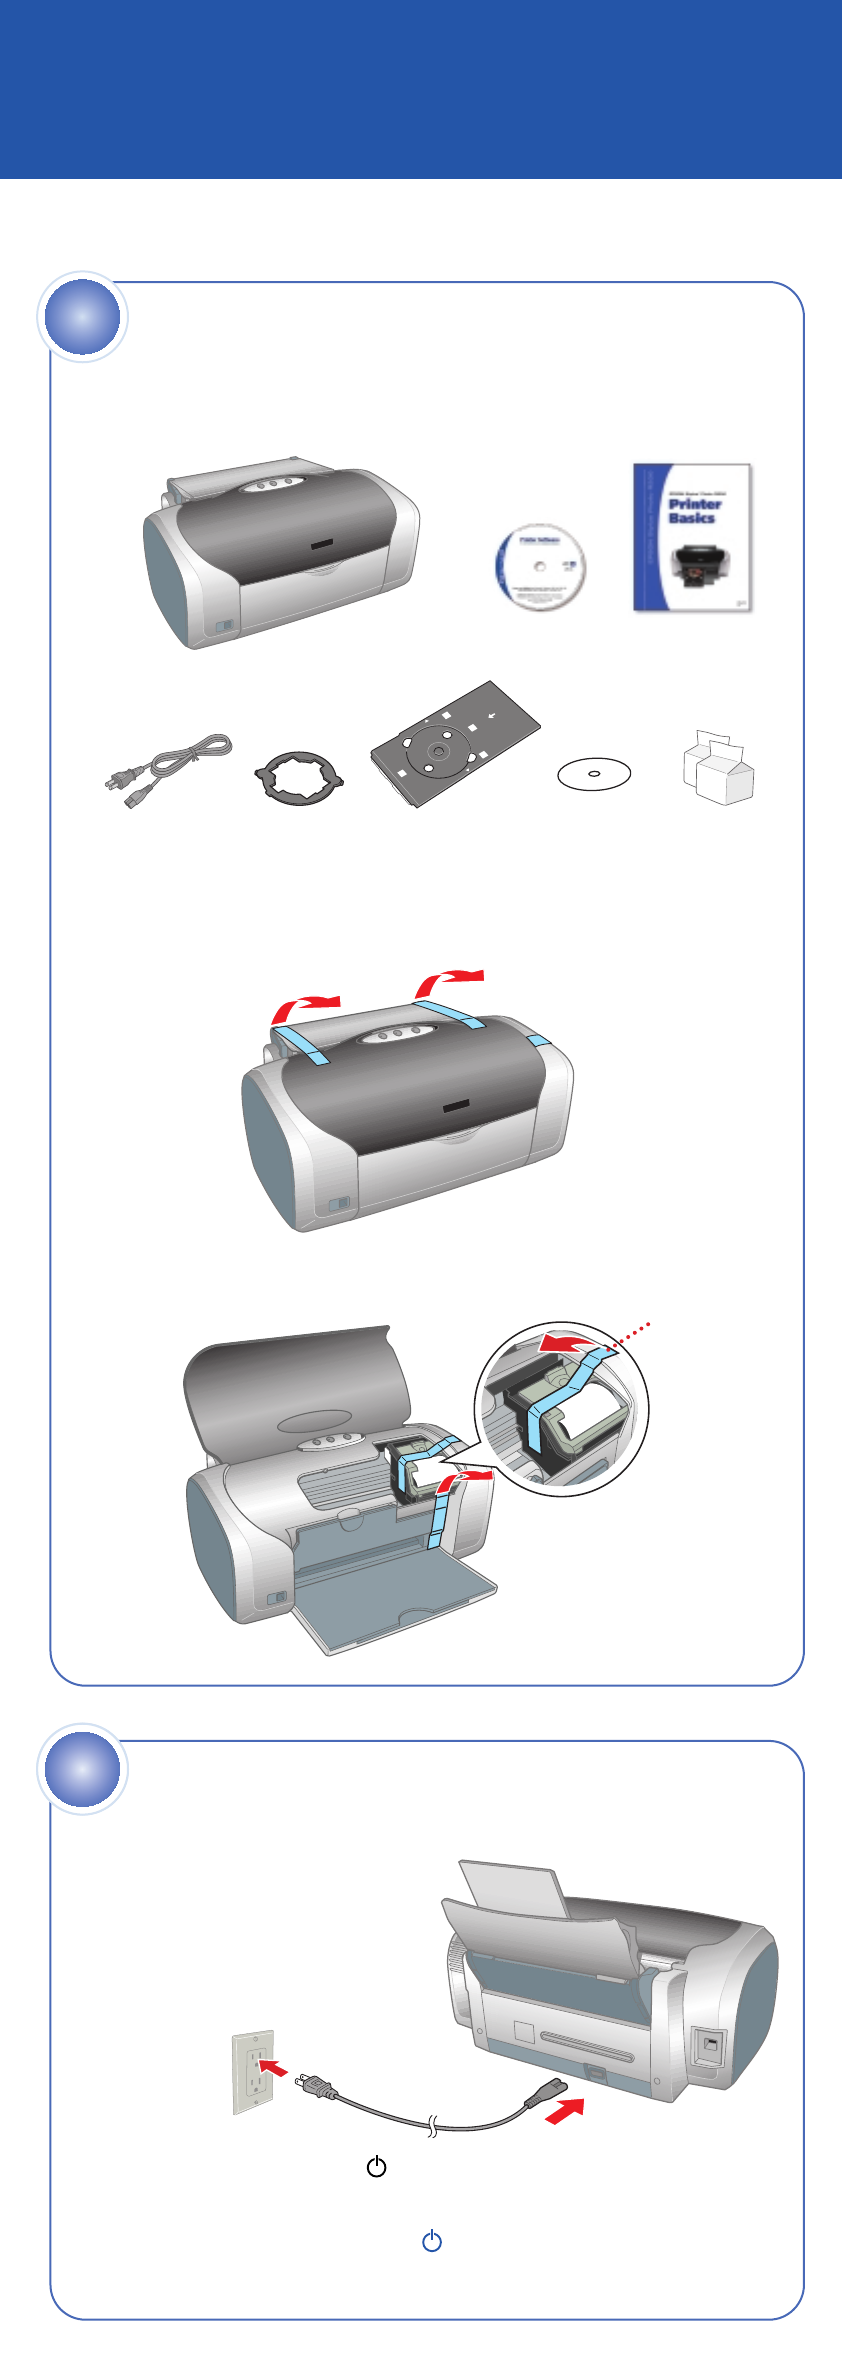
1 Remove everything from the box.
2 Remove any tape and packing material inside and around the printer.
The tape may be in slightly different places on your printer, so check
carefully.
3 Lift the printer cover and remove the tape securing the ink
cartridge holder.
Unpack
Install Ink Cartridges
1
2
3
CD/DVD tray
CD position
check disk
Software
CD-ROM
Printer Basics
Printer
Ink cartridges
continue
continue
4046837-00 XXX
Remove tape
Don’t touch the green circuit
boards or remove any labels
7 Close the cartridge cover.
8 Press the ink button and close the printer cover.
The green power light flashes as your printer charges ink
for several seconds.
Caution: Don’t turn off the printer while the green power light
is flashing, unless the printer hasn’t moved or made noise for
more than 5 minutes.
1 Make sure your computer is turned off. Keep it turned off until
section 6, “Install Software.”
2 Plug the square end of the cable into the USB port
on the back (or front) of your printer.
3 Plug the flat end of the cable into any available USB port
on your computer.
Connect the Printer
4
1 Fan a few sheets of paper and place them under the tab against
the right edge guide.
2 Slide the left edge guide against the paper, but not too tightly.
Note: For instructions on loading and printing on CDs or DVDs,
see your Printer Basics book.
Load Paper
5
Turn over
1 Connect the printer’s power cord
to the printer, then plug it into a
grounded electrical outlet.
2 Press the printer’s power button until the green power light
comes on.
Caution: Use only the printer’s power button to turn the
printer on and off.
Power On
2
2
Me
98
Small CD insert
Power cord


