Epson Stylus
®
CX7800
Start Here
1 Open the paper support and pull up its extensions.
2 Open the output tray and pull out its extension.
3 Flip the feeder guard forward.
4 Slide the edge guide left.
5 Load paper against the right edge guide and slide the left edge
guide over.
6 Flip the feeder guard back.
4 Insert the cartridges in the holder for each color.
5 Press the cartridges down until they click.
6 Close the ink cartridge cover and press it down until it clicks.
7 Close the scanner.
8 Press the Start button to charge ink. Charging takes about
2 minutes.
Caution: Don’t turn off the Epson Stylus CX7800 while the On light is
flashing or you’ll waste ink.
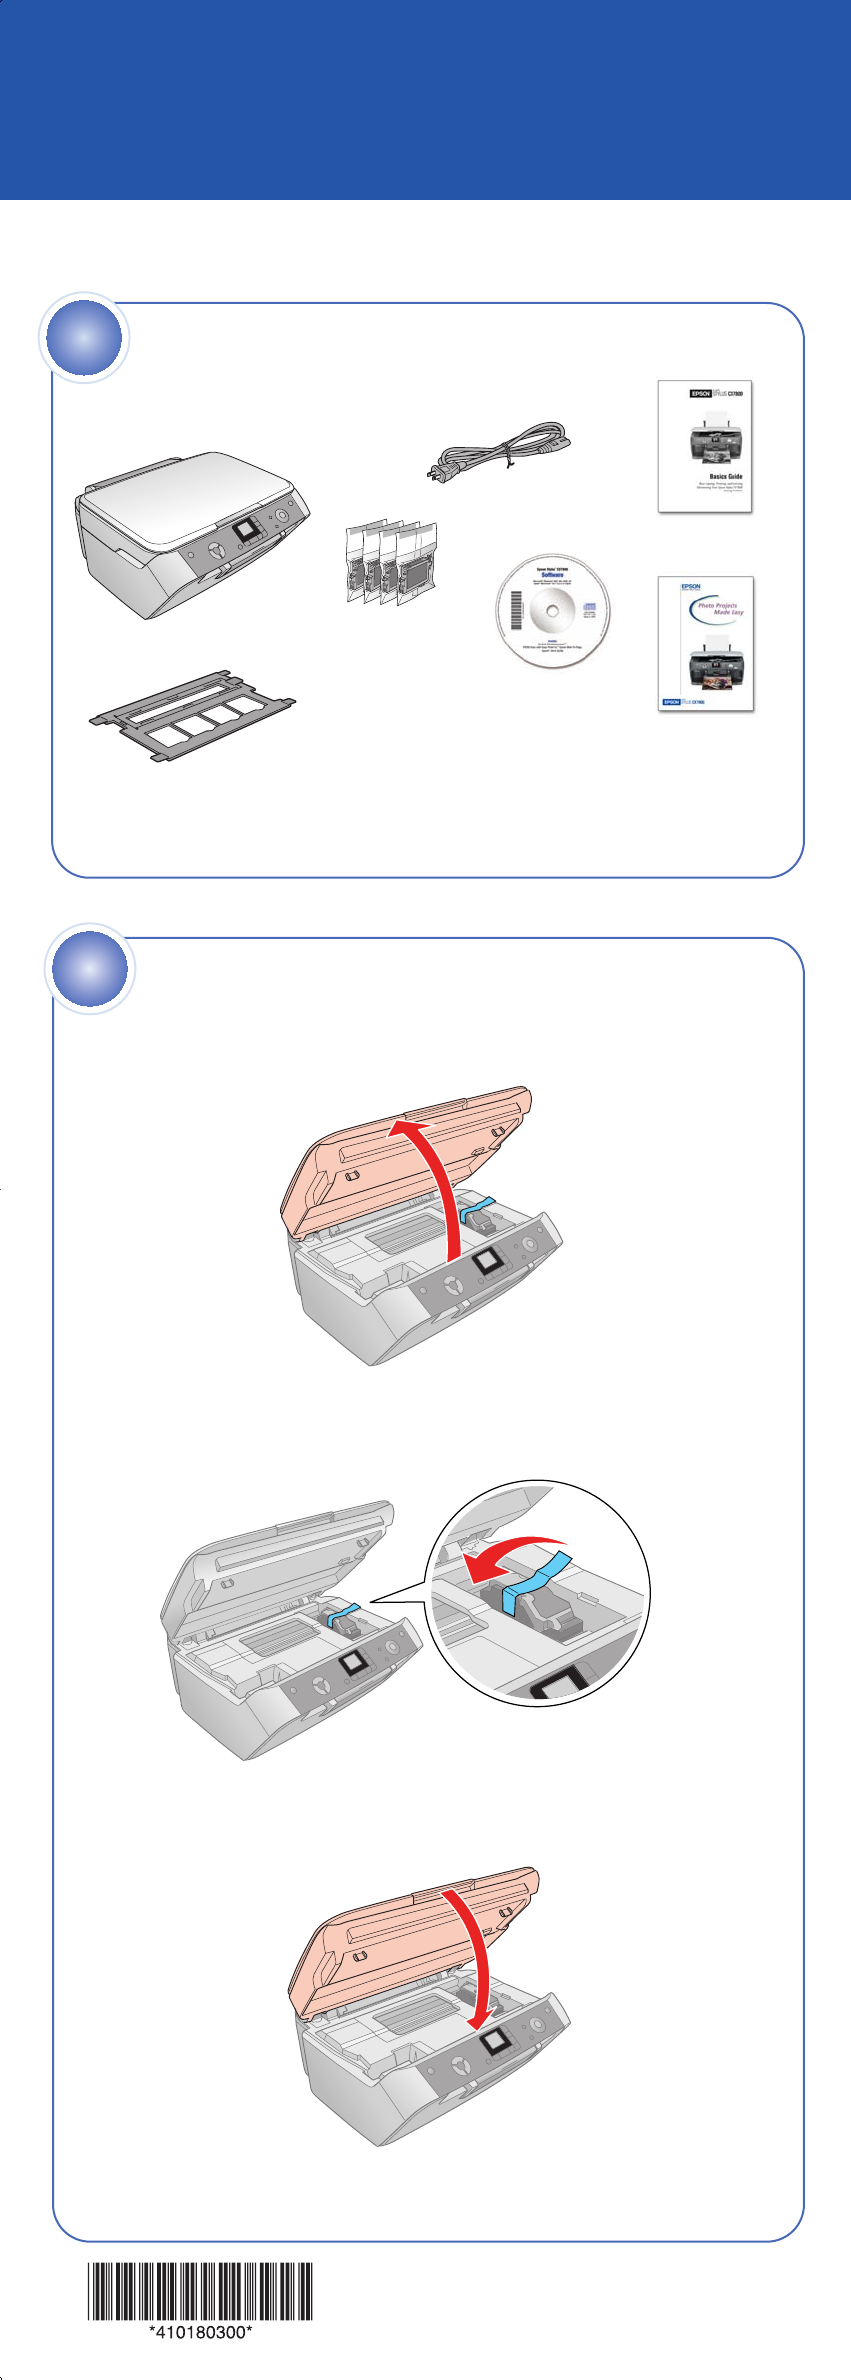
Remove all the tape.
If any of these parts are missing, contact Epson
®
as described on the back
of this sheet.
Unpack
1
5
Load Paper
Note: Don’t load paper before installing the ink cartridges.
1 Lift up the scanner.
2 Open the ink cartridge cover.
3 Shake the ink cartridges, then unpack them.
Install Ink Cartridges
4
4 ink cartridges
1 Lift up the scanner.
2 Remove the tape from the ink cartridge holder.
3 Close the scanner.
Unlock the Printer
2
1 Connect the power cable.
2 Press the On button.
Turn On the
Epson Stylus CX7800
3
Paper support
Output tray
Letter
Software CD-ROM
Film holder
(see the Basics Guide
for storage instructions)
Power cord
Photo Projects
Made Easy
Basics Guide
Epson Stylus CX7800
Letter
4 x 6-inch or 5 x 7-inch
4 x 6-inch or 5 x 7-inch
CPD20264_Sapp_SH_E.qxd 7/13/05 9:12 AM Page 1


