EPSON Stylus Color 880/880i
8/00 EPSON Stylus Color 880/880i
- 1
Accessories
Media
The availability of paper types varies by location. Not all paper
type names match the Media Type setting names in your
printer software. See the chart on page 6 or the instructions
that came with your paper to select the correct Media Type
setting.
Ink Cartridges
Printer Specifications
Printing
Printing method On-demand ink jet
Nozzle configuration
Black 144 nozzles
Color 144 nozzles
(48 each: cyan, magenta, yellow)
Resolution Maximum 2880 dpi
×
720 dpi
Print direction Bidirectional with logic seeking
Control code EPSON ESC/P2, EPSON Remote
Input buffer 256KB
Media name Size Part number
EPSON 360 dpi Ink Jet Paper Letter
A4
S041060
S041059
EPSON Photo Quality Ink Jet
Paper
Letter
A4
Legal
S041062/S041029
S041061
S041067
EPSON High Quality Ink Jet
Paper
Letter
A4
S041111
S041117
EPSON Photo Quality Glossy
Paper
Letter
A4
S041124
S041126
EPSON Photo Quality Glossy
Film
Letter
A4
A6
S041072
S041071
S041107
EPSON Ink Jet Transparencies Letter
A4
S041064
S041063
EPSON Photo Quality Ink Jet
Cards
A6 S041054
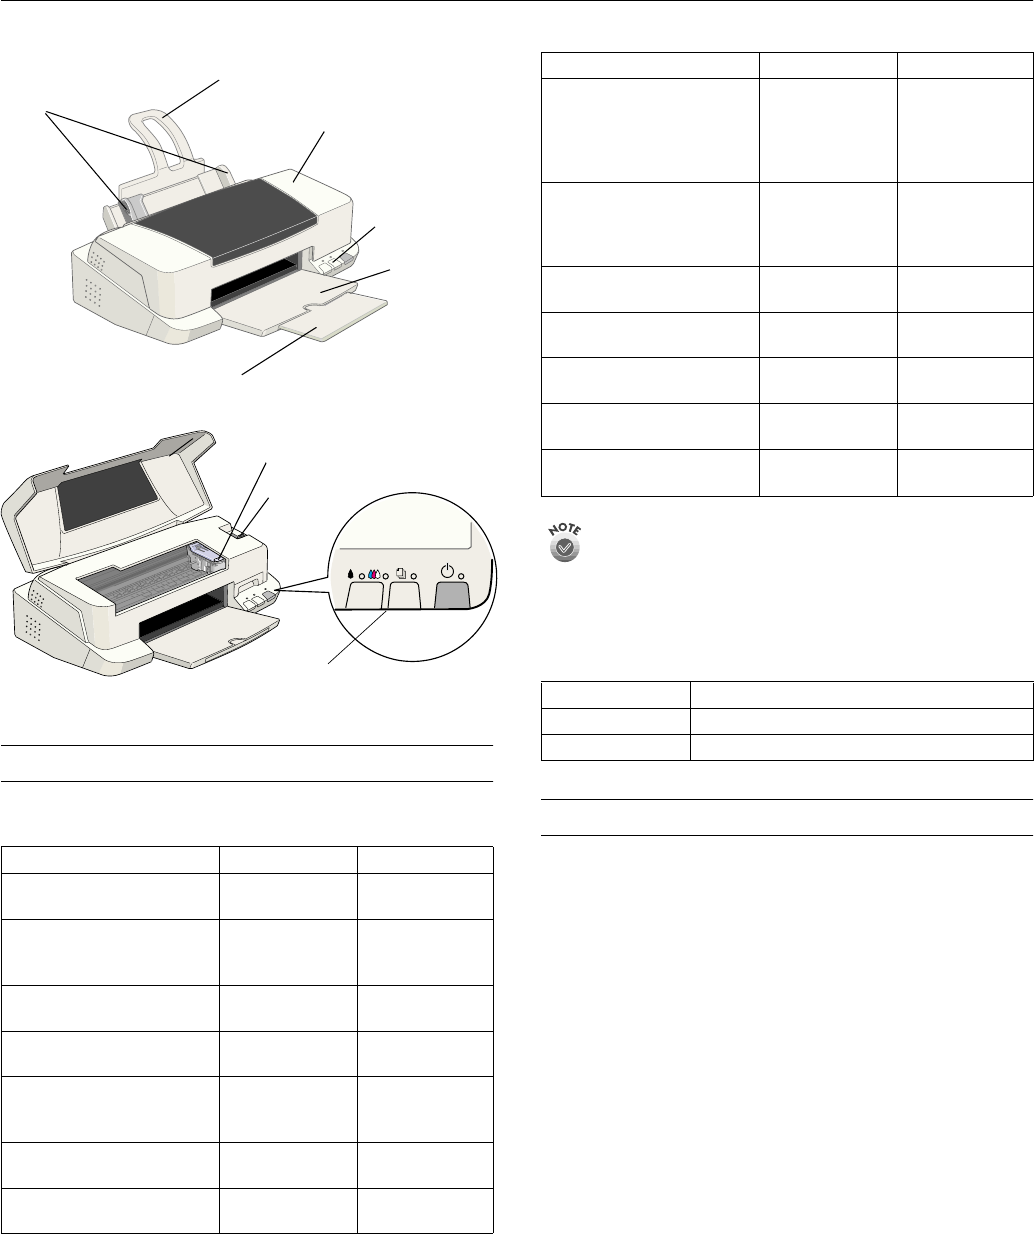
ink cartridge
clamp
printer cover
edge
guides
paper support
control
panel
output tray
extension
output tray
thickness
lever
control panel
EPSON Photo Paper Letter
A4
4
×
6 inches
Panoramic (8.3
×
23.4 inches)
S041141
S041140
S041134
S041145
EPSON Photo Stickers
®
Kit
(CD-ROM and paper)
EPSON Photo Stickers
(refill, paper only)
A6, 16 frames per
sheet
A6, 16 frames per
sheet
S041144-KIT
S041144
EPSON Iron-On Cool Peel
Transfer Paper
Letter S041153/S041155
EPSON Photo Quality Self
Adhesive Sheets
A4 S041106
EPSON Matte
Paper - Heavyweight
Letter
A4
S041257
S041258
EPSON Premium Glossy Photo
Paper
Letter S041286
EPSON Glossy Photo Greeting
Card Kit
Letter S041267
Cartridge Part number
Black T019201 (U.S.) T019311 (Canada)
Color T020201 (U.S.) T020311 (Canada)
Media name Size Part number


