GSS 100 • Setup Guide
The Extron GSS 100 is a portable graphic still store with 16 MB of memory that can hold up to
6 XGA (1024 x 768) bitmap images (BMP) or 32 or more XGA JPEG images.
The GSS outputs stored images in an RGB video format. The GSS provides a pass-through RGB
video input, in addition to the stored images, and allows you to switch the output between the
RGB pass-through input and one of the stored images.
Connections
R
R
50/60 Hz
RS-232
LAN
RESET
G
G
B
B
H/HV
H/HV
V
V
100-240V .3A MAX
RGB PASS-THRU
OUTPUT
1 4 5
3 6
2
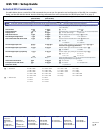
a AC power connector — Plug a standard IEC power cord
into this connector to connect the GSS to a 100 VAC to
240 VAC, 50 or 60 Hz power source.
b RGB Pass-thru connectors — Connect a high resolution
video input or computer input to these female, BNC
connectors.
c Output connectors — Connect an RGB video display or
other device to these female BNC connectors.
NOTE: The still image output format (RGBHV or RGBS) must be configured using the front panel controls or a Simple
Instruction Set (SIS™) command. The output format applies only to the output of still images stored in the GSS; the
RGB Pass-through video is output exactly as it is input.
d LAN port — Connect the GSS to a PC or to an Ethernet LAN, via this RJ-45 connector. You can use the HTML pages embedded in
the GSS to upload still images from the PC to the GSS and to control the GSS. You can also use a PC to control the GSS with SIS
commands. The default address is 192.168.254.254.
e RS-232 port — Connect a computer or control system to this 9-pin D connector to allow remote
RS-232FunctionPin
1
2
3
4
5
6 - 9
—
Tx
Rx
—
Gnd
—
Not used
Transmit data
Receive data
Not used
Signal ground
Not used
control using the SIS commands.
f Reset button — See the GSS 100 User Guide for greater detail.
Controls and Indicators
GSS 100
ADJUST/
SELECT
IMAGE
TAKE
MENU
NEXT
1 2 43 65
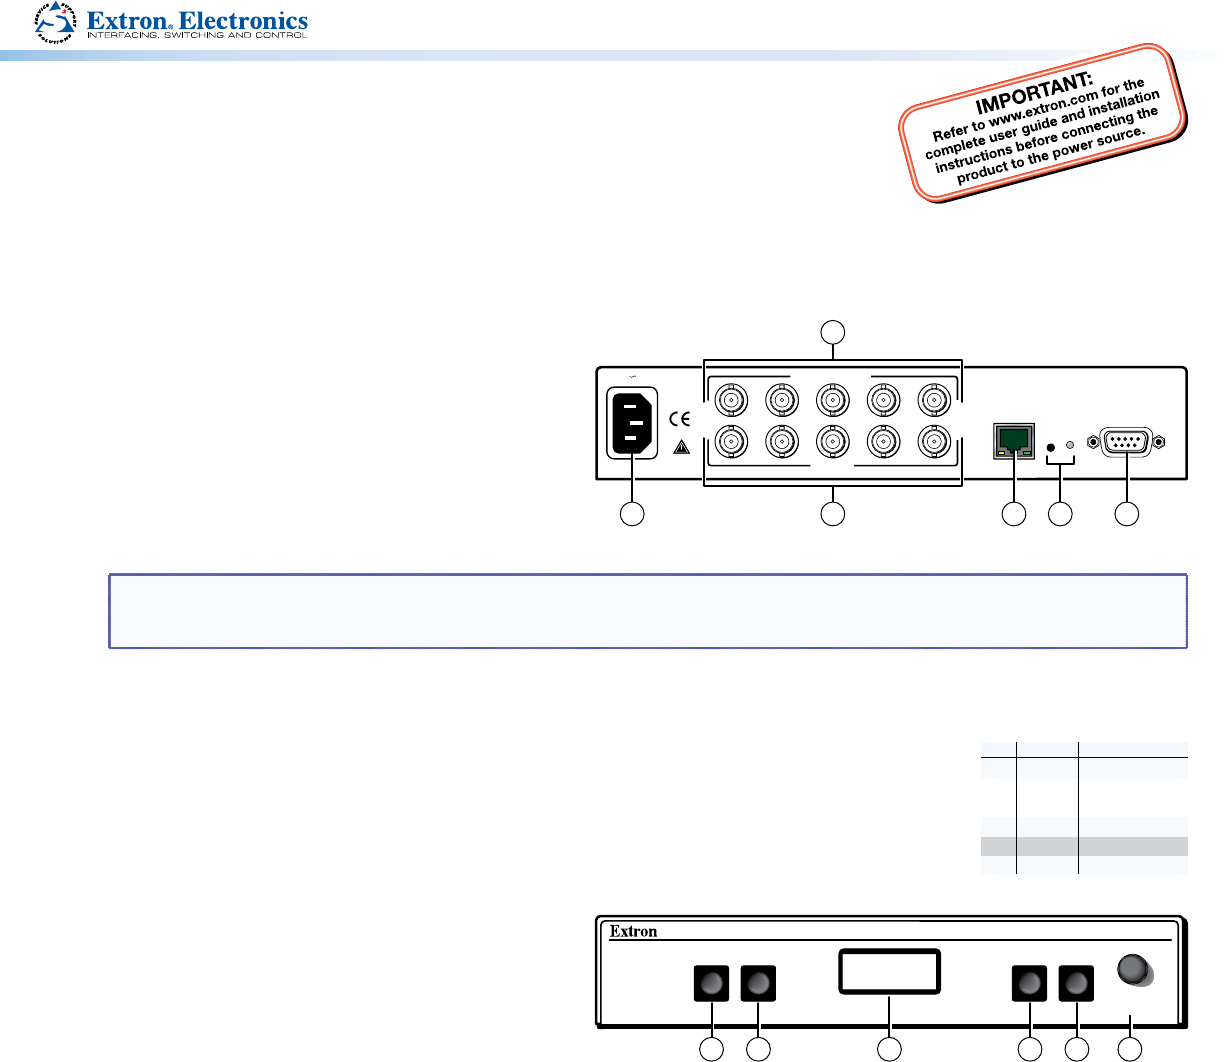
a Image button — Press this button to activate the
menu on the LCD display (
c
) that allows you to select
between the RGB pass-through input and one of the
stored images.
b Take button — Press this button to activate either the
RGB pass-through input or one of the stored images.
c LCD display — 8-column by 2-line screen
d Menu button — Press the Menu button to enter and move through the main menu system in the GSS.
e Next button — Press the Next button to step through the submenus in the GSS menu system.
f Adjust/Select knob — Rotate the Adjust/Select knob to change a setting when it is used in conjunction with the Image and Take
buttons or the Menu and Next buttons.