HFX 100 Series • Setup Guide
The Extron HFX 100 Series consists of a transmitter (HFX 100 Tx) and receiver (HFX 100 Rx)
that use one multimode fiber optic cable to extend a HDMI signal up to 984 feet (300 m).
This guide provides basic instructions for an experienced installer to set up and operate the
HFX 100 Series extender (see the HFX 100 Series User Guide, at www.extron.com, for full
instructions).
Installation
Step 1 — Mounting
Mount the HFX 100 Tx close to the HDMI source and the HFX 100 Rx close to the HDMI display
device. See the HFX 100 Series User Guide for all mounting options. Follow the instructions
provided with the appropriate installation kit.
Step 2 — Cable Connections
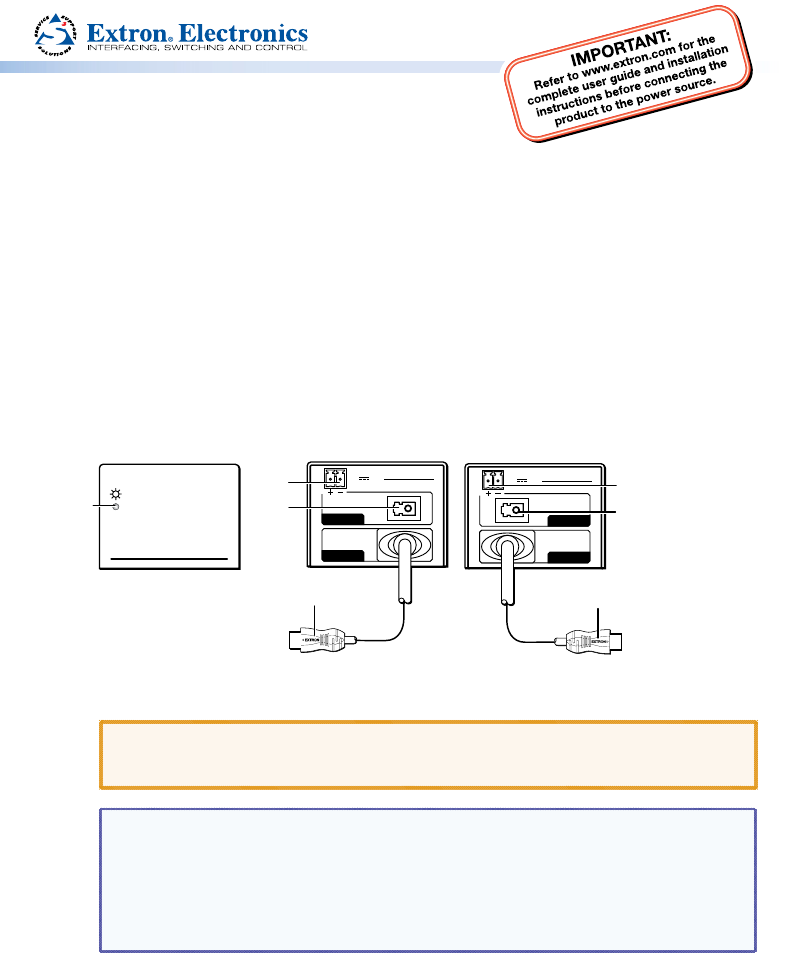
HFX 100 Series Front Panel HFX 100 Tx Rear Panel HFX 100 Rx Rear Panel
Extron
Extron
POWER
12V
0.3 A MAX
OUTPUT
INPUT
HFX 100 Tx
POWER
12V
0.3 A MAX
OUTPUT
INPUT
HFX 100 Tx
POWER
12V
0.2 A MAX
INPUT
OUTPUT
HFX 100 Rx
POWER
12V
0.2 A MAX
INPUT
OUTPUT
HFX 100 Rx
a
b
d
c
b
f
e
1. Connect one of the provided 12VDC power supplies to the front panel captive screw
connectors of the transimtter and the other to the receiver (
b
).
ATTENTION: Before connecting power to the HFX 100 Tx or Rx, see the attention
box in the “Power Supply” section of the HFX 100 Series User Guide for important
information about power supplies.
NOTES:
• When the units receive power but no input signals, the front panel LED (
a
) lights
amber.
• When the transmitter receives power and a HDMI input signal, the front panel LED
lights green
• When the receiver receives power and a ber optic input signal, the front panel LED
lights green.


