5700A/5720A Series II Calibrator
Service Manual
4-6
5. Remove P11 from J11. Then remove the two paddle board mounting screws and
separate the paddle board from the Rear Panel assembly.
6. Remove the jack screws for each connection on the rear panel housing, then gently
lift the Rear Panel assembly out from the housing.
7. Reverse this procedure to install the Rear Panel assembly.
4-11. Front Panel Removal and Installation
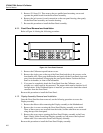
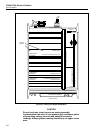
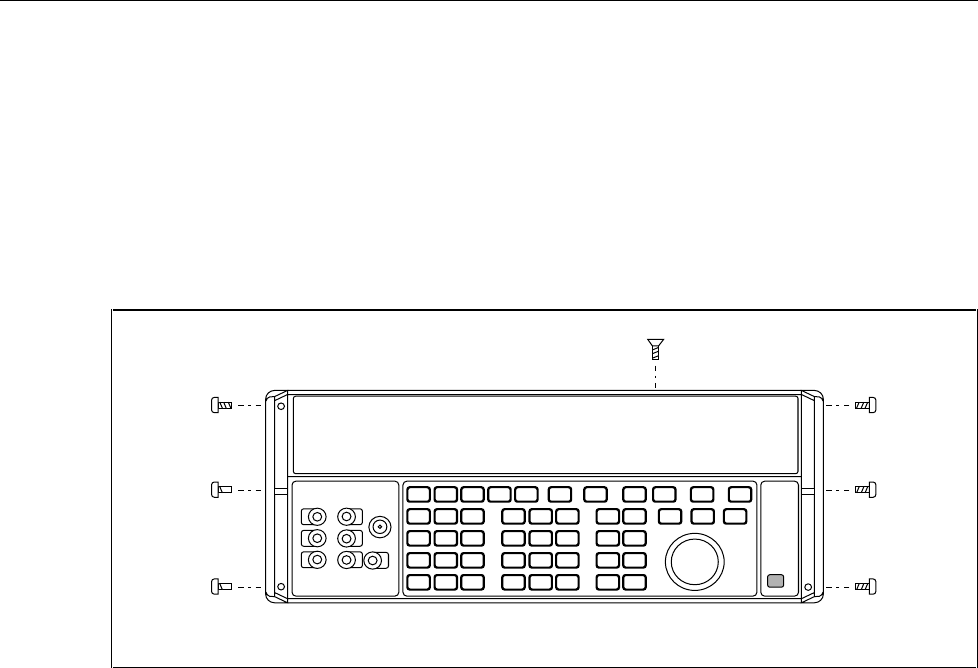
Refer to Figure 4-4 during the following procedure:
F4-4.EPS
Figure 4-4. Front Panel Removal
1. Remove the Calibrator top and bottom covers.
2. Remove the single screw at the top of the Front Panel and the six hex screws on the
front handle sides. Then grasp both handles and gently tilt the Front Panel down and
away from the mainframe, disengaging the green power button. Position the Front
Panel on its handles, in front of the instrument.
3. If you need to completely detach the Front Panel from the Calibrator, one, or
possibly two, cables must be disconnected. The output cable must be detached in all
configurations. If the Wideband Option is installed, you must also detach the related
connector from the Front Panel.
Reverse this procedure to install the Front Panel.
4-12. Display Assembly Removal and Installation
Once the Front Panel has been removed, use the following procedure to access the
Display assembly.
1. Remove the ribbon cable connecting the Display assembly to the Motherboard.
2. Remove the six screws securing the Front Panel Display assembly cover shield.
Three of these screws are accessed from the inside, and the other three are accessed
along the top of the front panel.
3. Remove the seven screws securing the Front Panel Display assembly to the Front
Panel. Gently lift the Front Panel Display assembly up, and remove the keyboard
ribbon cable. Now remove the Front Panel Display assembly.
Reverse this procedure to install the Front Panel Display assembly.


