System status Changing the FortiGate firmware
FortiGate-4000 Installation and Configuration Guide 111
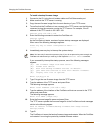
9 Type the address of the TFTP server and press Enter.
The following message appears:
Enter Local Address [192.168.1.188]:
10 Type the address of the internal interface of the FortiGate unit and press Enter.
The following message appears:
Enter File Name [image.out]:
11 Enter the firmware image file name and press Enter.
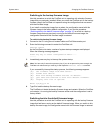
The TFTP server uploads the firmware image file to the FortiGate unit and messages
similar to the following appear.
• FortiGate unit running v2.x BIOS
Do You Want To Save The Image? [Y/n]
Type N.
• FortiGate unit running v3.x BIOS
Save as Default firmware/Run image without saving:[D/R]
Type R.
The FortiGate image is installed to system memory and the FortiGate unit starts
running the new firmware image but with its current configuration.
12 You can log into the CLI or the web-based manager using any administrative account.
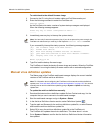
13 To confirm that the new firmware image has been loaded, from the CLI enter:
get system status
You can test the new firmware image as required.
Installing and using a backup firmware image
If the FortiGate unit is running BIOS version v3.x, you can install a backup firmware
image. Once the backup firmware image is installed you can switch to this backup
image when required.
This section describes:
• Installing a backup firmware image
• Switching to the backup firmware image
• Switching back to the default firmware image
Installing a backup firmware image
To run this procedure you:
• access the CLI by connecting to the FortiGate console port using a null-modem
cable,
• install a TFTP server that you can connect to from the FortiGate as described in
the procedure “Installing firmware images from a system reboot using the CLI” on
page 107.
Note: The local IP address is used only to download the firmware image. After the firmware is
installed, the address of this interface is changed back to the default IP address for this
interface.


