Network configuration Configuring DHCP services
FortiGate-4000 Installation and Configuration Guide 163
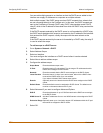
Configuring a DHCP relay agent
In a DHCP relay configuration, the FortiGate unit forwards DHCP requests from
DHCP clients through the FortiGate unit to a DHCP server. The FortiGate unit also
returns responses from the DHCP server to the DHCP clients. The DHCP server must
have a route to the FortiGate unit that is configured as the DHCP relay so that the
packets sent by the DHCP server to the DHCP client arrive at the FortiGate
performing DHCP relay.
To configure an interface as a DHCP relay agent
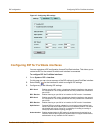
1 Go to System > Network > DHCP.
2 Select Service.
3 Select the interface to be the DHCP relay agent.
4 Select DHCP Relay Agent.
5 Enter the DHCP Server IP address.
6 Select Apply.
Configuring a DHCP server
As a DHCP server, the FortiGate unit dynamically assigns IP addresses to hosts
located on connected subnets. You can configure a DHCP server for any FortiGate
interface. You can also configure a DHCP server for more than one FortiGate
interface. For each DHCP server configuration you can add multiple scopes (also
called address scopes) so that the DHCP server can assign IP addresses to
computers on multiple subnets.
Use these procedures to configure an interface as a DHCP server:
• Adding a DHCP server to an interface
• Adding scopes to a DHCP server
• Adding a reserve IP to a DHCP server
• Viewing a DHCP server dynamic IP list
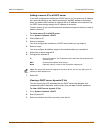
Adding a DHCP server to an interface
To add a DHCP server to an interface
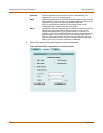
1 Go to System > Network > DHCP.
2 Select Service.
3 Select an interface.
4 Select DHCP Server.
5 Select Apply.
Adding scopes to a DHCP server
If you have configured an interface as a DHCP server, the interface requires at least
one scope (also called an address scope). The scope designates the starting IP and
ending IP for the range of addresses that the FortiGate unit assigns to DHCP clients.


