Start Here
3 Squeeze the edge guide as you slide it all the way to the
left.
Tip: If the clear plastic feeder guard is in the way, flip it forward.
4 Load letter- or A4-size paper against the right edge and
behind the tab, with the printable side face up.
5 Slide the edge guide over.
6
Connect the phone cord
To fax, connect the included phone cord to a telephone wall
jack and to the LINE port on your product. To connect a
telephone or answering machine, see the Quick Guide.
Note: If you’re connecting to a DSL phone line, you must use a DSL
filter or you won’t be able to fax. Contact your DSL provider for the
necessary filter. See your online User’s Guide for ISDN wall jack and
router connections.
Read these instructions before using your product.
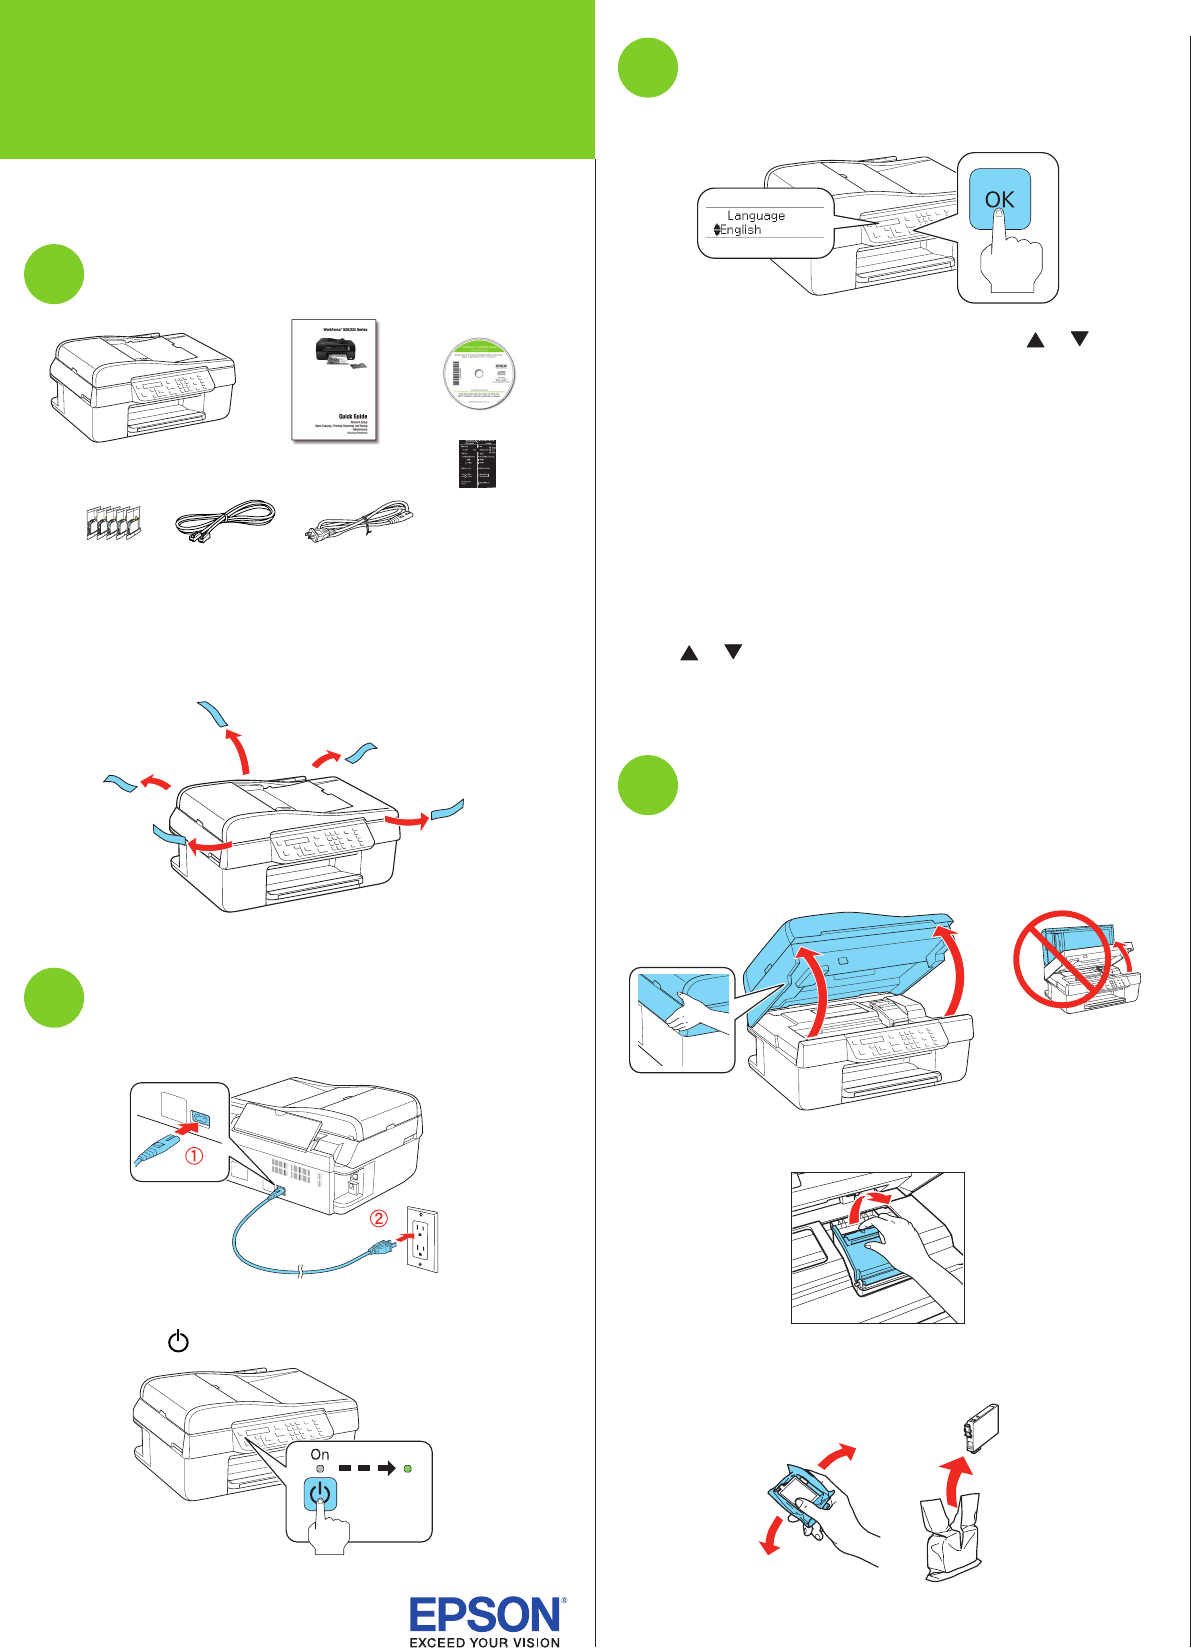
1
Unpack
French control
panel stickers
(included for
Canada only)Power cordPhone cord
Caution: Do not open ink cartridge packages until you are ready to
install the ink. Cartridges are vacuum packed to maintain reliability.
Remove all protective materials.
2
Turn on
1 Connect the power cable.
Caution: Do not connect to your computer yet.
2 Press the On button.
3
Select settings
1 To select English as your language, press OK.
(If you want to change the language, press or to
select it, then press OK.)
2 Select your Country/Region and press OK.
3 Select the current Daylight Saving Time setting (Winter
or Summer) and press OK.
4 Select the Date format and press OK.
5 Press the number keys to enter the Date and press OK.
6 Select the Time format (12h or 24h) and press OK.
7 Press the number keys to enter the Time. Then press
or to select AM or PM, if necessary.
8 Press OK.
4
Install ink cartridges
Note: Do not load paper yet.
1 Lift up the scanner.
2 Open the cartridge cover.
3 Shake the ink cartridges gently 4 or 5 times, then unpack
them.
4 Remove only the yellow tape from each cartridge.
Caution: Don’t remove any other seals or the cartridges may
leak.
5 Insert the cartridges in the holder for each color.
6 Press each cartridge down until it clicks.
7 Close the cartridge cover. Press down until it clicks.
8 Lower the scanner.
9 Press the OK button to charge the ink.
Priming takes about 2½ minutes.
Note: Your printer ships with full cartridges and part of the ink
from the first cartridges is used for priming the printer.
Caution: Don’t turn off the printer while it is priming or you’ll
waste ink.
5
Load paper
1 Open the paper support and pull up the extensions.
2 Pull out the output tray extensions and raise the stopper.
WorkForce
®
520/525 Series


