


Configuring NAT
EN/LZT 108 6492 R2 - October 2003
67
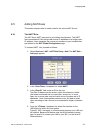
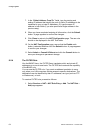
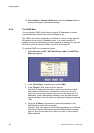
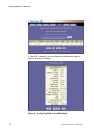
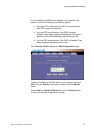
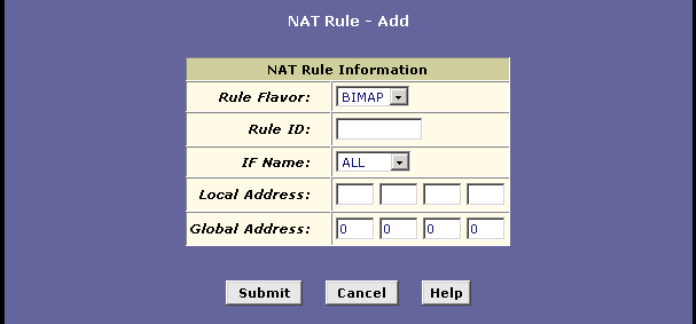
1. Select Services > NAT > NAT Rule Entry > Add. The NAT Rule –
Add page appears:
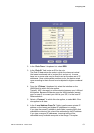
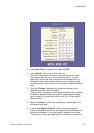
2. In the ”Rule Flavor:” dropdown list, select NAPT.
3. In the “Rule ID:” field, enter an ID for the rule.
The Rule ID determines the order in which the rules are invoked
(the lowest numbered rule is invoked first, and so on). In some
case, two or more rules may be fined to act on the same set of IP
addresses. Once a data packet matches a rule, the data is acted
upon according to that rule and is not subjected to higher-numbered
rules.
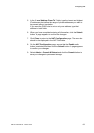
4. From the “IF Name:” dropdown list, select the interface on the
HM210dp/di to which this rule applies.
Typically, NAT rules apply to communication between your LAN and
the Internet. Because the device uses the WAN interface (named
ppp-0 or eoa-0) to connect your LAN to your ISP, it is the usual IF
Name selection.
5. In the “Local Address:” field, type the private IP address of the
computer to which you are granting external access.
6. In the “Global Address:” field, type the address that you want to
serve as the publicly known IP address for the LAN computer.
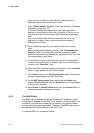
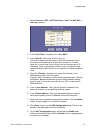
7. When you have completed entering all information, click the Submit
button. A page appears to confirm the changes.
8. Click Close to return to the NAT Configuration page. The new rule
should no be displayed in the NAT Rule table.
9. On the NAT Configuration page, ensure that the Enable radio
button is selected and then click the Submit button. A page appears
to confirm your changes.