D-1
Appendix D: Adding and configuring
optional paper trays
This section provides information on installing and configuring optional Elite 12ppm
paper trays. These include:
• A 500-sheet paper tray
You’ll need to install the 500-sheet feeder to add the 500-sheet paper tray. You can load
sheets of US Letter, A4, Legal 13" and Legal 14" paper. You can select this tray from your
computer, using an application’s Print dialog box.
The 500-sheet feeder is supplied with one 500-sheet paper tray.
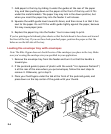
• An envelope tray
You’ll need to install the 500-sheet feeder to add the envelope tray. You can select this tray
from your computer, using an application’s Print dialog box.
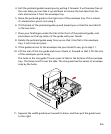
• A face-up output tray
This fits on the rear of the printer to catch paper. You’ll need this tray if you select the
Rear (face up) option in an application’s Print dialog box.
Because you can select the 500-sheet paper tray and the envelope tray from your computer,
you’ll need to change the printer driver software also. See the section “Updating your
computer’s software.” You may want to make the 500-sheet paper tray your default paper
tray. This is covered in the section of this appendix “Setting default paper trays through the
control panel.”
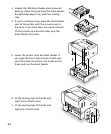
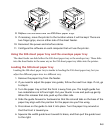
Installing the 500-sheet feeder and paper tray
If you carry out the installation by yourself, you’ll need enough space to put the printer
alongside the 500-sheet feeder. If you have someone to help you, that person can position
the 500-sheet feeder while you hold the printer. When the installation is complete, the
printer will be five inches higher. Make sure that there will be enough space above the
printer to open the top cover.
1. Turn off the printer and disconnect the power and interface cables.
2. Remove the paper tray from the printer.


