


D
Series 90–70 Remote I/O Scanner User’s Manual – July 1992144
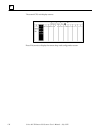
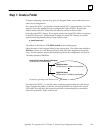
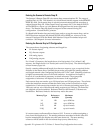
Step 2: Configure the Remote I/O Scanner
Display the configuration screen for Rack 0, which is where the Remote I/O Scanner is
installed.
The Remote I/O Scanner is installed in slot 1 of the rack; however, as the configuration
screen shows, this is the slot normally assigned to a CPU. The CPU module must be
replaced in order to create a remote drop folder.
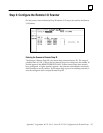
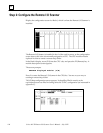
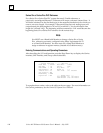
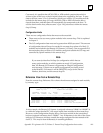
In the Rack 0 display, zoom (F10) into the CPU slot, and press the F2 (Remote) key. A
module description screen appears.
The screen prompts:
REPLACE displayed module? (Y/N)
Press Y to enter the Remote I/O Scanner in the CPU slot. You are on your way to
creating a remote drop folder.
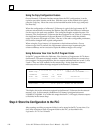
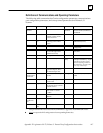
Th I/O Map configuration screen appears. It should be filled in exactly as the
equivalent screen was filled in during Series 90–70 PLC configuration (as instructed in
appendix C).
Bus Adr
29