


12
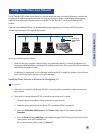
Select Your Printer
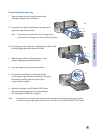
To use your HP DeskJet 1120C printer, make sure that it is selected as the default printer.
To select your printer as the default printer - Windows 95 and Windows NT 4.0
1 Click Start, select Settings followed by Printers.
2 Click the HP DeskJet 1120C printer icon to select it.
3 From the File menu, select Set As Default, then close the window.
To select your printer as the default printer - Windows 3.1
1 In the Program Manager, open the Main program group.
2 Double-click Control Panel to open it, then double-click Printers.
3 Select the HP DeskJet 1120C printer from the Installed Printers list, and then click
Set As Default Printer.
4 Click Close and exit the Control Panel.
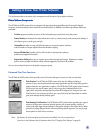
Change Print Options
HP’s Print Settings dialog box allows you to select settings such as paper type and print quality that are not
provided by the software program.
You can change the print settings for the current document from your software program. This procedure will vary
depending on the software program you are using.
1 Select either Print, Print Setup or Printer Setup from the File menu.
2 Click Printer, Setup, Options or Properties according to your software program.
3a If you click Printer in step 2, you will need to click Options, then Setup.
3b If you click Setup, you will either see the HP Print Settings right away, or you will need to click Options.
3c If you click Options, you will need to click Setup.
3d If you click Properties, you will see the HP Print Settings right away.
4 Change the settings under the Setup, Colour, Features, or Preference tabs in the HP print settings dialog
box.
Note: Click the Help button at the bottom right-hand corner of each tab for explanations on the items
found in each tabs.
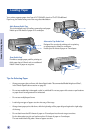
Section 2 - Printing Basics
Changing Print Settings