


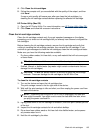
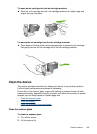
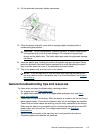
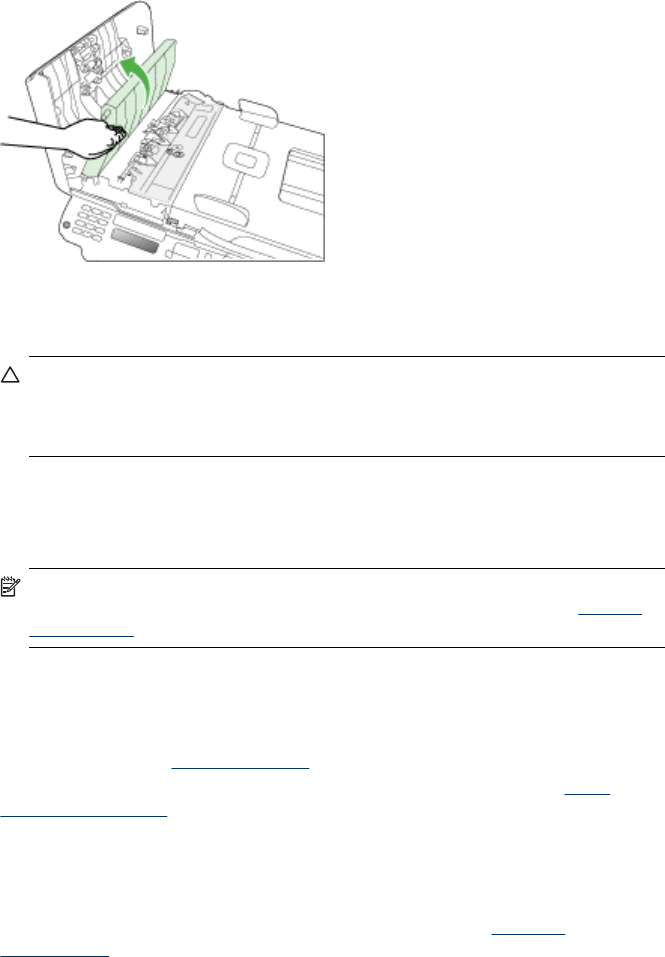
4. Lift the automatic document feeder mechanism.
5. Clean the plastic strip with a soft cloth or sponge slightly moistened with a
nonabrasive glass cleaner.
CAUTION: Do not use abrasives, acetone, benzene, or carbon tetrachloride
on the plastic strip, since they can damage it. Do not place or spray liquid
directly on the plastic strip. The liquid might seep under the glass and damage
the device.
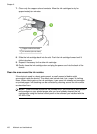
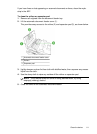
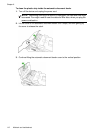
6. Insert the plastic strip, hooking the holes in the plastic strip over the tabs. Gently
lower the automatic document feeder mechanism to avoid dislodging the plastic
strip, and then close the cover of the automatic document feeder.
7. Plug in the power cord, and then turn on the device.
NOTE: If you still see dust or lines on scans after cleaning the plastic strip,
you may need to order a new plastic strip. For more information, see
Support
and warranty.
General troubleshooting tips and resources
Try these when you begin troubleshooting a printing problem.
• For a paper jam, see
Clear paper jams.
• For paper-feed problems, such as the paper skew and paper pick, see
Solve
paper-feed problems.
• Power light is on and not blinking. When the device is turned on for the first time, it
takes approximately 12 minutes to initialize it after the ink cartridges are installed.
• Power cord and other cables are working, and are firmly connected to the device.
Make sure the device is connected firmly to a functioning alternating current (AC)
power outlet, and is turned on. For voltage requirements, see
Electrical
specifications.
• Media is loaded correctly in the input tray and is not jammed in the device.
• All packing tapes and materials are removed.
General troubleshooting tips and resources
113