


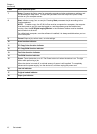


Label Name and Description
NOTE: To make a copy, the HP All-in-One must be connected to a computer, the computer
must be turned on and you must be logged on, and the software must be installed and
running. Also, the HP Digital Imaging Monitor in the Windows Taskbar must be installed
and turned on at all times.
On a Macintosh computer, once the software is installed, it is always available when you turn
on the computer.
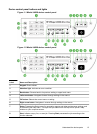
9
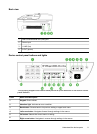
Cancel: Stops a job, exits a menu, or exits settings.
10
Scan function indicator
11
PC Copy Color function indicator
12
PC Copy B&W function indicator
13
Fax Color function indicator
14
Fax B&W function indicator
15 Power: Turns the device on or off. The Power button is lit when the device is on. The light
blinks while performing a job.
When the device is turned off, a minimal amount of power is still supplied. To completely
disconnect the power supply, turn the device off, and then unplug the power cord.
16
Redial button (model J4660): Displays the last number dialed.
17 Speed dial button (model J4660): Selects the first entry in the list of programmed speed
dial entries.
18 Wireless button (model J4680): Turns the 802.11g wireless feature on or off. The button is
lit when the wireless feature is on.
19
Low ink indicator
20
Original loaded indicator
21
Paper jam indicator
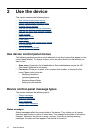
Connection information
Description Recommended
number of connected
computers for best
performance
Supported software
features
Setup instructions
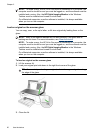
USB connection
One computer
connected with a USB
cable to the rear USB
2.0 high-speed port on
the device.
All features are
supported.
Follow the setup poster
guide for detailed
instructions.
Printer sharing
Up to five computers.
The host computer must
be turned on at all
times, or the other
computers cannot print
to the device.
All features resident on
the host computer are
supported. Only print is
supported from the
other computers.
Follow the instructions
in
Share the device on a
locally shared network.
Chapter 1
(continued)
14 Get started