HP StorageWorks P4000 SAN Solution Quick Start Guide
*TA688-96016*
Printed in
Step 3Step 2Step 1
Setting up the virtual SAN appliance
Setting up the networkSetting up the storage system
or
Setting up the SAN
Step 1
Documentation Available
For detailed instructions about using the HP StorageWorks P4000 SAN Solution, see the following resources.
• Online Help
Click Help > Help Topics from the menu bar to open the Online Help. Context sensitive help is available by clicking the question mark on any window.
• HP StorageWorks P4000 SAN Solution User Manual
Find complete instructions for configuring and managing storage nodes and clustered storage volumes in the User Manual. The User Manual is available in PDF format, installed in the same
directory as the Centralized Management Console program files.
• HP StorageWorks P4000 VSA Quick Start Guide
Find detailed instructions for planning and installing the VSA and getting started with the Centralized Management Console.
• HP StorageWorks P4000 VSA User Manual
Find detailed instructions for designing your virtual SAN, including hardware design and virtual network design. Also includes important information about using VSAs in the HP StorageWorks
P4000 SAN Solution, including sample configurations.
• Release Notes
Review the Release Notes and Service Notes for the latest information about the product.
These documents can be found at the HP support website at: http://www.hp.com/support/manuals after selecting your product model.
Support Contacts
Telephone numbers for worldwide technical support are listed on the HP support website: http://www.hp.com/support
Install the storage system into a rack, if necessary.
We recommend using the provided rail kit for installing
the storage system in a rack.
Safety information
Due to the weight of the storage system,
use two people to lift it into a rack.
Connect a keyboard and monitor (KVM). You will use this
connection to assign a hostname and IP address to the
storage system.
(Optional) Connect a PC or laptop to the storage
system’s serial port using a null modem cable. On
the PC or laptop attached to the storage system,
open a session with a terminal emulation program,
using the following settings:
19200, 8-N-1
Make certain that all the drives are seated and latched.
Connect the power cord(s) to the storage system and plug
into the power source(s).
Warning
Use only the power cord(s) supplied with the storage
system. Other power cords may not fit correctly and may
cause problems maintaining power to the storage
system.
Power on the storage system.
!
1
2
3
4
5
1
2
3
4
5
6
7
8
9
Insert the HP StorageWorks P4000 VSA CD in the CD drive.
The installer should launch automatically.
Installing the P4000 VSA for ESX:
Select Install VSA for ESX
Unzip to the prepared directory and start the VI Client.
Transfer the virtual machine to the ESX server.
Add the VSA to inventory.
Select the network.
Configure the data disk.
• Virtual device node must be SCSI (1:0)
• Mode must be Independent > Persistent
Reserve at least 2000 MHz CPU and 1024 MB memory.
Power on the VSA.
Set the IP address and host name of the VSA
Repeat for each VSA
Installing the P4000 VSA for Hyper-V:
Select Install VSA for Hyper-V
After installation is complete continue with step 3: Setting
up the SAN.
10
1
2
1
2
3
4
5
6
Prerequisites
Before configuring the network settings on individual storage
nodes, have the following information ready:
• Host names
• IP addresses, subnet mask and gateway.
Logging into the configuration interface
Press enter to log in. Use the tab key to move through the fields
and menu options in the configuration interface.
Configuration interface main menu
Tab to network TCP/IP settings and press enter.
Selecting an interface to configure
Tab to select the network interface that you want to configure
(eth0 or port1) and press enter.
Change the host name and set IP address
Set the IP address, subnet mask and gateway.
Best practice
Manually assign IP addresses to the storage nodes. Using DHCP
to obtain an IP address is not recommended unless using reserved
addresses.
Verify IP address
Ping the IP address of the storage node from another host on the
network to verify that it is operating correctly.
Repeat for each storage node.
1
2
4
5
6
7
8
9
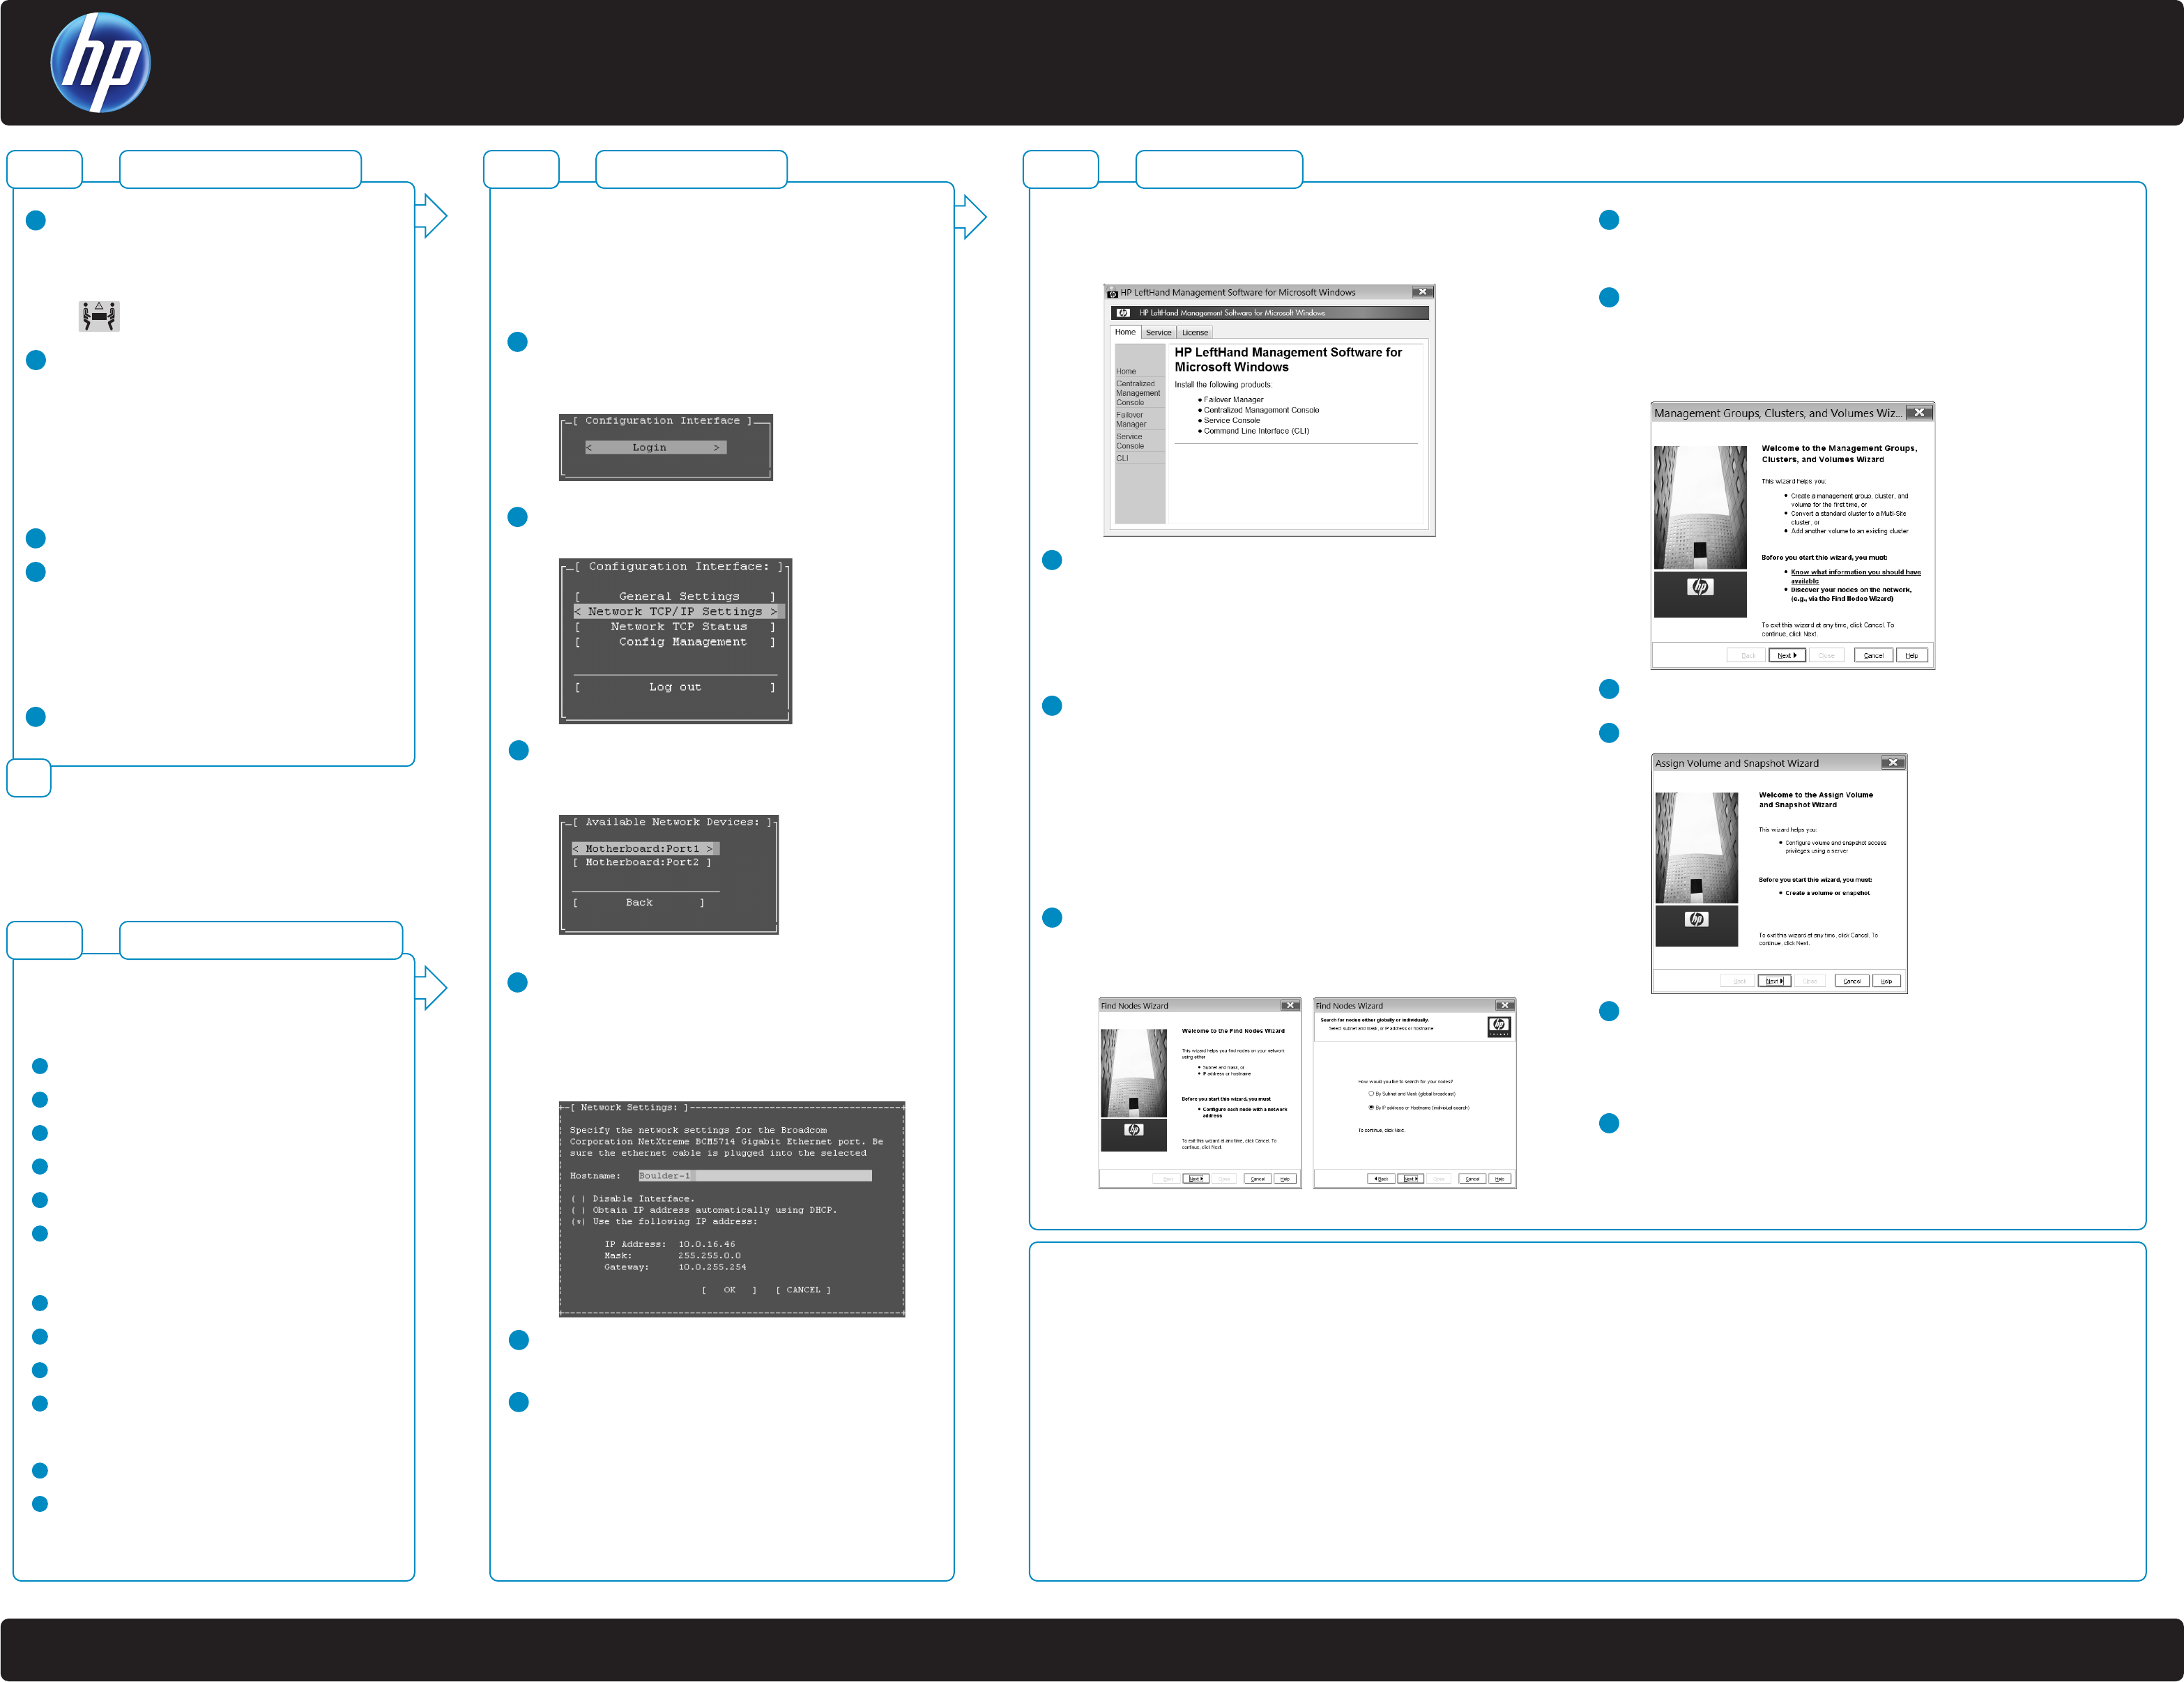
Using the HP StorageWorks Management DVD:
Insert the HP StorageWorks Management DVD in the DVD drive. The installer
should launch automatically.
Installing the centralized management console (CMC)
Install the CMC on the computer that you will use to administer the SAN. You
need administrative privileges while installing the CMC.
Using the installation wizard:
1. Click centralized management console.
2. Click Install CMC.
3. Continue through the installation wizard, following the instructions on each
window.
Install the Failover Manager
Install the Failover Manager onto a separate server on the network.
Caution: Do not install the Failover Manager on the HP LeftHand Storage
Solution, since this would defeat the purpose of the Failover Manager.
Using the installation wizard:
1. Click Failover Manager.
2. Click Install FOM.
3. Continue through the installation wizard, following the instructions on each
window.
After the installation wizard finishes, the default choice is to launch the
Failover Manager.
4. Click Finish to exit the wizard and start the Failover Manager.
Discover nodes on the network
Use the Find Nodes wizard to discover the storage nodes on the network, using
either IP addresses or host names, or by using the subnet and gateway mask of
the storage network.
The found storage nodes appear in the available category in the CMC.
Verify or configure RAID. Configure network settings
Verify the RAID configuration on your storage nodes before creating storage. You
can only reconfigure RAID on storage nodes that are in the available pool.
Change network settings, including bonding NICs, before creating storage.
Setting up SAN storage
Use the management groups, clusters and volumes wizard to set up the storage
configuration and create a storage volume.
• Using a 2-node or multi-site SAN configuration
You may need to install the failover manager that runs on VMware for
automated failover configurations or multi-site SANs.
Download and install iSCSI initiator(s)
Install the appropriate iSCSI initiator on your application servers.
Enable access to volumes
Log in to volumes via iSCSI initiator(s)
Configure the initiator(s) to ...
• Connect to the cluster VIP
• Discover the targets
• Log on
• Format the disks with a file system.
Install and set up service console
Install service console from the
HP StorageWorks Management DVD. Configure the
service console to automatically upload SAN health information to HP
StorageWorks technical support.
3


