HotBrick Network Solutions
Page 44
Interface
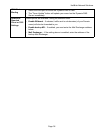
Binding
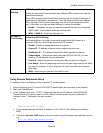
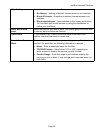
SMTP (Simple Mail Transport Protocol) Binding
Unless you are using E-mail accounts from different ISPs on each port, you can
ignore these settings.
Some ISPs configure their E-mail Servers so they will not accept E-mail from IP
addresses not allocated by themselves. If you are using accounts from different
ISPs, sending E-mail over the wrong port may result in non-acceptance of the
mail. In this case, you can use these settings to correct the problem.
• Enable - If enabled, the port you specify below will be used for all outgoing
SMTP traffic. If not enabled, either port will be used.
• WAN 1 / WAN 2 – Select the desired port.
Protocol &
Port Binding
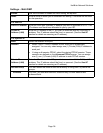
Protocol and Port Binding
Use these settings if you wish to ensure that particular traffic is sent by a
particular WAN port, and thereby a particular ISP account.
• Enable - Enable or disable each item as required.
• Source IP - IP address of source which packets are sent from.
• Destination IP – IP address of destination which packets are sent to.
• Subnet Mask – With subnet mask other than 255.255.255.255, you can
make an IP sub-network as your destination.
• Protocol - Select the protocol used by the traffic you wish to configure.
• Port Range - Enter the beginning and end of the port range used by the traffic
you wish to configure. If only a single port is used, enter the port number in
both fields.
• WAN - Select the port you wish this traffic to use.
Using Remote Web-based Setup
To connect to the Load Balancer from a remote PC via the Internet:
1. Ensure that both your PC and the VPN 800/2 Firewall Router are connected to the Internet.
2. Start your Web Browser.
3. In the "Address" bar, enter "HTTP://" followed by the Internet IP Address of the VPN 800/2
Firewall Router If the port number is not 80, the port number is also required. (After the IP
Address, enter ":" followed by the port number.)
e.g.
HTTP://123.123.123.123:8080
• This example assumes the WAN IP Address is 123.123.123.123, and the port number is
8080.
• If using the Dynamic DNS feature, you can connect using the domain name allocated to you.
e.g.
HTTP://my_domain_name.dyndns.org:8080


