HUAWEI E960 HSDPA Wireless Gateway Quick Start
The HUAWEI E960 supports HSDPA/WCDMA 2100, GSM/GPRS/EDGE 1900/1800/900/850,
and network auto-switch. With the E960, you can experience wireless gateway and USB modem
at any time and any place.
E960 Appearance
Mode
Reset
Power
Interface
Ethernet
Pho
ne
Power
WLAN Signal
ON/OFF
y Power Interface: When connected with the power adapter, the E960 functions as a wireless
gateway. When connected to the PC with a USB data cable, the E960 functions as a USB
modem.
y Ethernet: Insert a Ethernet cable connected to the PC or other network equipments.
y Phone: Insert a phone cable connected with a telephone to realize the voice service.
y Power: Power indicator. When it is in yellow, the charge is finished.
y WLAN: WLAN indicator. If it is steady on and in yellow, the WLAN is enabled. If it is
blinking, data is transmitting.
y ON/ OFF: Press and hold to power on or off the E960.
y Signal: Signal strength indicator. The following table shows the status of the signal strength
indicator:
Status Description Status Description
Fast blinking in
red
No SIM card or unverified
PIN code
Steady on in
yellow
Signal strength in level
two or three (middle)
Steady on in red
Signal strength in level
one (weak)
Steady on in
green
Signal strength in level
four or five (strong)
y Mode: The network mode indicator. The following table shows the status of the network mode
indicator:
Status Description Status Description
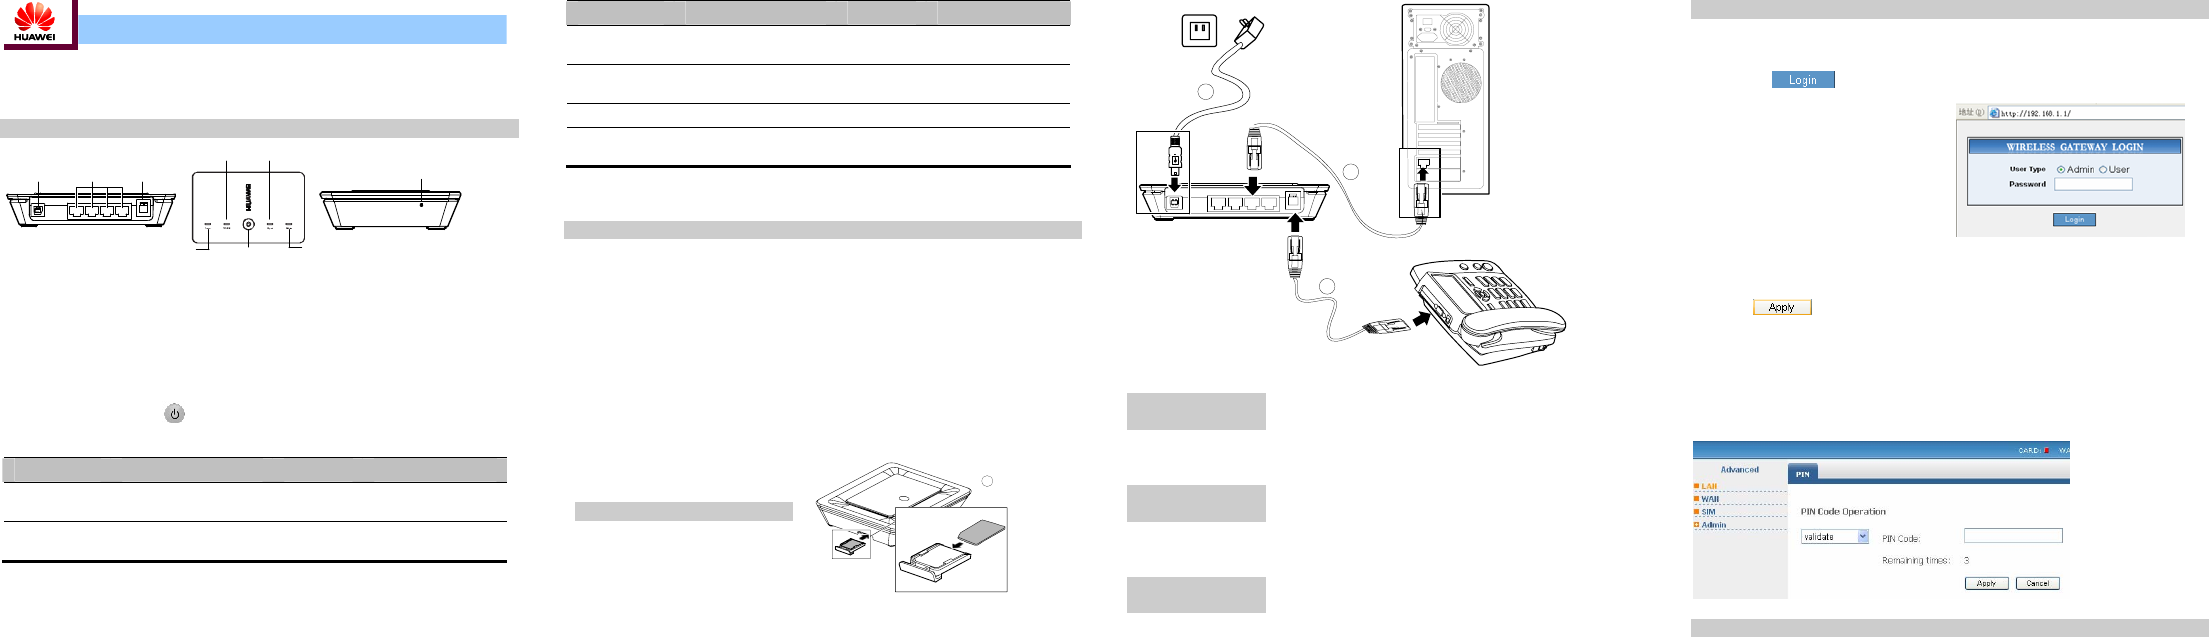
Step 5: Log in to the Wireless Gateway Web Management
1. Open the Internet Explorer, and then enter the default web address (192.168.1.1) of the E960
in the address bar.
Double blinkin
in green
g GE Searching the network or
no network
Blinking in
blue
Normal GPRS/ED
network
2. In the WIRELESS GATEWAY LOGIN page, select the user type, enter the password, and
then click
Steady on and
in green
GPRS/EDGE data service
connected
Fast blinking
in green
Downloading the
upgrade mode
.
2
Admin: Have the rights the view and modify
the configurations, and the default password
is admin;
Blinking in blue Normal WCDMA network Indicator off Off
Steady on in
blue
WCDMA data service
connected
Steady on in
cyan
HSDPA data service
connected
User: Only view the basic information, and
the default password is user.
3
y Reset: Reset n the side of the E960. Press and hold it for more than five seconds to button. O
restore the factory defaults.
Only one user can log in to the E960
management page at one time, which is to
prevent the configuration conflict.
PC Configuration Requirements
The recommended PC configurations for using the E960 are as follows:
LCD resolution: 800*600 or above, recommended 1024*768.
0 or above, Firefox 1.5 or above, Netscape 8.0 or above
Note: If the configurations of the PC are lower than the recommended, the performance of the
ed.
y CPU: Pentium 500 MHz or above
4
3. If you are prompted to enter the PIN code, you need to enter the correct PIN code, and then
click
y Memory: 128 MB RAM or above
.
y Hard disk: 50 MB available space
y Operating System: Windows 2000, Windows XP, or Windows Vista
Note:
y
y If the correct PIN code or PUK code is invalid, you cannot use the network-related
services.
y Interface: standard USB interface
y Internet Explorer: IE6.
y Please consult your service provider about whether to use SIM/USIM card.
Plug in the USB end of the power adapter to the power interface
of the E960, and plug in the power plug to the power socket.
Please use the E960 compatible power adapter; otherwise, the
E960 can be damaged.
Step 2: Install the
y Your service provider provides the SIM/USIM card. For more information about
SIM/USIM card, please consult your service provider.
Power Adapter
E960 may be weaken
1
Step 3: Connect
The Ethernet cable cannot be longer than 100 meters. For better
effect, please use the shielded cable.
Step 1: Insert the SIM Card
to the PC
Insert the SIM card into the socket with
the golden contact facing upward. Insert
the card socket into the E960.
Step 4: Connect
The telephone cable cannot be longer than three meters, and the
telephone can be connected with three extensions.
to the Telephone
Step 6: Making the First Call


