


Printer Conversion to KODAK EKTACOLOR Edge 8 and EKTACOLOR ROYAL VIII Papers • CIS-201 5
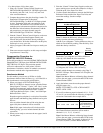
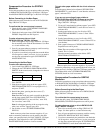
Divide the Cyan, Magenta, and Yellow difference
values by 10 to obtain the color correction:
The correction for this example is -1.5 Cyan,
-0.7 Magenta, 0.0 Yellow, and -0.4 Density.
4. When the message SET REFERENCE is displayed,
press NO. Enter the correction, and then press YES.
5. Press YES to reprint the test.
6. Repeat Steps 2 through 5 until the test print on Edge 8/
ROYAL VIII Paper matches the reference print on
Edge 7/ROYAL VII Paper.
7. Keep the final test print as your new reference print for
Edge 8/ROYAL VII Paper.
8. Print customer negatives to verify print quality.
Compensation Procedure for NORITSU 1701/
1702 Printers (without NOUS Scanner)
Follow this procedure to convert to KODAK EKTACOLOR
Edge 8/ROYAL VIII Papers from KODAK EKTACOLOR
Edge 7/ROYAL VII Papers.
Normal Correction
1. When your supply of EKTACOLOR Edge 7/
ROYAL VII Paper is about to run out, print the Printer
Setup Negative “Normal,” “Under,” and “Over” on the
channel most commonly used for the paper. Label the
three prints “Old-Paper Reference Print—Normal,”
“Old-Paper Reference Print—Under,” and “Old-Paper
Reference Print—Over.”
2. When you are ready to convert to the new paper, load it
into the printer. Then press MODE, AUTO SETUP, and
NO. Select “0” to print a test. Press YES and place the
“Normal” Printer Setup Negative in the negative mask.
Press YES, YES, and NO. When the test prints leave the
processor, select “measure,” PAP.
3. Enter the readings from the print labeled “Old-Paper
Reference Print—Normal” into the Reference Aim.
Then press D-IN and YES. Then press NO.
4. Enter the readings from the -D, N, and +D test prints
into the P-BAL correction mode. Press D-IN and YES.
The correction will be made to the paper balance for the
new paper.
5. Select “0” to make another print, and then YES. Select
“Normal” and press YES. Place the “Normal” Printer
Setup Negative in the negative mask, and press YES and
YES again. Then press NO.
6. Repeat Steps 2, 4, and 5 (do not repeat Step 3) until no
further correction is required.
Perform a Morning Setup, and carefully follow these
instructions:
7. Press MODE, AUTO SETUP, and YES. Insert the
Setup Filter, press D-IN, and then YES. After the
Change of Light has been completed, press YES.
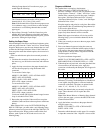
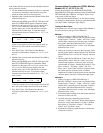
Color Correction -1.5 -0.7 0.0
8. Measure the -D, N, and +D test prints, but DO NOT
enter the correction. Record the correction on a piece of
paper; then press NO.
9. Press MODE, then C-DATA. Input the correction from
Step 8 into 00 CH BALANCE; then press YES.
Repeat Steps 7 through 9 until no further correction is
required. Remove the Setup Filter. The NORMAL balance is
complete.
Setting the Paper Slope (Under)
If the Under slope requires adjustment, follow this
procedure:
1. Select the channel that will be most commonly used for
the new paper. Press MODE, then AUTO SETUP. Then
press NO until AUTO SETUP appears. Select “0” for
“print,” press YES, and enter the number for “U”
(Under). Then press YES.
2. Set the “Under” Printer Setup Negative in the negative
mask, and press YES and YES. When NEXT SETUP
appears, press NO.
3. Measure the -D, N, and +D test prints, but DO NOT
enter the correction. Record the correction on a piece of
paper. Then press NO.
4. Enter the correction determined in Step 3 by pressing
MODE, SETUP, and NO until CH UNDER SHIFT Y/N
appears.
5. Press YES, place the “Under” Printer Setup Negative in
the negative mask, and press YES. (If the Under
negative is not in the negative mask, an NG error will
occur and the correction will not be made.)
6. Press D-IN and input the range of channels that will be
using the new paper (do not include channel 00). Enter
the correction, and press YES.
Repeat Steps 1 through 6 until no further correction is
required. Setup of the Under slope is complete.
Setting the Paper Slope (Over)
If the Over slope requires adjustment, follow this procedure:
1. Select the channel that will be most commonly used for
the new paper. Press MODE, then AUTO SETUP. Then
press NO until AUTO SETUP appears. Select “0” for
“print,” then YES. Enter the number for “O” (Over);
then press YES.
2. Set the “Over” Printer Setup Negative in the negative
mask, and press YES and YES again. When NEXT
SETUP appears, press NO.
3. Measure the –D, N, and +D test prints, but DO NOT
enter the correction. Record the correction on a piece of
paper, and then press NO.
4. Enter the correction determined in Step 3 by pressing
MODE, SETUP, and NO until CH OVER SHIFT Y/N
appears.
5. Press YES, and place the Over negative in the negative
mask. Press YES. (If the Over negative is not in the
negative mask, an NG error will occur and the
correction will not be made.)