


NIC Installation and Verification
2-4 July 1998
I
N
S
T
A
L
L
A
T
I
O
N
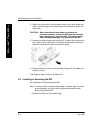
2. Attach the wrist portion of the antistatic strap to your wrist. Attach the
other end of the strap to the metal plate on the electronics drawer on
the proofer.
CAUTION: Wear the antistatic strap when you remove the
electronics drawer, remove the NIC from the antistatic
bag, and remove or install the NIC. This helps prevent
static discharge damage to the proofer and the NIC.
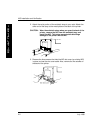
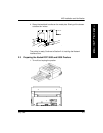
3. Remove the three screws that hold the NIC in place. Also, remove the
four screws (two on each side) on the back of the proofer holding the
electronics drawer with cable connectors in place.
4. Grasp the black handle on the metal plate. Slowly pull the drawer out
about six inches.
The proofer is ready. Continue to Section 2.4.
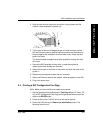
2.4 Installing or Removing the NIC
Do as follows to install and seat the NIC.
Note: To remove a NIC, complete these steps in reverse order. On some
printers/proofers, you may need to squeeze the standoffs with
pliers to remove the NIC.
1. Remove the NIC from its antistatic bag.