


Novell NetWare
4-2 July 1998
N
O
V
E
L
L
N
E
T
W
A
R
E
5. Set up the preferred server name on the NIC, using NIC conÞguration
utilities for Windows.
Note: For more information on setting the preferred server name, see
Chapter 3, Windows - FastManage ConÞguration Utilities.
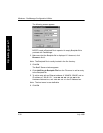
4.3 ConÞguring in an NDS Environment
4.3.1 Configuring Your NDS Server using PCONSOLE
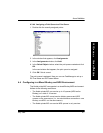
To conÞgure the NIC using PCONSOLE:
1. Run PCONSOLE using the following command (from the /public
directory on the server):
pconsole
2. Using the arrow keys, select Quick Setup and press [Enter].
3. In the Print Services Quick Setup window, select Print Server and
press [Enter].
4. Press [Insert] to create the Print Server Object for the NIC.
The name must have eight characters. Begin with ÒKDÓ and end with
the last six digits of the hardware address (found on the NIC
faceplate or NIC conÞguration test page). For example, if the
hardware address of a printer is Ò0040C81234AB,Ó create a print
server named KD1234AB.
Note: The print server name is not case sensitive.
5. After creating the print server object, select New Printer and press
[Enter].
6. Enter a name for the new printer object used by the printer. The name
should be less than 256 characters, including the context. The print
server will service only one printer per NDS Server.
7. After adding the new printer object, select New Print Queue and
press [Enter].
8. Type the name of a Queue (that the printer will service).
The queue name must be less than 256 characters, including the
context. By default, all queues are serviced by the printer.