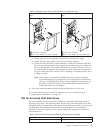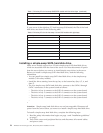
Table 7. Drive bay IDs for hot-swap SAS/SATA models with four drive bays (continued)
Drive bay ID
5 1
6 2
7 3
If your server is the eight-bay, 2.5 inch hot-swap SAS model, the IDs of the hard
disk drives are shown in the following table.
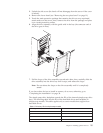
Table 8. Drive bay IDs for the hot-swap 2.5-inch SAS models with eight bays
Drive bay ID
4 0
5 1
6 2
7 3
8 4
9 5
10 6
11 7
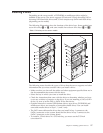
Installing a simple-swap SATA hard disk drive
Some server models support four 3.5-inch simple-swap SATA hard disk drives,
which are accessible from the front of the server. You must disconnect all power
from the server before you remove or install simple-swap drives in the server.
Before you install a simple-swap SATA hard disk drive, read the following
information:
v You can install four simple-swap SATA hard disk drives in the simple-swap
models (7-drive-bay models).
v Install the drives starting from the top bay to the bottom bay (bay 4, 5, 6, and
then 7).
v The four simple-swap SATA hard disk drive connects to the SATA 0 through
SATA 3 connectors on the system board as follows:
– The drive in bay 4 connects to the SATA 0 connector on the system board.
– The drive in bay 5 connects to the SATA 1 connector on the system board.
– The drive in bay 6 connects to the SATA 2 connector on the system board.
– The drive in bay 7 connects to the SATA 3 connector on the system board.
–
v
Attention: Simple-swap hard disk drives are not hot-swappable. Disconnect all
power from the server before you remove or install a simple-swap hard disk drive.
To install a simple-swap hard disk drive, complete the following steps:
1. Read the safety information that begins on page v and “Installation guidelines”
on page 7.
2. Turn off the server and peripheral devices and disconnect all external cables
and power cords.
24 ThinkServer TS100 Types 6431, 6432, 6433, 6434: Installation Guide


