PN-34000247 Rev0
ParaShield 1224
User’s Manual
ParaShield 1224 is designed to provide a local power solution for cable
telephony, wireless local loop (WLL), and fiber to the home (FTTH)
broadband equipment.
IMPORTANT SAFETY WARNINGS
(SAVE THESE INSTRUCTIONS)
This manual contains important instructions regarding the installation and
operation of this device. Read this manual thoroughly before attempting to
unpack, install or operate this device
CAUTION! The battery can energize hazardous live parts inside even
when the AC input power is disconnected.
CAUTION! To reduce the risk of electric shock, do not remove the cover,
except to service the battery. No user serviceable parts inside, except for the
battery.
CAUTION! To avoid electric shock, turn off the unit and unplug it from the
AC power source before servicing the battery or installing your equipment.
INSTALLATION
(QUALIFIED SERVICE PERSONNEL ONLY)
Please read this manual before installing this DC UPS as it provides important
information that should be followed during the installation and repair of the DC
UPS:
1.) The ParaShield 1224 is intended to be installed in a temperature controlled
environment that is free of conductive contaminants. Select a location which
will provide good air circulation for the DC UPS at all times. Avoid locations
near heating devices, water or excessive humidity, or where the DC UPS is
exposed to direct sunlight. Route power cords so they cannot be walked on
or damaged.
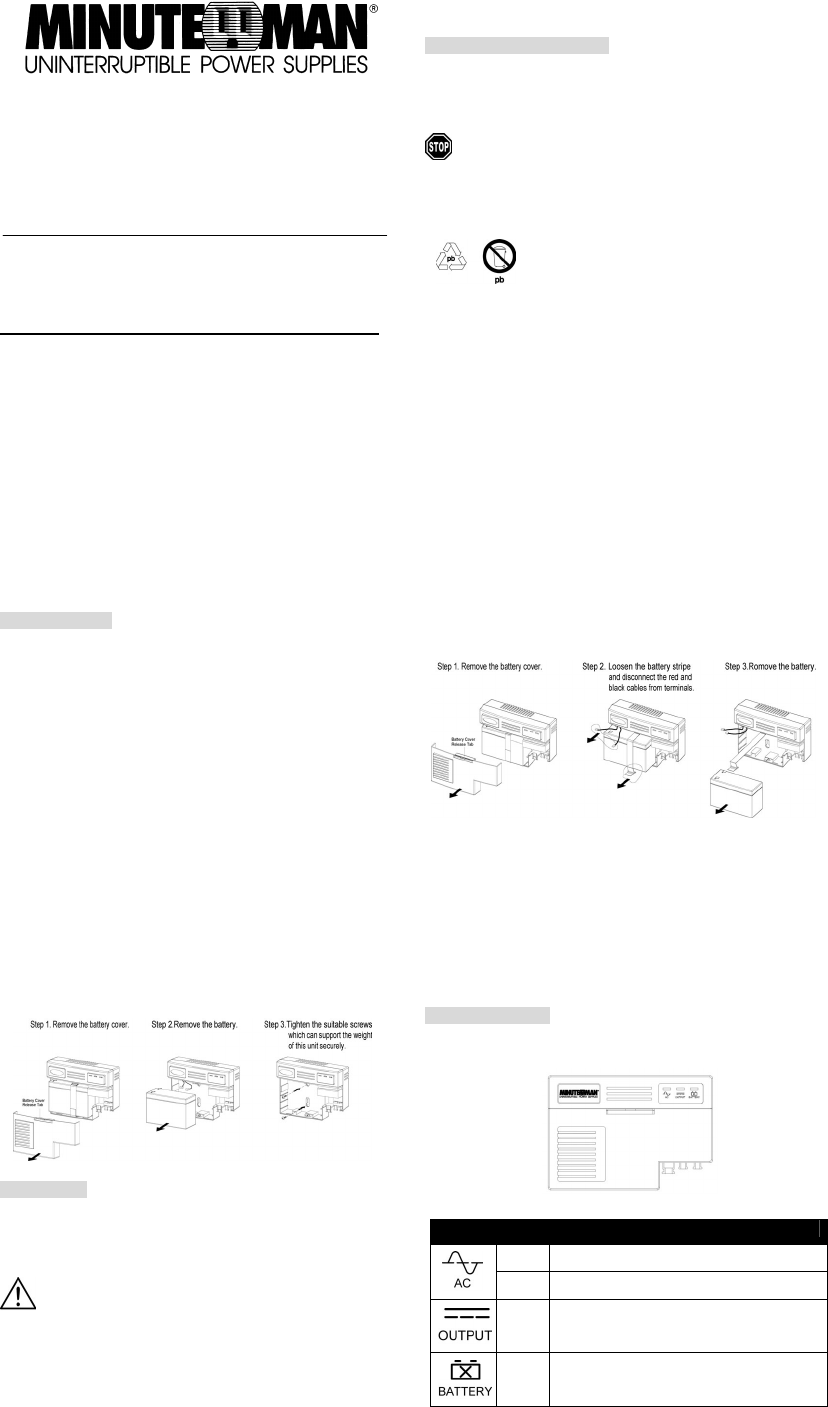
2.) Remove the cover.
3.) Remove the battery.
4.) The wall mount screws must be the appropriate size for total weight of the
UPS and the mounting structural material.
5.) Connect the battery negative (Black) wire to the battery negative terminal.
6.) Connect the battery positive (Red) wire to the battery positive terminal.
7.) Re-install the battery into the case.
8.) Connect the output wires and connector to the DC UPS.
9.) Connect the Communications Signal wires to the DC UPS.
10.) Re-install the cover.
11.) See the section “Operation” for the startup procedure.
OPERATION
1.) Plug the DC UPS power cord into the AC inlet on the DC UPS.
2.) Plug the DC UPS power cord into the wall outlet.
3.) Turn on the connected equipment.
4.) The DC UPS is ready for normal operation.
The DC UPS charges the battery when it is connected to utility
power. It is recommended that the battery charge for minimum of
18 hours before use. The DC UPS may be used immediately,
however, the “On Battery“ runtime may be less than normally
expected.
BATTERY REPLACEMENT
(QUALIFIED SERVICE PERSONNEL ONLY)
This DC UPS has a hot-swappable battery. Hot-swappable battery means
that the battery can be replaced without powering down the whole DC UPS
system.
If there is a power interruption while replacing the hot-swappable
battery, with the DC UPS on, the load will not be backed up.
CAUTION!
Do not open or mutilate batteries. Released electrolyte is harmful
to the skin and eyes and may be toxic.
Do not dispose of batteries in a fire. The batteries may
explode. The batteries in this UPS are recyclable.
Dispose of the batteries properly. The batteries contain
lead and pose a hazard to the environment and human
health if not disposed of properly. Refer to local codes
for proper disposal requirements or return the battery to
MINUTEMAN in the packing material for the new
battery.
CAUTION!
Although battery system voltages are only 12VDC the battery
system can still present a risk of electrical shock. The current capability of a
battery is sufficient to burn wire or tools very rapidly, producing molten metal.
Observe these precautions when replacing batteries:
1.) Remove watches, rings, or other metal objects.
2.) Use hand tools with insulated handles.
3.) Wear protective eye gear (goggles), rubber gloves and boots.
4.) Do not lay tools or other metal parts on the top of the batteries.
5.) Disconnect the charging source before connecting or disconnecting the
battery terminals.
6.) Determine if the battery is inadvertently grounded. If the battery is,
remove the source of the grounding. Contact with any part of a grounded
battery can result in an electrical shock. The likelihood of such shock will be
reduced, if such grounds are removed during installation and maintenance.
Step 4. Connect the black cable to the battery negative terminal on the new
battery.
Step 5. Connect the red cable to the battery positive terminal on the new
battery.
Step 6. Install the new battery into the battery compartment.
Step 7. Tighten the battery stripe to secure the battery.
Step 8. Re-install the battery cover.
Step 9. The DC UPS is ready for normal operation.
Step 10. Dispose of the old battery properly.
Warning Indicator
● Front Panel
Indicator Color Condition
Green DC UPS is on utility power.
Yellow DC UPS is on battery power.
Green DC output power is provided by the battery or
utility power.
Red The battery is not connected or the battery needs
to be replaced.
