1
Control projector by using a personal computer
1) Interface
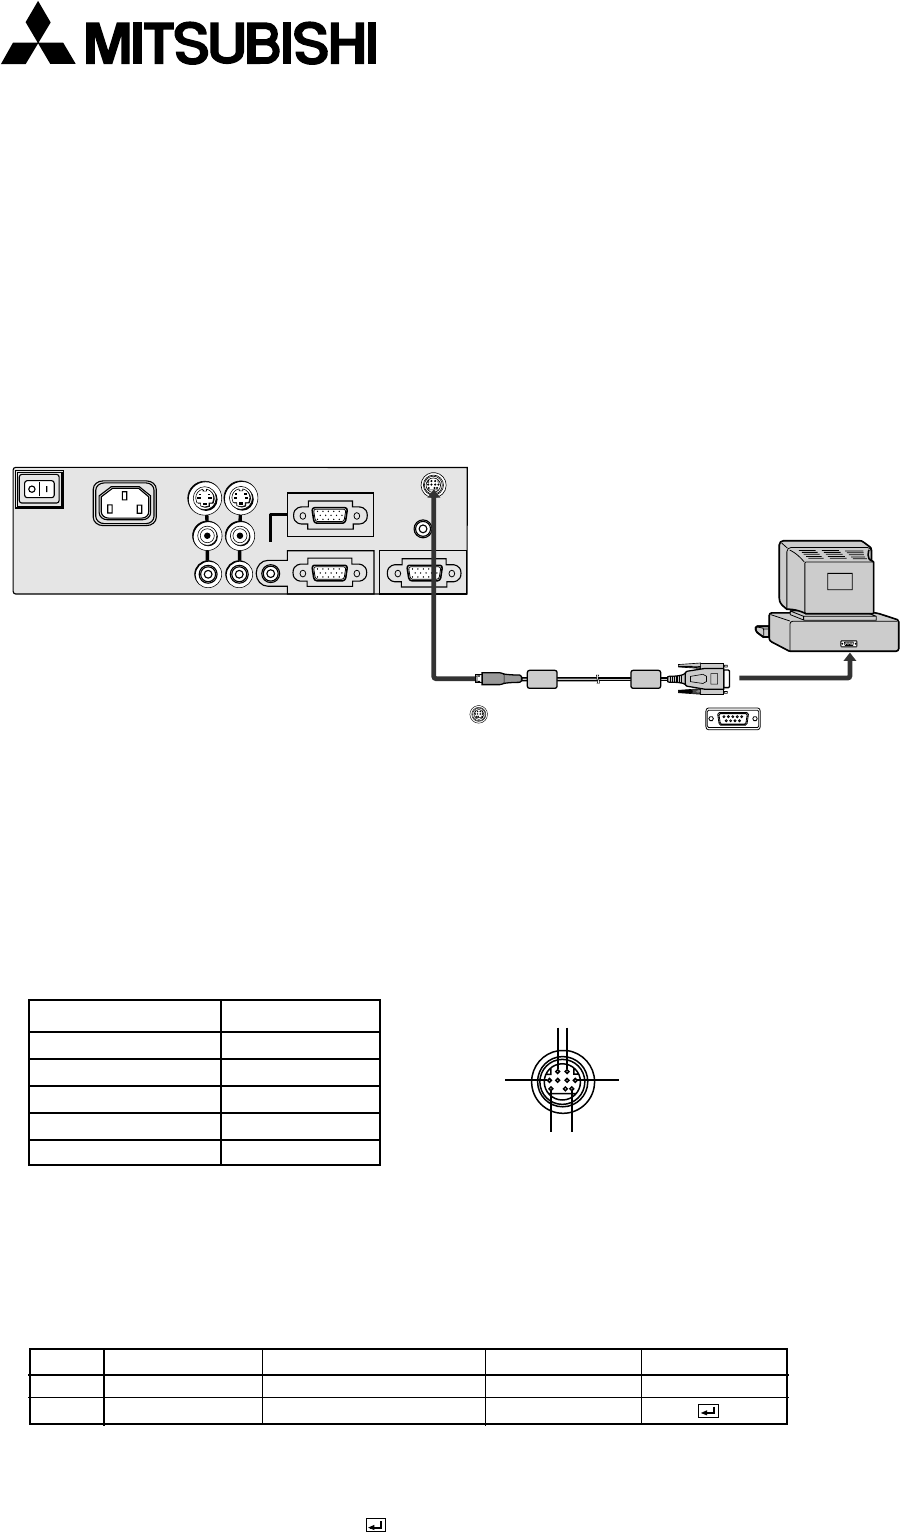
This projector can be controlled by connecting a personal computer with RS-232C terminal.
Functions can be controlled by a personal computer:
• Turn the ON or OFF
• Changing input signals
• Menu setting (for picture related setting only)
Connection
COMPUTER OUT
COMPUTER 2 / COMPONENT IN
COMPUTER 1 IN
COMPUTER
AUDIO IN
VIDEO 1
IN
VIDEO 2
IN
S-VIDEO
VIDEO
AUDIO
AC IN
AUDIO OUT
MAIN
MOUSE /RS-232C
to Com1
Comport
to RS-232C terminal
RS-232C cable
D-SUB 9P
Mini DIN 9P
Important:
• Make sure that your computer and projector are turned off before connection.
• Turn on the projector after the computer is started up.
(If you do not follow this order, the Comport may not function.)
• Adapters may be necessary depending on the PC connected to this projector. Contact your dealer for details.
PROTOCOL RS-232C
BAUD RATE 9600 [bps]
DATA LENGTH 8 [bits]
PARITY BIT NONE
STOP BIT 1 [bit]
FLOW CONTROL NONE
This projector uses RXD, TXD and GND lines for RS-232C control.
For RS-232C cable,the reverse type cable should be used.
2) Control command diagram
The command is structured by the address code, function code, data code and end code. The length of the
command is different by each function.
Address code Function code Data code End code
HEX 30h 30h Function Data 0Dh
ASCII '0' '0' Function Data
[Address code] 30h 30h (In ASCII code, '0' '0') fixed.
[Function code] A code of each fixed control move.
[Data code] A code of each fixed control data (number) and not always indicated.
[End code] 0Dh (In ASCII code, ' ') fixed.
DATA Projector
XD200U
SD200U
• This cable is a special cable. For
more details, consult your dealer.
12
3
7
9
6
1 RXD (IN: on the Projector side)
4 GND
7 TXD (OUT: on the Projector side)


