3 – 17
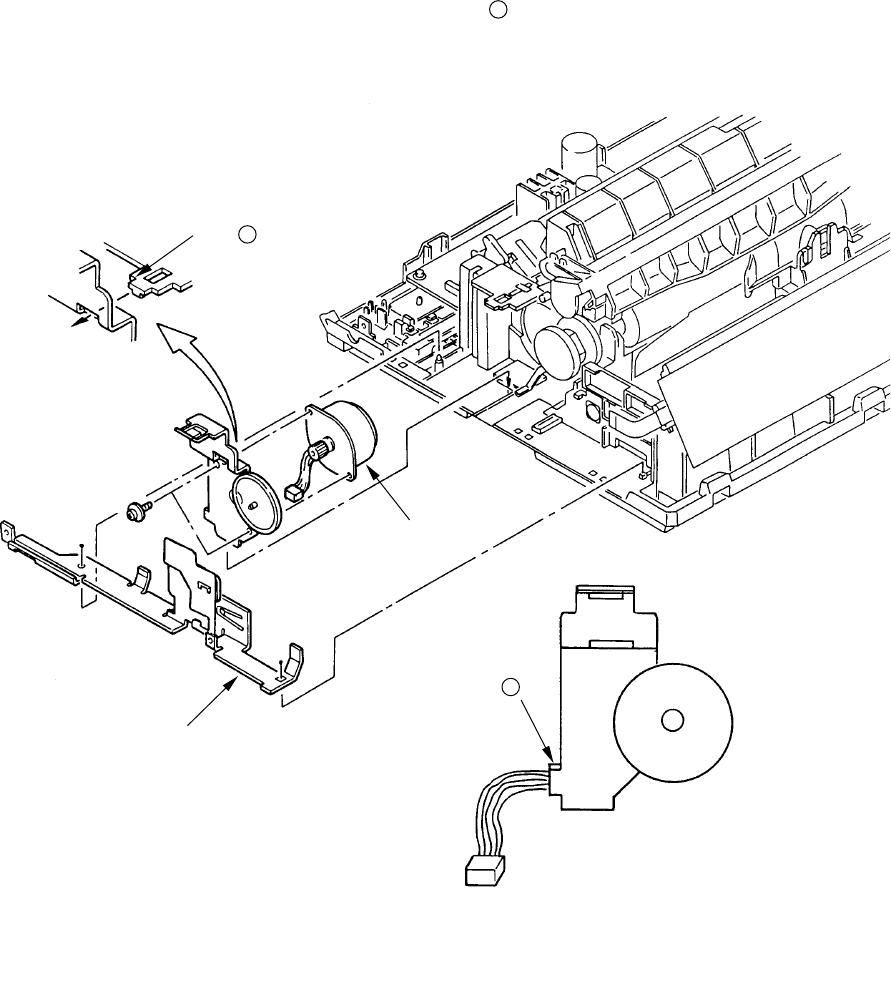
3.3.13 LF Motor
(1) Remove the printhead (see 3.3.1).
(2) Remove the ribbon protector (see 3.3.2).
(3) Remove the pull-up roller Assy (see 3.3.3).
(4) Remove the upper cover (see 3.3.4 (1) – (5)).
(5) Remove the platen Assy (see 3.3.11).
(6) Remove the driver board (see 3.3.12).
(7) Remove the left FG plate 1.
(8) Release the lock A to remove the LF motor 2.
(9) To install, follow the removal steps in the reverse order.
Remark on assembly:
(1) Press the LF Motor Cable with a portion A of the Motor Plate.
Lock A
2
1
A


